Tuesday, April 29, 2014

Artistcellar Stencil Postcard

Today I'll be using one of the stencils out of the new Quasicrystals Series stencil collection from Artistcellar to create a postcard or an all occasion card, whichever you choose.  This is what the finished card looks like and if you want to see how it is created just keep reading the mini tutorial.


To make this type of card I start first with a piece of watercolor paper that measures 6" by 4" and coat it with a thin layer of gesso, then let it dry.  I began with a stencil called Bodacious Pods made by Artistcellar.  I placed the stencil over my watercolor paper and applied Tsukineko's Radiant Neon Pigment Inks in Electric Pink and Electric Orange using a stencil brush.


After I had enough ink on the background I dried it with a heat gun.  Then I stamped my image, phase and some random background stamps with StazOn permanent ink in the new Spiced Chai color.  The image is Lonely Girl by Dina Wakley and the phrase is from Dyan Reaveley.  I applied clear embossing powder to this and melted it with my heat gun.


The top coat of aqua was done with acrylic paint using the Fibo stencil and a small sponge.


After I applied the paint and let it dry I matted the postcard on aqua paper, black paper and then glued the panel to a blank card.  It doesn't take long to make these postcards and you could do several at one time decorating them all differently.


I hope you'll give the new Quasicrystals series stencils a try, they are so versatile.   I use all of my stencils with ink, paint and chalk.  They work well layered on top of each other, too.

Thanks for stopping by, please leave a comment if you have time.  I always enjoy hearing your thoughts on my projects.  Take care, talk to you soon ~ Renee

Saturday, April 26, 2014

Paint Nite Boston


Have you seen that Groupon offer called "Paint Nite"?  A large group of my friends got together and we went to a local Paint Nite event here in the Boston area.  So much fun!  There were about 35 of us in the class, if you wanted to drink wine or order something to eat while you painted you could.  No muss no fuss, no clean up, etc.  Great concept.  The teacher had all of us paint the same thing during a two hour period.  I'm not much of a flower painter but I figured I'd try it.  This is what my painting looked like when I was finished.  Tah Dah!


My art friend Ann was there also, her painting looked pretty much like mine did.  We both decided we would work on these together at my house on another day.  When we got together this week we started by tearing up some maps and gluing them down with Mat Medium just in the areas we weren't too happy with.  After a little while the canvas looked like this.

Ann's canvas


Renee's canvas

Then we each applied gesso, acrylic paints, stencils, stamping, you get the picture.  Here is Ann's "after".

Ann's Mermaid

And here is my "after".

Beatrice picks a flower
I think Paint Nite was a huge success!  We had fun and then we had more fun later.  You can still see tiny bits of the pink flowers if you look closely.

Thanks for stopping by, please leave a comment if you have the time.  I always appreciate hearing what you think.  Take care, talk to you soon ~ Renee

Tuesday, April 22, 2014

Map art using Artistcellar stencils

I decided to do a little map art today using Jane Davenport's face stencils again.  I looked through my Job Lot 2008 one dollar map book and there is a town in Massachusetts called "Holland".  That is my daughter's name so the face looks a bit like her.  Here is the finished face followed by a short tutorial in the event that you'd like to try your hand at it.


When I do map art the first thing I do is choose the map I want to use.  Next I put the stencil down and then outline the features with a pencil.  I draw the neck and shoulders after the face is sketched into place.


 I find that the eyes turn out better if I leave the stencil in place and start placing the eyes and pupils within the stencil.  You can always adjust the features later.


After that I start putting the hair around the face using pencils, Pan Pastels and colored pens.  She looked like she needed bangs so I cut some twigs out using a Sizzix die using the same map paper.


I continue to adjust the colors on the face and hair using Pan Pastels and white gesso.


Instead of just bangs I added another layer of paper twigs going the opposite direction to form a crown like appearance.


Then I cut a flower out of some additional map paper using Tim Holtz's Tattered Florals die.  I glued that to her head to mimic a crown with a spring flower popped into it.  I used another stencil called Bodacious Pods, also made by Artistcellar,  to make it look like she is wearing a white lace dress.  I used my palette knife to spread a small amount of white gesso through the stencil randomly on the upper body.


I love doing map art, next time I am going to do a similar face but turn it into a personal life experience map.  Doesn't that sound like fun?  Thanks so much for stopping by today, please leave a comment if you have time.  In the meantime, take care, talk to you soon. ~ Hugs~ Renee

Monday, April 21, 2014

Boston Marathon 2013 Reflections

Today is the day of the Boston Marathon.  I'm sure everyone here in New England could tell you where they were last year when this event took place.  Our grandchildren and their keepers were on one of the last flights to leave Boston that afternoon and I was trying to recuperate from their delightful visit.  My husband was driving home from the airport and wondered about all the emergency vehicles going into the city.   Our neighbor was concerned because her girls were supposed to be around the finish line with their friends (they decided to go to the Mall instead, thank goodness!).  The sadness after the incident still lingers a year later.  A few weeks after the incident I still felt a deep sadness that I finally put down on a piece of Mail Art.  Later I mailed it into Stampington magazine and they published it in the Mail Call section of one of their magazines.  So in remembrance of that day I thought I would share it again.


It is a beautiful sunny day today and I plan on going outside to do a little more clean up in my garden.  I'm so grateful for the warm weather.  Take care, I'll be back tomorrow with a posting on Artistcellar stencils.  I have had a lot of fun playing around with those versatile stencils, can't wait to share it with you.  Hugs to you all ~ Renee

Tuesday, April 15, 2014

Artistcellar Quasi-Crystals Series Stencils

Hello, it's Tuesday so I will be doing a mini tutorial showing the new Artistcellar stencil series called Quasi-Crystals.


 I've been playing with these for days and I'm amazed at what a beautiful background can be made by using not just one but two of these stencils.  Here is what I made for today, it's a card but it could have been a  tag.  I'll show you the finished project and if you're interested in the tutorial just read on.


I started with this stencil called Quasi and some Pan Pastels in greens,  yellow ochre and blues.  I taped the stencil down on a piece of watercolor paper using some washi tape and applied the pastels.


When I liked the look I had achieved, I set the pastels with a spray on fixative.  Next I tore the top and bottom edges and applied more of the darker green pastel.  The next stencil from the series of four that I used was this one, it's called Penrose:


I applied white gesso on top of the Pan Pastels so that the piece I was gluing on top would stand out.


 I decided to add some pop dots to the paper to simulate bubbles and then applied blue and green glitter to them.  I also stamped some circles from Dina Wakley's new stamps and some lines from a Hampton Art stamp.  I am using a lot of items from my stash lately and this was no exception.  I pulled my "Mermaid in a Bottle" tag out of a box of old projects and glued a message in a tiny bottle onto her long, slender Stampotique hands.


  I added another stamped message that says "just a note" on top of the "sunshine & seashells" message and did a few rub-ons from Tim Holtz's collection warning that it was Fragile Glass.  This was a great way not only to play with my new stencils but also to re-purpose old discarded projects.


 I was inspired by the Artistcellar new stencils but also by the altered Bottle art work on display at the Craft Stampers Take It, Make It Challenge.  I hope you will check out the Artistcellar blog and see the other fabulous creations made by the rest of the members of the design team.  There is also a blog hop taking place that you can participate in.  Who knows maybe you'll win a fabulous prize!  In the meantime, thanks for stopping by, take care ~ Renee

April 12 – Lisa Cousineau http://www.artistcellar.com/wp
April 14 – Lynn Krawczyk  http://smudgedtextilesstudio.com/blog/
April 15 – Effy Wild www.effywild.com
April 16 – Jill K Berry http://jillberrydesign.com/blog
April 17 – Carmen Whitehead  www.serendipitystudiobycw.blogspot.com
April 18 - Lea Cioci www.leacioci.blogspot.com
April 19 – Guadalupe Brizuela Cabal http://guadasartplace.blogspot.com.ar

Saturday, April 12, 2014

Painting Faces with Acrylics

I am back on my face drawing kick again but I decided to paint them on old discarded canvases that I found when I was cleaning out my studio.  I am trying to use my stash as much as possible.  I hate to waste anything so I seem to have all sorts of pieces of thread, paper, projects that didn't work before, etc. in a large plastic container.  Actually 6 large plastic containers......all color coordinated.  (Like that makes it sound better, right?)  Any way, I had these canvases that were distressed but unfinished.  I recently saw the work of the most WONDERFUL artist on Pinterest so she was my inspiration for these two pieces.  Her name is Mystele, if you get a chance click on the link and check her out.  She is AMAZING and so talented.  Both of theses canvases measure around 7" by 13" by 1" and had been previously painted, distressed and cast aside, now they're cute.

Miranda wants to fly

Beatrice is in the show

I used some of my delightful Artistcellar stencils and some gesso to add a little more interest to the backgrounds.  These little paintings were really fun to do if only for my own amusement!  So what are you up to this weekend?  Are you letting your Muse run wild?  I hope so.  Thanks for stopping by, take care ~ Renee


Friday, April 11, 2014

April's Take It, Make It Challenge

You still have time to enter the Craft Stamper Take It, Make It Challenge.  A quick reminder of the theme..."Bottle Art".  For some additional inspiration I decided to make a card with a bottle on it to share with you.  I began by loosely drawing a bottle on some watercolor paper.  I cut it out, colored it, stamped it and glued on some butterflies and extra wings.


For even more inspiration from the other team members be sure and visit the Craft Stamper Blog.  You'll be glad you did!  Thanks for stopping by today.  I hope you will take the challenge, it is open until the midnight April 23rd.  Thanks for stopping by, take care. ~ Renee

Tuesday, April 8, 2014

Aristcellar Sacred Hearts Stencil Series

It's Tuesday again, which means I will be sharing a project created with Artistcellar Sacred Hearts stencils.  I thought it would be fun to do a wall hanging with a flying heart, something with a Steampunk flavor to it.  Here is the finished project and I will follow that with a short tutorial if you are interested in seeing the process behind it.


 I started with a 6" by 6" piece of 140# watercolor paper.  Then I taped the stencil down on top of the paper on my craft sheet.  The outline was done with a magic pencil, an Aquarellable Stabilo pencil that can be activated with water.  After I laid down the dark lines I applied Pan Pastels to the heart and around the edges of the paper.  Leaving the stencil in place I stamped the new LUV heart from Stampendous through the stencil onto the heart.


I used StazOn Jet Black permanent ink to stamp a "stitched" border around the edges using an old Stampers Anonymous stamp that I picked up for $1 somewhere.  That didn't seem like enough stitching so I used my sewing machine to stitch around the borders and around the heart too.  Some of the threads were left hanging to give it a grunge feel.  I gave it a little pop of color with Smooch inks using the Berry Punch color.


I dipped the edges of the watercolor paper in water to make them more pliable, then I inked them with Vintage Photo Distress Ink and blended the ink to distress it.  I rolled and folded the edges of the paper to make it more interesting.  At this point I glued the canvas to the burlap covered 6" by 6" canvas that I got on sale at Michael's last week.  Red line tape works the best for this, I tried other glues but the tape really holds it in place.  I have a drawer full of knobs that I have purchased over the years so I attached a brushed bronze one to the top with a screw, that way I have something to attach ribbons to.


To bring in the Steampunk look I decided to glue on some Idea-ology metal cogs.  I had some lovely wings in my stash that my daughter made for me with clay.  She was going to throw them out because she burned them a little but I told her I liked the burn marks.  It saves me time so I don't have to ink the to simulate burned wings.  The red line tape holds the wings perfectly in place on either side of the heart.


I tied some ribbons on the top and Voila!  Fini!  I can use this as a wall hanging or set it on a stack of books on my bookshelf.  Either way it was fun to make, wouldn't it be a cute series of hearts using all four heart stencils?  There were four burlap covered canvases in that pack.......we'll see.

Thanks so much for stopping by today, I love it when you leave a comment.  Talk to you soon~Renee


Friday, April 4, 2014

Take It, Make It Challenge for April~ Bottles!

The theme this month from the Craft Stamper Take It, Make It Challenge is Bottle Art.  The technique is to use a bottle somewhere in your project.  This could be an altered bottle, using small bottles/vials in your project, or using a stamped image of a bottle.   I must admit that for me this was a real challenge as I have never altered any bottle other than the obvious alteration....taking it from full to empty.

I looked at Pinterest for some inspiration and the only thing that really caught my eye were the dolls made from bottles.  Never having been a doll person I thought this would be a way to channel my inner child and do something whimsical.  When I think whimsy I usually think Marie Antoinette. Other than to buy a pretty pink bottle from Michaels for $3.00, I decided to work with items completely from my stash .  I'll show you my finished project and then follow it up with a short tutorial in the event that you want to see how she was put together.


Washing the bottle before construction makes sure that there is no trace of  residue that might show later.  I worked on the headpiece first.  The head is from a collage sheet and was attached with a strong glue to one of those pins from Idea-ology, it is sharp enough to penetrate the cork.  The bow was tied and glued to the cork piece.


I added Distress Stickles to the flowers in her hair and the pearl around her neck.  The skirt is made from the elastisized ribbon in the Idea-ology ribbon pack.  I measured the ribbon, cut it and sewed it to make a circle.The trim with beads was applied on top of that with red line tape then the unit was put in place.


I used a stamp called "Forget Me Not" for the bodice of her "dress".  It was stamped on 90 lb watercolor paper, colored with pens and cut out.  Instead of arms I used the wings from Pam Carriker called "I Will Soar" and stamped them with Neon Purple, Pink and Orange inks from Tsukineko. It was easy to secure the winged heart image to the bottle with the strong clear double-sided red line tape.  I glued a large red rhinestone heart to the stamped image.


Just one more detail.  I used Tim Holtz's rub-ons,  which by the way work perfect on glass, to put just one word, "Imagination" at the bottom of the bottle.

With that my altered bottle doll is finished!


I hope that you will check out the challenge going on at the Craft Stamper Take It, Make It site.  The beauty of a challenge is that it gets you out of your comfort zone and helps you to experiment with things you never would have even thought of doing.  That's what challenges do for me anyway.  Thanks so much for stopping by, please leave a comment if you have time.  I love to read what you think.  Take care, talk to you soon!
~Renee xx

Tuesday, April 1, 2014

Artistcellar Stencils~Sacred Hearts Series

This is my first post for Artistcellar as a member of their Design Team!  I received the beautiful Sacred Hearts Stencils in the mail last week and have been playing around with them ever since.  There are four 6" by 6" stencils in the pack and each one is different.  I will be posting a different project every Tuesday this month showing each of the stencils in the pack.


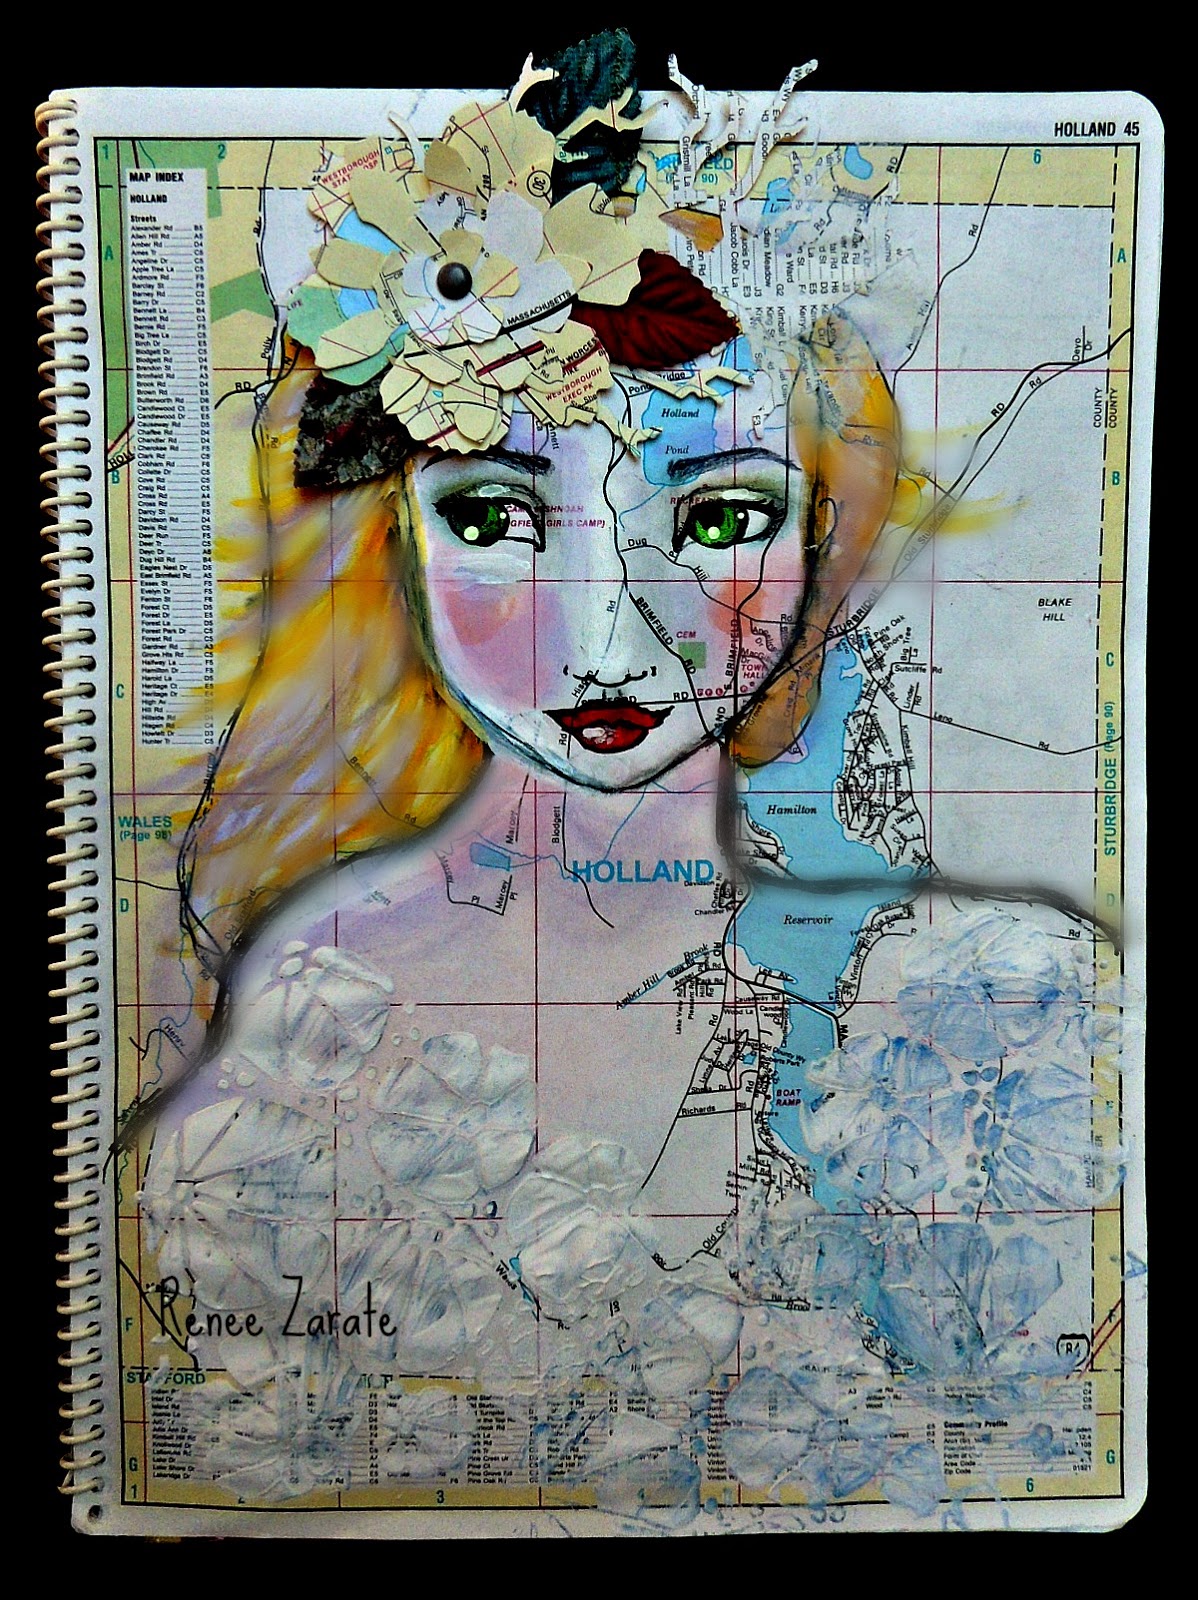
I chose the one with the crown as my first stencil in the series to demonstrate.  I thought it would make a perfect background for a two page spread in my art journal.  This is the finished project, if you would like to see how this was done just keep reading and I will show you step by step in a short tutorial.


First I applied a light coat of gesso to my journal pages and allowed it to dry.  I used Tsukineko/Imagine Crafts Fireworks! spray inks, they have a really concentrated color that can be blended and there is a little bit of sparkle to them.  I used Spring colors and just kept moving the stencil around on both of the pages.


My stencil is dark only because I previously used black permanent ink on it and haven't cleaned it off yet with alcohol.  I started with Bahama Blue Fireworks! and then used other shades of blue, yellow, pink and purple.  I tried keeping all the colors in a Spring palette.  I did bring in other stencils by The Crafters Workshop such as the one called Spinning Tops and Silhouette Script which I felt added more interest.


After spraying the inks through stencils, I carefully lifted off the stencil and blotted the paper with a roll of paper towels and dried it with a heat gun.  Then I used my heart stencil again but this time with Modeling Paste.  I applied a thin layer of Modeling Paste to the pages and allowed them to dry completely.  Be sure to wash your stencil thoroughly after you've finished applying the paste, you don't want it to dry on the stencil.


I moved the stencil around several times on each page repeating the modeling paste application.  When it is dry it has a translucent effect that doesn't take away from all the colors previously applied.  It has great texture, too, when you run your fingers across the finished pages and feel the raised designs.


I decided to stamp a large face, her name is "Missy" (found at Beeswax), on a separate piece of white paper, trim it out and glue it to the art journal page with PVA glue.  The words are rub-ons from Idea-ology.


I made her necklace out of ribbon and a flower that I had in my stash.  Later I colored in her eye and lips with Pan Pastels.  A few black lines applied with black gesso and an old credit card helped to balance out the colors on both pages.  The words are made of Grunge Board letters and the quote is one of  Wendy Vecchi's stamps.


I hope this tutorial helps you to see the versatility of stencils and the beauty of the new Sacred Heart Series by Artistcellar.  By the way, there is a blog hop taking place this week showing how different artists are using this group of stencils.  Of course there are prizes to be had.  In case you would like to join in and put your name in the hat to take advantage of  the give-aways I have included the blog hop list for you.  Thanks for stopping by today, take care ~ Renee

 Here is the Blog Hop list found on the Artistcellar site:

We’ve got a nice line up artists here, be sure to visit their blog on their day of the hop. As usual, we will be giving away a free set of stencils to one lucky person who leaves a comment on each blog. Including this one! I will leave comments open until Friday night, even though the blog hop ends on Thursday :-)  Here’s the lineup: