Showing posts with label Jane Davenport art supplies. Show all posts

Saturday, October 28, 2017

Gel Plate and Stencil play

Do you have a Gel Plate? or two or three?  I have at least three different sizes and brought one out to play with today.  I forget I have them but they're very useful to make master boards which I then cut up for projects.  While pulling my prints I had too much paint on the GP so I grabbed a black canvas that was nearby to mop up the excess.  The colors were so vibrant that I placed a Prima stencil over my mess and used some white gesso to transfer a lovely face outline onto the canvas.  This is what happened.


A little Jane Davenport paint, a little Dina Wakley paint, a cute butterfly and a Washi tape eye and voila!

Thanks for allowing me to share my art with you and always thanks for stopping by!
Hugs ~ Renee

Friday, June 30, 2017

Stencil Girl Stencils and Jane Davenport's Products

I've been playing with my Stencil Girl stencils, in this case Andrea DeMeng's "Eve" face stencil, and Jane Davenport's Mermaid Markers and Paint Over Pens.  Wow, what fun results can be had with this combination of supplies.  Here's my Parisienne Lady.


This was not difficult to do.  I traced the shape of a hat I liked in some publication, the face is Stencil Girl's "Eve" and I used Jane Davenport's Mermaid Markers for the bright colors, spraying them occasionally with water to cause them to run just a little.  The face is colored with Jane's Paint Over Pens, just remember that these are pretty permanent and cannot be watered down.

I hope you have fun with your supplies.  Combine them, mix it up a little, don't let them sit around drying out, use them!  Have fun ~ Renee

Saturday, May 27, 2017

AIRs " Fly" Tag Using Imagine Crafts Products


Shipping tags are a wonderful substrate for mixed media art. They are small, the paper is durable and when completed they fit nicely into an art journal or can be used in place of a card. This tag showcases not only texture and color but also techniques such as embossing, masking off areas when stamping, mixing inks, using foils, coloring ribbon with inks, just to name a few. A mixed media tag is a great excuse to break into all those stockpiled, precious products since a tag requires only a small amount of each product.


Skill: All Levels
Time: one hour or less


Instructions:

Step one:  Mask off the head portion of the image to be used, Washi tape can be used for this, ink up the stamp with StazOn Jet Black permanent ink and stamp image onto the shipping tag.


Step two: Stamp swirls with Paris Dusk ink then stamp again in the same area using Rose Bud ink. Dry with a heat tool. Fill a water pen with Fireworks! New Sprout and color dress with the water pen.  Stamp the word “Fly” with Delicata Black Shimmer ink; this can be embossed with Clear Embossing powder melted with a heat tool. Add highlights on the heart, arms and legs of stamped image and dots on the swirls with a Memento Marker pen in Rose Bud color; silver foil can be randomly added onto portions of the tag.


Step three: Spray two pieces of ribbon with Fireworks! Craft spray.  One ribbon will be sprayed with Lilac Posies and the other with New Sprout, additional water can be sprayed onto the ribbons to achieve the desired color. Blot with a paper towel, coil up the ribbons separately and allow them to dry. When dry the ends can be trimmed, they will be richly wrinkled. Tear faces off of the Washi tape and place on tag. Lay lines of Washi tape on a scrap piece of card stock, die cut into a butterfly shape, adhere some silver foil to the butterflies.


Step four: Ink edges of tag, tie the dried colored ribbons on the top, and staple the butterflies into place.


Supply List
Imagine Products:
StazOn ink – Jet Black
Delicata – Black Shimmer
Memento Dew Drop ink – Rose Bud, Paris Dusk
Fireworks! Craft Spray – Lilac Posies, New Sprout
Memento Marker – Rose Bud
Embossing Powder – Clear
Craft Mat

Other supplies:
Manila Shipping Tag
Stamps – Mela by Stampotique, word “Fly” by Stampotique; Joy Clair Hugs & Smiles
Washi Tape – Jane Davenport
Prima – Silver foil and Glue stick; water pen
White ribbon
Sizzix – Butterfly die
Card stock
Heat tool
Big Kick Die Cutting Machine
Paper towels

Check out the Imagine Crafts blog today for this and other design team creations!
Thanks for stopping by ~ hugs ~ Renee

Wednesday, April 26, 2017

An art journal page using Jane Davenport's face stamp

Can't draw faces the way you'd like?  As you know I love face stencils but have you seen Jane Davenport's large face stamp?  It's addictive and actually very versatile.  I used it in my art journal, the large Dyan Reaveley one, because the pages in that journal can withstand a lot of water.  The face is stamped with StazOn ink and then colored in with watercolor pens.  The words written on the page are the lyrics from the song "Will you still love me when I'm no longer beautiful".  There is generally music blasting in my studio while I work and this song inspired the pages.  If you have difficulty writing something in an art journal lyrics are always an option.


I have a color challenge to work on right now so there are magenta colored projects all around me.  Her hair and lips were trials of pigment inks blended together searching for just the right shade.  Black Gelatos provided the shading around the face.  I hope you like her.  That stamp can be found at Michael's along with Jane's other magical products.

Thanks for stopping by, I always appreciate your visits!  Hugs ~ Renee

submitted to Craft Stamper Magazine/Take it Make it ~ April theme "Anything Goes"
Stamps featured:  Jane Davenport's large face stamp
swirls in hair:  Joy Clair "Hugs and Smiles"

Monday, April 17, 2017

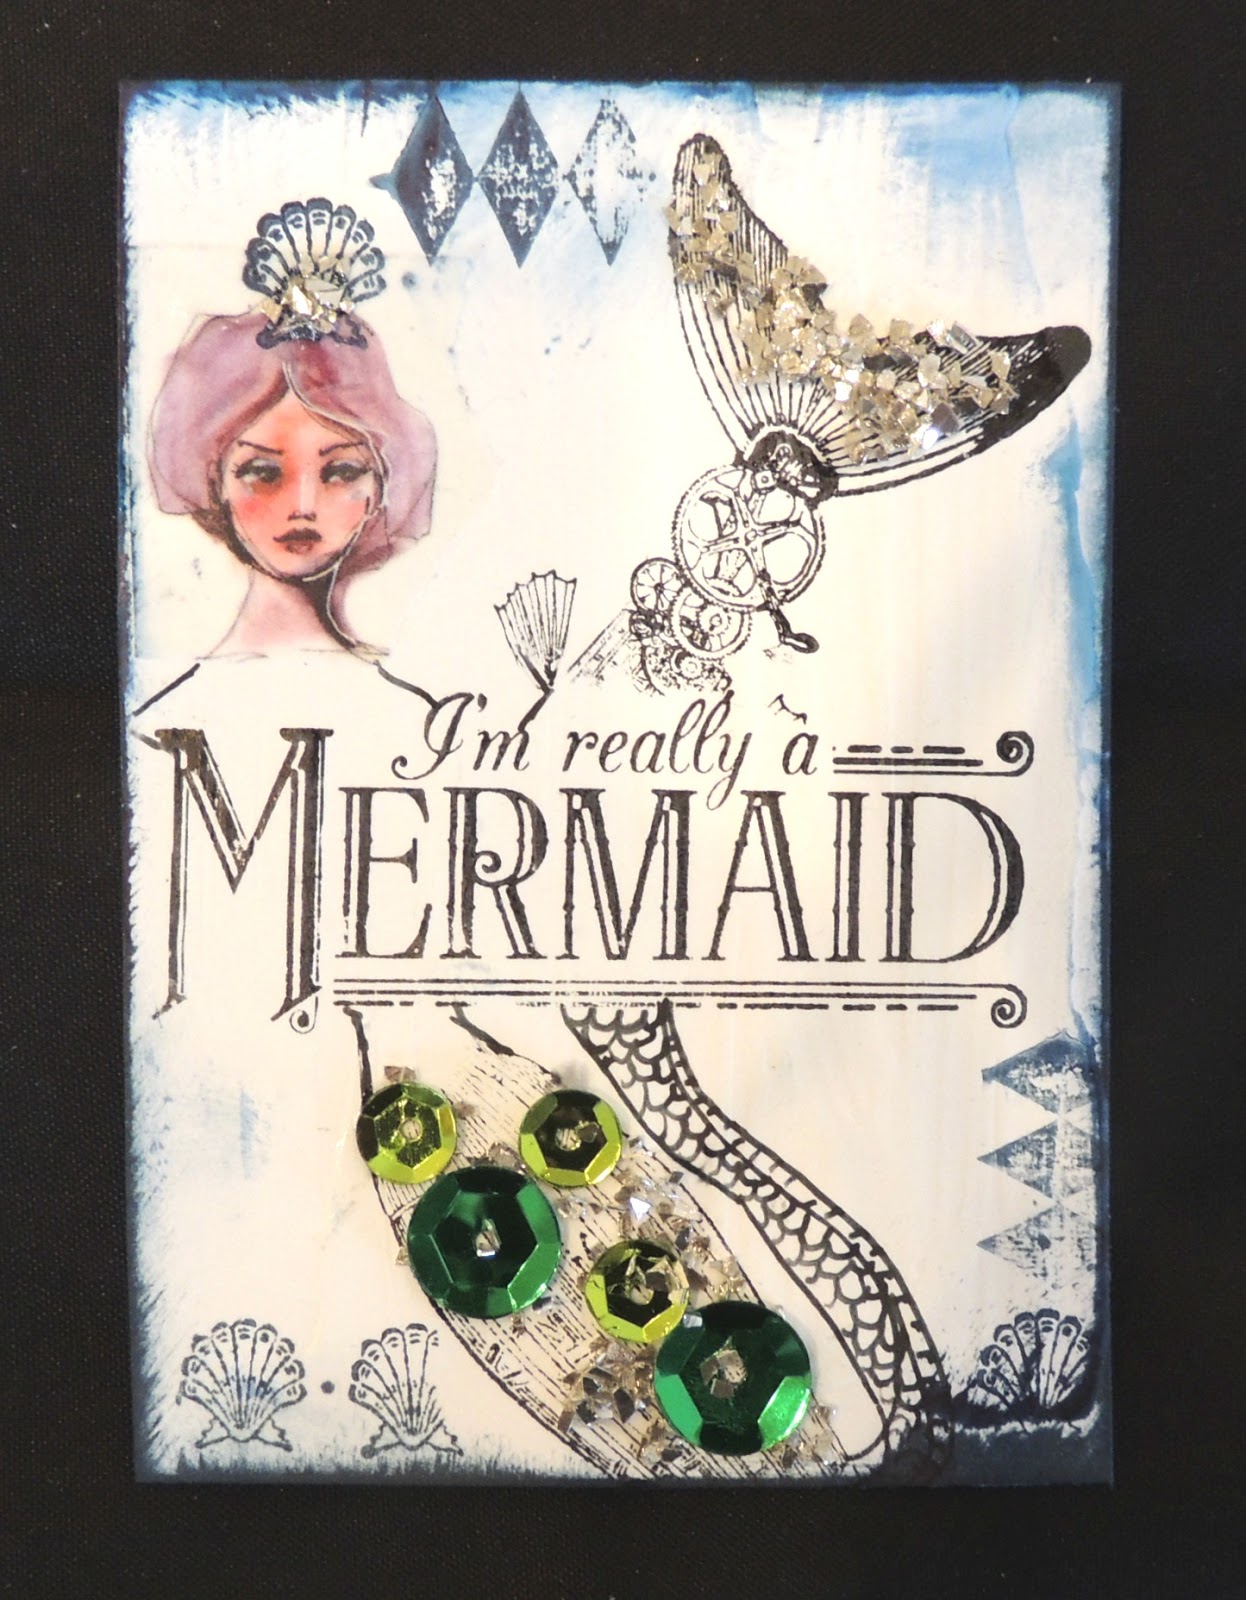
A chunky ATC featuring Mermaids!

With an AIRs theme challenge like "bigger is better" I had to really put on my thinking cap.  Who doesn't love ATCs?  I thought a "bigger/better" ATC would be a Chunky ATC.  In order to create this type of Artist Trading Card I used a block of wood that measures 2 1/2" by 3 1/2" and is 1 1/2" wide.  When it's decorated and has tiny feet on it, it becomes the perfect little shelf decoration or paper weight.  Most of you know by now what a major art crush I have on Jane Davenport's supplies; this project demonstrates a fun use for her washi tape featuring, what else, mermaids!


Description:

ATCs, Artist Trading Cards, have been around for a few years now. They traditionally measure 2 ½” by    3 ½”, they can be collaged, stamped, matted, left plain, attached to greeting cards or put into albums. They’re quick and fun to make but you might wonder what other uses are there for this tiny work of art or are they only to trade with fellow artists? There are times when you love an ATC so much you can’t bear to trade it, you just want to look at it yourself and not share it with others. We don’t have to hide them away in an album, we can keep them on display by making them bigger and better, turning them into a free standing CHUNKY ATC. It’s very satisfying to create an ATC with whatever subject matter you choose; many times the subject matter is determined by a new set of stamps or paper. When you’re happy with the ATC mount it on a wooden block, add ephemera and four delicate feet. Now you can look at your favorite one on a shelf or turn it around to change the view with a second ATC.

Skill: All levels
Time: 2 hours or more, it depends on the artist


Instructions:

Step 1: Buy or cut a wooden block that measures 2 ½” by 3 ½” by 1 ½”.


Step 2: Decide the placement of the handle on top and the clock key on the side, make a hole to insert these items, remove, they will be glued on later.  Paint the wooden block any color desired; when dry apply a thin coat of white gesso, dry.

Step 3: Make two ATCs using stamps, ink, Washi tape, whatever scraps are on hand.  Make the ATCs on gessoed water color paper cut to measure 2 ½” by 3 ½”.  When the stamped images are dry, adhere to the wooden block. The faces on these ATCs are made from Washi Tape.  Ink the edges of the ATCs using a Jumbo Dauber.


Step 4: Glue feet onto the bottom of the block, these feet can be beads or small wooden embellishments.  Apply On Point Glue to the feet and then dip each one in glitter or micro beads.  Attach the knob on the top of the block, keys to the sides; decorate the ATC images with sequins and glitter.  Tie twine and baker’s twine to the handle/knob on the top.


Supply List
Imagine Supplies
StazOn ink –St. Valentine, Jet Black and Midnight Blue
Memento Luxe – Bahama Blue, Nautical Blue
On Point Glue
Jumbo Dauber
Craft Mat

Other Supplies
Stamps – Diamond Pattern, Clam Shell design, Phrase and Mermaid tail ALL by Graphic 45
Prima - Foil, Glitter, Micro beads, Foil Glue Stick, Metal Ephemera
Idea-ology - handle
Michael’s - Baker’s twine, brown twine, sequins, white gesso, watercolor paper
Paper Trimmer
Strong adhesive
Jane Davenport Mermaid Washi Tape
G45 “Voyage beneath the Sea” Collection paper
Wooden block measuring 3 ½” by 2 ½”by 1 ½”
Dark blue acrylic paint by Americana
Paint brush

If you pop on over to the Imagine Blog you can find other great examples of projects by many different and unique artists.  We can all use a little inspiration from others, it keeps our work fresh when we discover new ways to use products that are languishing on the shelves of our studio spaces.

Thanks for stopping by!  Hugs ~ Renee


Saturday, April 8, 2017

"Thinking of You" card on the Imagine Crafts Blog today

This is an all occasion card I created for my Artists in Residence challenge using DCWV paper.  Beautiful papers that make mixing multiple papers for a project a breeze!  This is the card I created using Jane Davenport's mermaid washi tape along with the DCWV papers, even the envelope matches.


You can find the supply list and directions on the Imagine Blog site.  Thanks for stopping by, I appreciate the visit and the comments!  hugs ~ Renee

Friday, April 7, 2017

Jane Davenport's Mermaid Markers are so fun!

I've been making faces with Jane's Mermaid Markers which I found at Michael's the other day.  I used a Stencil Girl face stencil designed by Andrea Matus DeMeng called "Eve, a modern woman".  I traced it with a pencil and then applied the markers sparingly, they are intense.  I used a water pen to drag color around and Gelatos to adjust the colors. A few parts were brightened with Imagine Crafts Fireworks! spray, also poured into an empty water pen for easy, precise application.  It will take me awhile to learn how to use the markers and not flood the paper with too much color.  A little goes a long way with these pens.


It takes some time to find Jane's supplies, they sell out quickly, but they are worth the wait.

Have a great weekend!  Hugs ~ Renee

Wednesday, March 22, 2017

Just Because Cards ~ AIRs project using On Point Glue

Imagine Crafts released a really fun product on March 1, 2017, it's called On Point Glue.  This product is a clear glue that has a non-clog applicator to give super fine control for use on intricate projects and embellishments, like glitter and tiny flowers.  It is water based, dries clear and remains flexible, the dry time is moderate.  I liked the control it gave me when I was creating these cards.  To see the directions and supplies that I used please pay a visit to the Imagine site where I've given the complete breakdown.


The card on the left hand side is a stamped image by Prima on gessoed paper that has been colored in, foiled and had flowers added, the card on the right is a piece of Jane Davenport's new paper tablet trimmed out and embellished.  I love all of Jane's new products that can be found at Michael's stores here in the USA. The On Point Glue product makes it easy to put the small amounts of glitter in just the right places.

 Thanks so much for stopping by ~ hugs ~ Renee

Friday, March 3, 2017

Jane Davenport art supplies

I'm in love with Jane Davenport's new line of art supplies!  It is currently at Michael's or on Jane's site, the demand has been pretty staggering.  I saw the supplies the first day they were released, couldn't figure out what they were all about until I went home and watched Jane's free videos.  The next day I went back to Michael's only to discover most everything was gone.  Hmmm.  So I've been picking up her products here and there, checking at Michael's way too often, searching online, etc.  The manufacturer has been very helpful in reassuring all the "Davenpeeps" that they are working overtime to bring the popular items back to the shelves ASAP, things like the Mermaid Markers and the watercolors are no where to be found.

With my meager supplies I've been able to make some fun items, like this small canvas/refrigerator magnet.  You can tell I've been heavily influenced by Prima recently hence the glitter.  Finnabair's influence is there too with the metal ephemera painted with Jane's amazing Paint Over Pens.


Aren't new supplies and techniques the best thing ever?!  Have a great weekend ~ Renee

Products
Jane Davenport:  Face Stamp, Paint Over Pens, Inkredible Pen, Papers used in the background, and rub ons.
Prima:  Glitter, metal stars
Imagine:  Newly released On Point Glue and Creative Medium, StazOn Jet Black ink