Showing posts with label artistcellar stencil. Show all posts

Tuesday, December 22, 2015

Got your coloring book? Now what......

Once you purchase a coloring book you may wonder....now what do I do with it?  Why, color in the pages, of course!  What can you color it with?  Anything you've got on hand.  I started coloring in some of the pages in my copy of The Coloring Studio, it took longer than I expected.  Each page is unique in its representation of the artist who created it.  It is more like a workbook to me since there are so many instructions and hints throughout the entire book.  I started with one of my favorites, Mou Saha, on page 100.  I used Pan Pastels, Memento Markers, gesso, stencils, Micron pens and an irRESISTible Pico Embellisher.  It was a meditative, fun, relaxing experience.  You are not facing a blank page and have the liberty to do whatever floats your boat.  This is what my first page looks like now.


Next I thought it only fair that I color my own design on page 60.  The beauty of the book is that you can add even more doodling to the pages or add stamps, etc. to the pages.  Remember the quote that says "art is never finished, just abandoned".  Play with the pages until you feel like abandoning them.  Here's my page.


I couldn't seem to stop adding tangles, color, stamps, etc. to the page.  Finally abandoned.


Whatever coloring book you choose I hope you're having some relaxing moments with it!  Later down the road I'm sure I'll be tearing out pages and doing other projects with them but for now I'll leave them in the book.

Thanks for stopping by, I hope you're having a good one.  Hugs ~ Renee

Saturday, August 29, 2015

Girl Power Cards

 As soon as I heard one of the themes for my IMAGINE Crafts assignments as an Artist in Residence this month was "Girl Power" I knew right away what I wanted to do.  I love all the images Dyan Reaveley created called "Strength" and some of the phrases Dina Wakely has created with this same type of theme.  I decided to do a series of strong women cards the first one I'll share today.  The step by step directions can be found on the IMAGINE Crafts blog for the first one.  The rest were done pretty much the same way.  Take a look if you're interested in making your own set.


I'll share more cards like this later in the week.  Thanks for stopping by ~ hugs ~ Renee

Sunday, April 5, 2015

Masterboard Card using Faux Gelli Plate Technique


Last week when I made my "faux" gelli plate masterboard I was able to get 6 cuts out of one sheet of watercolor paper.  This is great when you want to make a set of cards that really look like a "set".  I started my faux technique using my craft mat instead of my gelli plate, which is great if you don't want to buy one more piece of equipment or just want to see if you even like gelli plate art.

1.  Drop 3 different colors of reinkers onto the craft mat and spray with water.

2.  Take a brayer and blend the colors together.  Next lay a sheet of watercolor paper on top of the ink and smooth the paper with your hands, this will spread the ink and pick it up at the same time.  Dry.


3.  Wipe off your mat with a baby wipe and add a contrasting color.  Make sure your paper is completely dry so the colors do not become muddy.  This time I dropped yellow and green reinkers randomly on the craft mat, sprayed water, spread the colors with a brayer and used the same piece of paper to pick up the color.  Dry.

4.  When the ink is dry, use a stencil and some gesso to pull the colors together and give the eye a place to rest.  Add more interest with a bottle cap dipped in blue ink and then flick black reinker droplets across the entire piece.  When the gesso is dry cut the paper into 6" by 4" piece panels.  These will be the backgrounds for your cards.


5.  Use stamps to decorate the panels.  For this one I stamped on a small piece of Vertigo and then enhanced the butterfly with StazOn Studio Glaze.  Using "3 in 1" adhesive the butterfly was attached to the panel easily.  Now just decorate and glue the finished panels to blank cards.  Here is one of the cards I created from this.  I'll share others at a later date.  I've included a supply list of products used here.


Supplies
IMAGINE Crafts featuring Tsukineko:  Radiant Neon reinkers:  Electric Blue, E. Purple, E. Green, E. Yellow, E. Pink;  StazOn:  Jet Black reinker, Midnight Blue ink pad;  StazOn Studio Glaze:  Gold, Claret;
Vertigo panel: Breeze, Craft Mat
Stamps:  Butterfly:  Stampendous;  phrase:  DeNami Designs
Stencils:  Artistcellar:  Chunky Chevron, Sea Foam
Miscellaneous:  watercolor paper, bottle cap, heat gun, paper cutter, adhesive, brayer

Thanks for stopping by today, know that I always appreciate your visits and comments.  Hugs~ Renee

Tuesday, February 10, 2015

A Cloisonne Effect using Stencils

It is Tuesday so on my calendar it is Artistcellar day.  Today I made a tag and used a stencil to put some extreme texture in the background.  If you want to see the steps it takes to make this project just keep reading.


I started with a Ranger manila tag that measures 3" by 6" and stamped an image from Dyan Reaveley's collection called "Strength".  I stamped a mask on a piece of scratch paper at the same time using the same stamp.


I trimmed out the masking piece and placed it over my image so I can use Creative Medium Green Iridescent paste on the tag without applying it to the image.


This is when the fun begins.  I placed the Sea Foam stencil over the tag and used a palette knife to apply the CM Green paste onto most of the tag.  When I had applied an ample coating of the paste, I lifted the stencil straight up so I wouldn't smear it and discarded the masking piece.  To maximize the texture I poured Ultra Thick Embossing Enamel powder onto the paste and melted it with my heat gun.  Now I have texture similar to cloisonne!


You can see how the light plays off of the iridescence of the paste but now I'm going to add more color.  I colored Metallic Gelatos all over the back ground.


The Metallic Mint and Blueberry Gelatos are easily blended with your finger but I chose to use a baby wipe to activate and blend the colors.  When this was to my satisfaction I inked the edge of the tag with StazOn Gothic Purple ink.


The image was colored in with Copic and Momento pens.  Then I attached some roses out of my stash, added some ribbon and a title for my girl, "L'Artiste".  The roses and top part of the tag were sprayed with Sheer Shimmer Sparkle and Gold to add a touch of bling.


Thanks for stopping by today.  I am having a lot of fun playing with this technique this week as I am pretty much snowed in!  Join me on Friday if you have time, I'll be sharing another stenciling project for Craft Stampers Take It Make It Challenge.  I hope to see you then.  Hugs ~ Renee xx

Tuesday, January 13, 2015

e.e. cummings poem~Mixed Media Canvas Blue

I really enjoyed making the canvas I made last week in autumn colors so I thought I would give it a try using different stencils and colors this week.  The poem is the same with just a few changes to the layout.


"i carry your heart with me"


Instructions
  Begin with  a large sheet of watercolor paper measuring  11” by 15”.  Using  the Calypso Kaleidacolor Ink Pad, ink up an brayer and apply the ink generously to the water color paper.  Blend the colors together with baby wipes.


I wanted to emphasis the Violet color so I blended in a little of the Victorian Violet color.


I drew the image of a girl with my Stabilo pencil free hand.  You could use an ad from a fashion magazine or a stencil to make your image.  Now I stenciled white gesso at the top using Blazonry and in the middle I used the same stencil but just used the Stabilo pencil.  This adds a lot of texture to the piece.  I added white acrylic paint to her hair and some Inktense pencil color to her skin and dress.


I painted around the image of the girl with Black Chalkboard paint and allowed it to dry.  This will be my journaling surface later.

Another layer of stenciling is added using lime green acrylic paint and two stencils, Numerals and Chequered Dots .  I gave detail to her dress using irRESISTibles in Silver and Wedding Dress white.


The hearts are stamped on a separate piece of water color paper using  Brilliance inks in Pearlescent Sky Blue, Mediterranean Blue, and Victorian Violet.  I heat embossed all three hearts with Clear Embossing Powder.  When these were dry I cut out the hearts and sewed a line down the middle of each one with my sewing machine.  Time to add the journaling.  My favorite poem is by e.e. cummings called "i carry your heart with me".  He purposely wrote the poem in lower case letters and so did I, using a white Gelly Roll pen.  I added more stenciling in white gesso with an Artistcellar stencil called Star Coral .  I adhered the three hearts to the canvas.


I used a Chunky Chevron stencil by Artistcellar with Bahama Blue irRESISTibles and a paint brush in several spots.


The dangling threads from the heart strings were trimmed but still left long.

 I framed it first with StazOn Midnight Blue ink on the edges of the canvas and glued the canvas to a piece of chip board.  I finished it by giving the canvas a framed look with StazOn Jet Black ink over the Midnight Blue ink, applying it with an applicator.

    A tiny re purposed flower was added to her waistband for additional interest.  Here is a list of my supplies.

Inks
Tsukineko StazOn Jet Black Ink
 Tsukineko Kaleidacolor ™Raised Rainbow Dye InkPad in Calypso color
Tsukineko Brilliance Archival Pigment Ink Pads
                Mediterranean Blue
                Pearlescent Sky Blue
                Victorian Violet
IMAGINE Craft irRESISTible Colored Texture Spray in Bahama Blue and Wedding Dress White
IMAGINE CRAFT irRESISTible Pico Embellisher in Silver
Stamps
                Dina Wakley Grunge Heart by Stampington
Stencils
                Artistcellar
Other supplies
                140# Watercolor paper
                Acrylic Paints
                Gesso
                Black Chalkboard Paint
                White Gelly Roll pen
                IMAGINE Craft Clear Embossing Powder
                Stabilo Pencil

Tools
            Brayer
Scissors
Inktense Pencils
Adhesive
Sewing Machine
Old credit card to scrape Gesso onto page
Baby Wipes

Thanks for stopping by today.  I hope to see you next Tuesday with more stenciling ideas!
 Hugs~ Renee


Tuesday, December 16, 2014

How to make a quick card with stencils

Sometimes you just need a simple, organic, very quickly made card.  That was the inspiration behind this stenciled card today.


You could use any stencils you have on hand and make the cards any color you choose.  I happen to love this stencil from Artistcellar called Bodacious Pods.  It is one of Chris Cozen's Playful Pods Series stencils.  I just pulled a blank, white card from my stash and taped the stencil over the front of the card, lightly tracing the stencil with a permanent black pen.


It isn't necessary to trace all of the stencil images onto the card, just as many as you would like.  Next I placed the stencil again on top of the card, taped it down to my craft sheet, but this time it was a little off from the original pen work.  Then I scribbled some purple Gelatos on my craft sheet, sprayed the Gelatos with water to activate it and sponged the light purple color on to the first pattern of pods.


I like the water color effect made by the Gelatos when used this way.  When this had dried it was time to stencil a sentiment onto the card.


I chose to use Tamara Laporte's stencil in the Articellar collection called "Tam's Inspiration".  I sponged StazOn Jet Black ink through the stencil.  When the card was dry I added some touches of gold and some doodles to finish it.


As I mentioned before you could use any stencils or colors that you prefer.  Try pulling your stencils out and making a quick card the next time you need one and don't have much time to make it.

Thanks for stopping by today, I always appreciate your visits and support.  Take care ~ Hugs,  Renee xx

Tuesday, December 9, 2014

Using Artistcellar Stencils in my Art Journal

It is Tuesday so it must be Artistcellar stenciling day!  Today I'm using my stencils in my art journal.


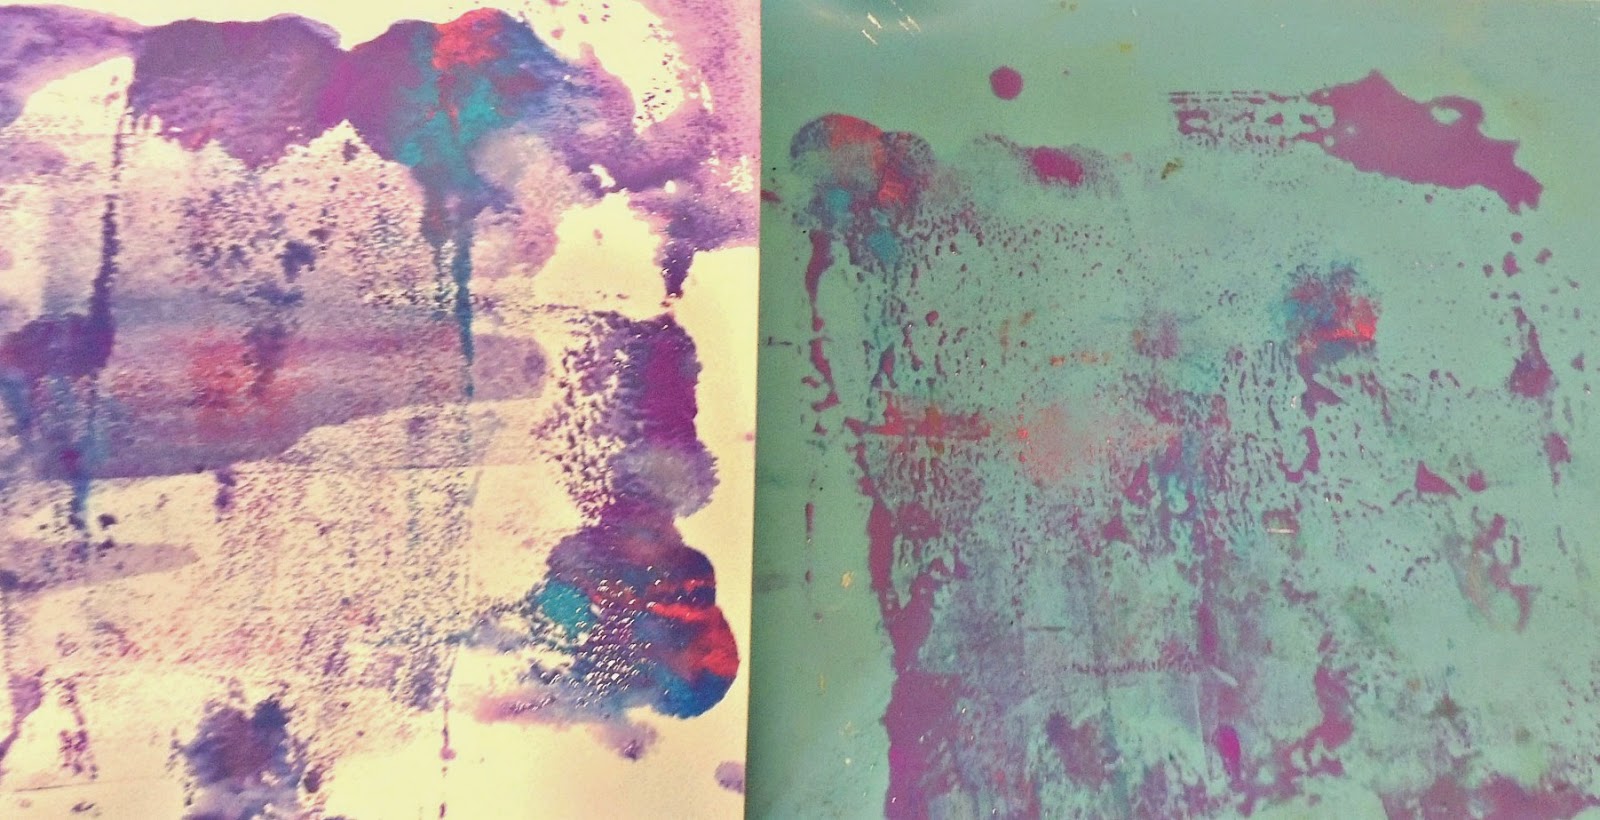
I always have my journal turned to two blank pages when I'm doing a lot of stenciling on other projects, this way I don't waste any of my inks.  These two pages were evidently test pages to see what color of Turquoise I had in the bottle and then a blast of Bubblegum Pink found its way there too.  I wiped a Balzer Silhouette Script stencil with Angel Pink irRESISTibles off on it at a later date.  At this point it doesn't look like much of anything to most people but when I look at it I see ball gowns.


After choosing my background in my journal  I went back to my Master Board stash and found a piece of paper that I worked on a couple of weeks ago.  I cut three tags out of this, smeared a glob of gesso in the center of each tag, stamped some of Dina Wakley's faces on it and a corset stamp that I got for free in the new Craft Stampers magazine and Voila! I was ready to play.


The lady tags were glued to the art journal pages and then I drew their dresses on with a black pen.


After their ball gowns were drawn on I added another lady tag to the mix.  I began just writing a little story randomly around the ladies, put crowns on them and gave one some flowers.  It didn't seem bold enough for my taste so I pulled out some more stencils, these are by Tamara Laporte and are called Tam's Inspiration. In this series of word stencils you'll find inspirational words written in Tam's lettering style.  I used Black StazOn ink with a sponge dauber to stencil these words onto my pages:  believe, stardust and you matter.


 Once the ink was dry I had my two pages done.  It is always fun to play in my art journal it gives me ideas to try on cards and mixed media canvases later.


My message on Tuesdays is always the same, get your stencils out and play with them in all sorts of different ways.  You'll be glad you did, I know I always am.  Take care, see you next Tuesday!  Hugs, Renee xx

Tuesday, December 2, 2014

Stampotique Poe Challenge~SDC175

This week Stampotique has a challenge that was posted by the lovely Kay Wallace.  Create a project using Stampotique stamps and an Edgar Allen Poe quote.  Since I have loved the writings of Poe since I was 12 this was right up my alley, my theme is the poem called Annabelle Lee.   I am always looking for places to store my small art projects like ATCs, tags and Art Cards so this seemed like a good idea.  I turned an old plain box into this.


It began as a plain cardboard box that I'd been saving for a while.  I coated the top and sides with white heavy gesso to give myself a nice smooth surface to work on.


Next I sprayed Dylusions Spray Inks through my Water Series stencils, Surf and Sea Foam.  I used London Blue and Cut Grass green then softened the colors with White Linen.


I decided to stamp through my Blazonry stencil with an Artistic Outpost word stencil but it didn't turn out like I had hoped so I used the same stencil to draw outlines with a black permanent marker.


Still not entirely happy with the results I used the Chunky Chevron stencil and some white gesso to cover up the parts I didn't like and to join the surface all together.


I had some book text by Poe in my stash and some other relevant images so I trimmed those into manageable pieces.  I stamped by Stampotique image called "Angel" onto a separate piece of paper then tore the image out.  The edges were distressed with several colors and heat embossed with clear powder.  Then I started gluing all the components to the top of the box.


Another fun way to get more mileage out of your stencils!  You might even make a box like this to store your stencils in.  There is still time, one more day,  to enter the Stampotique Challenge if you like, I have added the link.  Stop by next Tuesday for more stenciling ideas.  See you then ~ Hugs, Renee

Wednesday, November 19, 2014

Keeping a visual record of your stencils with a sample book


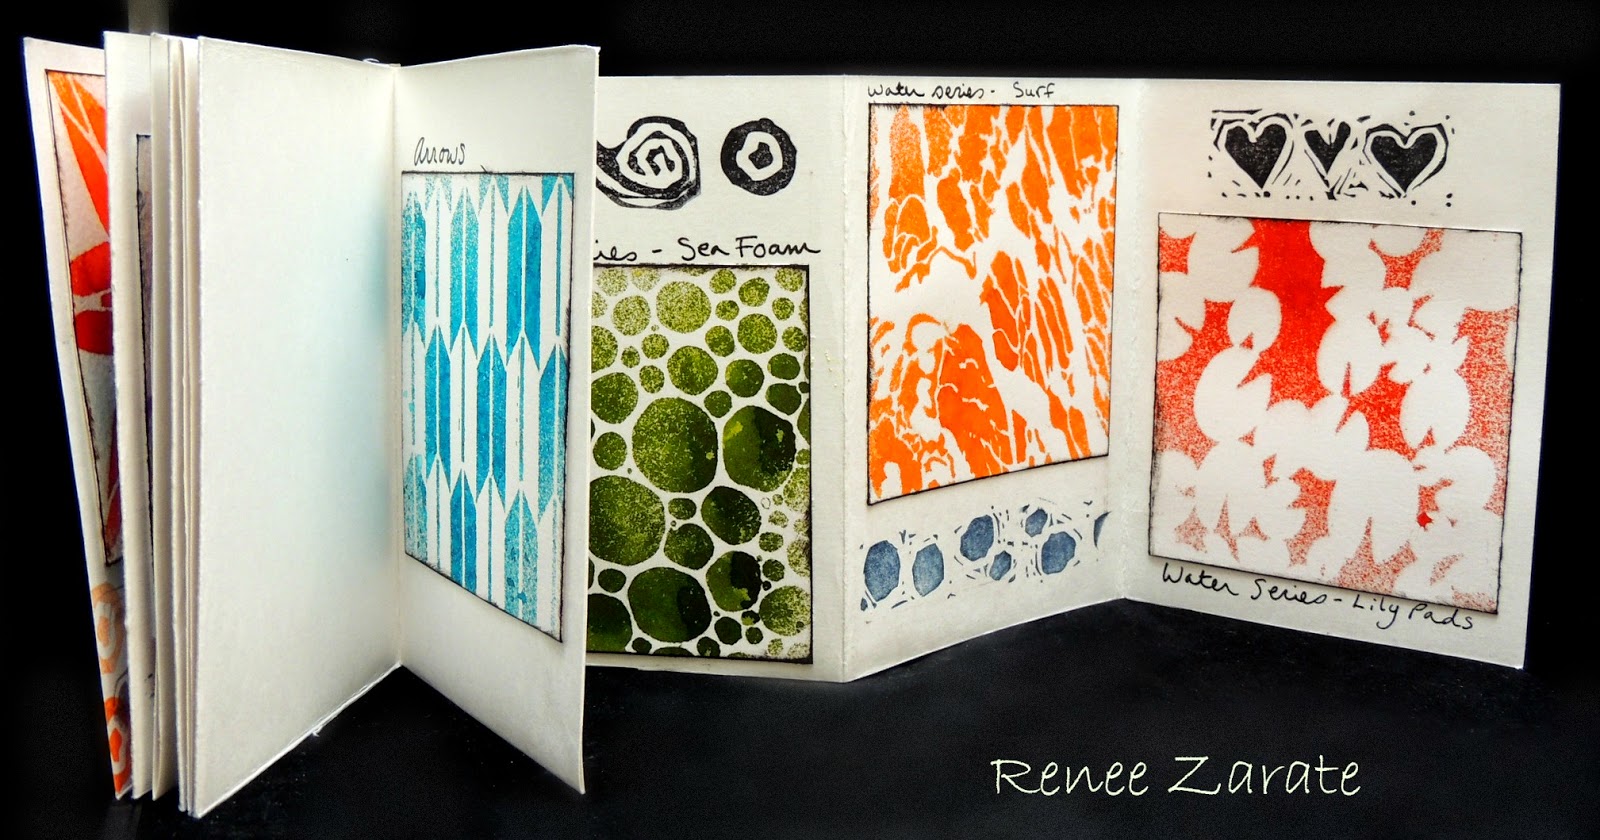
I made a mini book not long ago to remind me of what types of stencils I had and what they looked like when sprayed with ink.  Every month I receive new stencils from Artistcellar and need to keep track of what I have so I don't have to experiment too much when creating projects.  I just received a series of stencils called the WATER series so I've added their images to the book using the 4" by 4" art cards.  Here is what the book looks like.


Progressively adding more Art Cards with stencil designs


Blank book before adding Art Cards


First I placed the art cards in with the Kaleidoscope stencils designs on them.


Now I have added the Water Series of patterns to the back empty pages.


I was surprised when I sprayed each of these with ink by the patterns that came out!  The first one called Ripples almost looks like a wood grain stencil.  When there are samples like this it can really help the artist to see the possibilities quickly.

Thanks for stopping by today, I hope this has given you some stenciling ideas.  I will keep you posted each time I add art cards to my mini book.  I look forward to seeing you next week on my usual stencil day, Tuesday.  Take care, hugs~Renee xx