Showing posts with label tiny canvas. Show all posts

Tuesday, October 14, 2014

Stenciled Teacups

It's Tuesday, time for stenciling!  I am still creating little stenciled teacups using different Artistcellar stencils, combining them for backgrounds and decorations on stamped teacups.  This is similar to the one I created last week, the same color palette but different designs.  If you have time, sit down with a cuppa and take a look at my process.


This process started just like the one last week with a piece of my master board.  My master board has stamped images on it in different shades of blue and pink inks.  To begin I cut a piece measuring 4" by 4" and then stamped a teacup image on the paper.


When the ink is dry I started using stencils to make the designs and lines that I would color in or doodle designs in later. 


 First I completed the background with different stencils using Dylusions spray inks in a water brush type pen.  I used a Coral stencil with Fresh Lime ink.  Then I used the X's stencil with a deep yellow Memento marker called Dandelion.  When I was finished with the background I drew a horizon line with a Micron black pen.  I used the same pen to doodle in a design on the bottom portion of the cup.  I colored in the teacup with Dylusions Bubblegum Pink ink and Vibrant Turquoise.  The Memento Marker in Dandelion was used on the handle and other parts of the cup and saucer.  I made the teabag out of a tag and a piece of twine.  The phrase was part of a longer DR phrase just cut out, inked the edges of it and after gluing it on I anointed it with a coating of Clear irRESISTIbles Pico Embellisher.  The only thing left to do was ink the edges with StazOn Chai permanant ink.  Chai seemed like the perfect color to use!  Then I adhered my little water color panel to a  blank 4" by 4" canvas.


  Now I have two.


Thanks for stopping by today, I hoped you enjoyed seeing how I use my stencils.  I like getting the maximum value out of my supplies and using them in unusual ways does it for me.  I'll have another stenciling idea to share with you next Tuesday, hope to see you then!  Hugs~Renee

Tuesday, October 7, 2014

Small Stencils Make a Big Impact

Hi there, it's Tuesday so it must be Artistcellar stencil day!  Today I'm going to show you how many stencils I used on a small 4" by 4" canvas to make a huge impact.  The stamped teacup looks like the star of the show but without the stencils it would be pretty boring.  This started out as an Art Card experiment and ended up as a small canvas.  I have been hearing and reading about these new tiles called Art Cards, they measure 4" by 4" and remind me of ATCs.  Tiny surfaces packed with all sorts of colors and ephemera.  I'll walk you through my process.  CAUTION:  heavy use of photography!


I began by using a piece of an existing master board, that way I didn't have to face a blank canvas.  This gives the piece a background and a few colors to work with.  I just cut off a 4" by 4" piece of the master board made last week on 140# water color paper.


I used a stamp that had a lot of open space, this one is called "Teacup" by B Line Designs.  When stamping on water color paper I use Jet Black StazOn ink and really get a lot of ink on the stamp before stamping.


I collect old tea cups and none of them match.  I thought I'd do the same thing here and make a series of these using different colors and stencils so none of the cups match.  This is the first one.  I brought in one of the Sacred Hearts stencils; this one is called "Immaculate".  Using a Micron 01 Black pen I stenciled the rose on the top half of the cup and the beams of light on the lower half.  The stencil can be moved repeatedly to get the desired design.


I added color to the design with Dylusions inks that had been poured into a water brush pen. Now rather than spray the inks I can paint them on very specifically.


First I painted the Bubblegum Pink ink then Fresh Lime and Vibrant Turquoise.  I added yellow with a Memento Marker in Dandelion.


Next I used stencils again, this time for the background.  All of the stencils are 6" by 6" and are called X's from the Marked Series, Julie Fei-Fan Balzer's Circles in Lines and Fire Coral from the Coral Series.  I just layered one after the other and used different inks chosen from the above four colors.


I stamped a phrase from Dylusions, cut out the portion I wanted and edged it in the Turquoise ink.  Then I glued it to the watercolor panel and inked the edges of the paper.


The tea bag was created from a tiny tag stamped with stamp from Rubber Stamp Tapestry and attached to a piece of twine.  The tag was glued to the panel.


I used an irRESISTible Pico Embellisher in Shimmer to highlight areas of the teacup and the phrase.  It spreads easily with the needle-like tip and looks like liquid plastic when it dries.  When everything had dried I used a strong adhesive to glue the water color panel to a 4" by 4" by 3/4" canvas that I bought a Michaels.


That's it for today.  This was a fun project, didn't take very much time to make and challenged me to use stencils in different ways.  I will see you next Tuesday with more ideas on how to use stencils in your artwork.  Hugs~  Renee

Tuesday, July 15, 2014

Clowning around with stencils!

I love working on small canvases.  They are not intimidating and can be finished quickly.  Using stencils makes it even easier to complete a fun piece with lots of texture and interest.  Today's project is a small 6" by 6" canvas made with left over acrylic paints, a fun clip art image and some stenciling to pull it all together.  Here is my finished project with a short tutorial if you are interested in seeing how it was achieved.

Cheers!

To begin I covered a 6" by 6" canvas with a thin layer of gesso and allowed it to dry.  When it was thoroughly dry I painted some of Dina Wakley Media acrylic paints randomly on the canvas.  I was working on a different project and didn't want to waste any of that beautiful silky paint.


When the paint was dry I used a stencil called "Numerals" (TCW200) paired with white gesso.  This gives the canvas some raised texture.


Don't worry about any imperfections in the stenciling as these will be covered with the clip art image and rubber stamping.  Embrace the imperfections!  I added some stamping with Jet Black StazOn ink.  The stamps are by Wendy Vecchi and Crescendoh.


For a pop of color I stamped a balloon, colored it red, cut it out, attached it with glue and then added a piece of black waxed twine, punching a tiny hole in the canvas with a needle and tying it off on the back of the canvas.  I taped the twine knots down on the back to make sure they don't pop off later.


I drew a horizon line across the bottom of the canvas to "ground" my clown with a Fude pen and then painted the entire canvas with Creative Medium in clear gel to seal it.  This would make a sweet addition to a child's room or a get well gift for a friend.

Thanks for joining me today.  I'll see you next Tuesday with more stenciling ideas.  In the mean time, take care~ Hugs, Renee

Tuesday, June 24, 2014

Stenciling on canvas

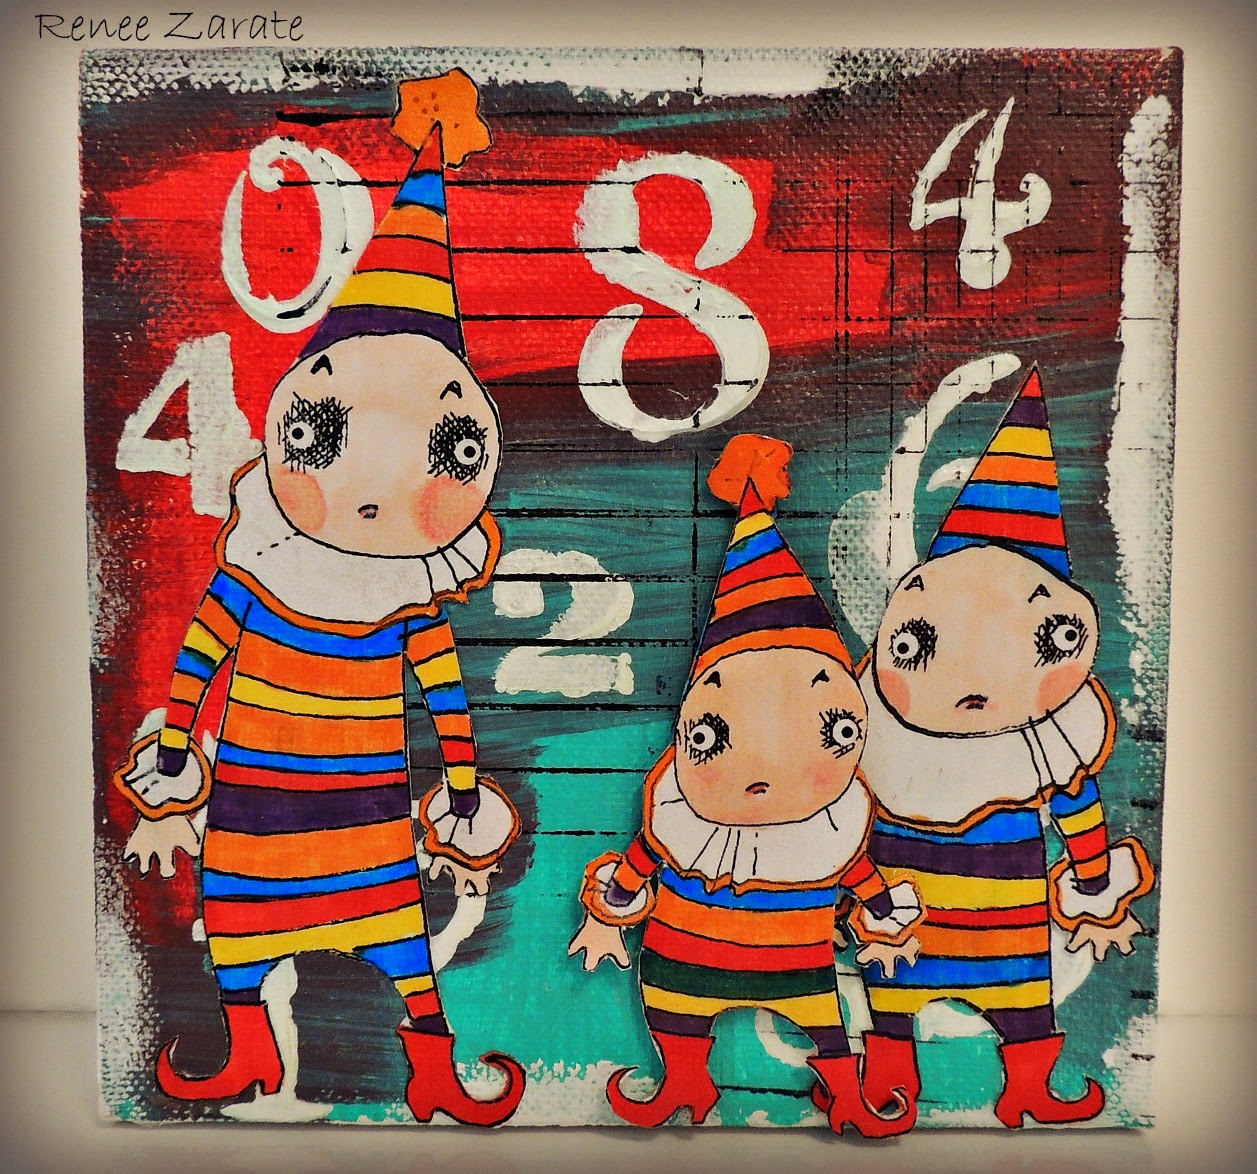
I love working on small 6" by 6" canvases!  The project I'm sharing today is done on a small canvas with paint, ink and gesso.  The clowns are clip art  from Rick St. Dennis.com.   I am calling it "The Usual Suspects".  These clowns definitely look guilty!

The Usual Suspects


 First I started by painting two colors of Dina Wakley's acrylic paints, Ruby and Turquoise, on my canvas.  I wasn't too careful and allowed the colors to mix a bit.


Next I used TCW's stencil called Numerals (TCW200).  I laid it on the canvas and applied some heavy gesso with a paint brush.  Lifting the stencil straight up I still managed to smear it a little, that's when I decided to add some clip art.


When the gesso was completely dry I ink up a lined stamp by Wendy Vecchi with Jet Black StazOn ink and rolled the stamp randomly here and there.   I colored in the printed clown clip art with Memento ink pens.  Then I cut out the ink colored clowns and glued them onto the canvas.


To seal in all that delicious color I painted the entire surface with  IMAGINE Craft's Creative Medium in the clear color.  Once this had completely dried I added the third clown who is popped up with pop dots.  He was also sealed with the Clear Creative Medium.


I hope you will continue to try different things with your stencils.  Small canvases like this are cute on bookcases or in children's rooms.  Thanks for stopping by, I'll see you next Tuesday with more stenciling ideas.  Take care ~ Renee xxx

Friday, January 20, 2012

The Map to Your Heart Challenge in the Moxie Fab World

Here is a new challenge from the Moxie Fab World.  The challenge is to use an old map or map paper to create a project.  My project is a card with a butterfly that was stamped on a piece of map paper by Wander Paper Pad/Basic Grey.  First I used a 5"x7" blank white card as my base.  I stamped it with miscellaneous travel stamps from Stampington using Ranger's Iced Spruce ink.  I then cut a strip of cardboard to adhere across the center of the card.  Tim Holtz's "journey" stamp graces the bottom.  I bought the tiny canvas,  which measures 2 3/4" x 2 3/4" square, at Michael's.  I did a direct to paper technique with Ranger's Stormy Sky ink and then cut little strips of the map paper and glued it all around the canvas to cover the edges.  The peel and stick words are from Authentique.  The butterfly stamp is by PSX.  I used Ranger's Rusty Hinge to stamp the butterfly and heat embossed with clear powder.  The antennae are a Jolee beaded coat hanger that has been twisted around.  The final touch are circles that were punched out of the map paper and glued randomly around.