Renee Zarate's Bolton House is still in New England but Renee herself has moved on to South Carolina. The days are a little different now, no garden to take care of means more studio time. Dealing with snow and blizzards will be a thing of the past but there will be new challenges. Challenges like...how will we ever carry these two chairs and this huge umbrella down to the beach? Stay tuned.
Showing posts with label Tag. Show all posts
Monday, January 1, 2018
My Word for 2018
Every year I give my "word for the year" quite a bit of thought. This year I thought my word should be YES. Hmm...what does that mean? To me it means saying yes to things that I've been holding back from learning or actually practicing. Like learning how to do videos of my art process. That may sound silly but sometimes all of the techie things just get to be too much for my old brain. I enjoy watching others progress in their journey but fear, like everyone else, holds me back.
So here we go again, another fresh start, another year, another opportunity to learn new and fresh ideas. Please join me in making 2018 a year where you will say "yes" to branching out artistically and embracing different products, ideas and techniques.
What's your word for 2018? Feel free to share it with me in the comment section. Thanks for stopping by, I hope you have a great start to a new year.
Hugs ~ Renee
Saturday, May 27, 2017
AIRs " Fly" Tag Using Imagine Crafts Products
Shipping tags are a wonderful substrate for mixed media art.
They are small, the paper is durable and when completed they fit nicely into an
art journal or can be used in place of a card. This tag showcases not only
texture and color but also techniques such as embossing, masking off areas when
stamping, mixing inks, using foils, coloring ribbon with inks, just to name a
few. A mixed media tag is a great excuse to break into all those stockpiled,
precious products since a tag requires only a small amount of each product.
Skill: All Levels
Time: one hour or less
Instructions:
Step two: Stamp swirls with Paris Dusk ink then stamp again in the same area using Rose Bud ink. Dry with a heat tool. Fill a water pen with Fireworks! New Sprout and color dress with the water pen. Stamp the word “Fly” with Delicata Black Shimmer ink; this can be embossed with Clear Embossing powder melted with a heat tool. Add highlights on the heart, arms and legs of stamped image and dots on the swirls with a Memento Marker pen in Rose Bud color; silver foil can be randomly added onto portions of the tag.
Step three: Spray two pieces of ribbon with Fireworks! Craft spray. One ribbon will be sprayed with Lilac Posies and the other with New Sprout, additional water can be sprayed onto the ribbons to achieve the desired color. Blot with a paper towel, coil up the ribbons separately and allow them to dry. When dry the ends can be trimmed, they will be richly wrinkled. Tear faces off of the Washi tape and place on tag. Lay lines of Washi tape on a scrap piece of card stock, die cut into a butterfly shape, adhere some silver foil to the butterflies.
Step four: Ink edges of tag, tie the dried colored ribbons on the top, and staple the butterflies into place.
Supply List
Imagine Products:
StazOn ink – Jet Black
Delicata – Black Shimmer
Memento Dew Drop ink – Rose Bud, Paris Dusk
Fireworks! Craft Spray – Lilac Posies, New Sprout
Memento Marker – Rose Bud
Embossing Powder – Clear
Craft Mat
Other supplies:
Manila Shipping Tag
Stamps – Mela by Stampotique, word “Fly” by Stampotique; Joy Clair Hugs & Smiles
Washi Tape – Jane Davenport
Prima – Silver foil and Glue stick; water pen
White ribbon
Sizzix – Butterfly die
Card stock
Heat tool
Big Kick Die Cutting Machine
Paper towels
Check out the Imagine Crafts blog today for this and other design team creations!
Thanks for stopping by ~ hugs ~ Renee
Tuesday, March 7, 2017
A Glitzy Mixed Media Tag
Hello and happy Tuesday! Here's a sneak peek at what is being shared on the Imagine Blog today. This is a Prima influenced mixed media tag using Imagine/Tsukineko supplies. Just click on the link to view the Imagine Blog.
Thanks so much for stopping by ~ hugs ~ Renee
Sunday, November 1, 2015
Just a whisper of color from StazOn Studio Glaze
Check out the tutorial on the IMAGINE Crafts/Tsukineko blog showing how to make this cute little canvas! Here is the link. Sneak peek below.

Thanks so much for stopping by, I always appreciate your visits. Take care, hugs ~ Renee
Labels:
AIRs Technique for StazOn Studio Glaze,
Canvas,
Tag,
wings
Wednesday, August 12, 2015
A Tag with Motion

I made this cute tag that can be used as a gift tag or a book mark.
Check out the link if you want to see how it is made.
Tuesday, December 23, 2014
Masterboard Tag Using Artistcellar Stencils
Whenever I make master boards with spray inks and I always blot my stencils off on a separate piece of paper getting a reverse image of the first paper. Kind of a two-for-one deal. I used the Water Series stencils, more specifically Ripples and Sea foam to create a master board a few weeks ago. First I sprayed Dylusions Spray Ink in Calypso Teal and then Dirty Martini, blotting off the excess ink along the way. I dried the ink as I went along with my heat gun. When the blue and green ink was dry I sprayed Dandelion irRESISTible Texture Spray over the top using Julie Fei-Fan Balzer's Silhouette Script stencil. I ended up with two very different papers.
![]() |
| First master board |
![]() |
| Second bonus sheet of blotted ink |
Tuesday, June 17, 2014
Gift Tag using Pocket Stencils
It is Tuesday so it must be STENCIL DAY! I decided to make a tag today, they always come in handy. I cut my own tag out of 140# water color paper, trimmed the top edges and punched a hole in the top center. The finished tag measures 4" by 10". A short tutorial follows.
After cutting the paper I trimmed the top, punched the hole and painted on a thin layer of gesso.
When the gesso was dry I sprayed some Dylusions in blues and purple onto the tag.
I painted on another thin layer of gesso and allowed it to dry. I inked up a Wendy Vecchi stamp with StazOn Jet Black ink and rolled it on a few areas of the tag. Using the TCW Circle Regiment stencil and a cosmetic sponge I applied Dina Wakley's new acrylic paint in the Blackberry Violet color.
When the Blackberry paint was dry I applied gesso again using another TCW stencil called Corn Flowers. I set this aside to dry.
I keep saying how much I love Artistcellar's new word stencils and they found their way onto this tag as well. I used the words from Creative Words and Virtues Words. This time I stenciled the words with a Memento marker in the color called Grape Jelly.
To finish off the tag I distressed the edges with StazOn Claret colored permanent ink and added a little more stamping with a Dina Wakley script stamp using the black StazOn ink. The ribbons on the top make it look festive.
It is fun to use your stencils to get different effects. There are no rules as to how many layers of stencils you can stack onto a project, you just end up with more depth and texture.
Thanks so much for stopping by today. I'll be showcasing more stencils and different ways to use them next Tuesday. Take care ~ Renee xxx
After cutting the paper I trimmed the top, punched the hole and painted on a thin layer of gesso.
When the gesso was dry I sprayed some Dylusions in blues and purple onto the tag.
I painted on another thin layer of gesso and allowed it to dry. I inked up a Wendy Vecchi stamp with StazOn Jet Black ink and rolled it on a few areas of the tag. Using the TCW Circle Regiment stencil and a cosmetic sponge I applied Dina Wakley's new acrylic paint in the Blackberry Violet color.
When the Blackberry paint was dry I applied gesso again using another TCW stencil called Corn Flowers. I set this aside to dry.
I keep saying how much I love Artistcellar's new word stencils and they found their way onto this tag as well. I used the words from Creative Words and Virtues Words. This time I stenciled the words with a Memento marker in the color called Grape Jelly.
To finish off the tag I distressed the edges with StazOn Claret colored permanent ink and added a little more stamping with a Dina Wakley script stamp using the black StazOn ink. The ribbons on the top make it look festive.
It is fun to use your stencils to get different effects. There are no rules as to how many layers of stencils you can stack onto a project, you just end up with more depth and texture.
Thanks so much for stopping by today. I'll be showcasing more stencils and different ways to use them next Tuesday. Take care ~ Renee xxx
Friday, June 13, 2014
Craft Stamper Magazine Take It Make It Challenge~Bleach Blocking Technique
Have you entered your project yet at the CS Take It Make It Challenge? You still have plenty of time. You don't even have to use real bleach, water will do. I did another project using the bleach blocking technique. Here is the finished project, it'll be followed by a short tutorial showing you how simple it is!
I started out by cutting my own tag out of 140 lb water color paper. (I ran out of tags.) I applied three colors of Distress Ink to the tag with an applicator. I used Shabby Shutters, Shaded Lilac and Dusty Concord.
Next I used a cosmetic sponge and the applicator to remove color by dipping them in water and then lifting off some of the ink.
Once I was satisfied with the effect I started stamping Dina Wakley's new stamps, little wonky birds and some phrases. I used StazOn permanent ink to do this. I cut the top corners at an angle and punched a hole in the center to make it look like a tag.
At this point I was disappointed in the way it looked so I decided I had nothing to lose. I stamped Dyan Reaveley's leaves in black ink around the birds. Then I decided to bring out my new Dina Wakley Acrylic paints and just play. I stamped the leaves and painted them green. Then I mixed other colors with a new product I bought this weekend called Whipped Spackle by Faber Castell, it is like a whipped gesso. Very light and fun.
You can really glob on the paint with the spackle. It allows you to see the brush strokes too. Next I added a little green ink around the leaves with a Memento Pear Tart pen. A tiny bit of PICO irRESISTible on the eyes in a silver color followed by a drop of white pen for a catch light. Then I distress the edges with StazOn Midnight Blue and tied some ribbons at the top through the punched hole and there we have it.
I hope you will enter the Challenge. I've had more fun with this technique than I thought I would. Be sure and link your creation so we can all see it. Thanks for stopping by. Talk to you soon ~ Renee xxx
I started out by cutting my own tag out of 140 lb water color paper. (I ran out of tags.) I applied three colors of Distress Ink to the tag with an applicator. I used Shabby Shutters, Shaded Lilac and Dusty Concord.
Next I used a cosmetic sponge and the applicator to remove color by dipping them in water and then lifting off some of the ink.
Once I was satisfied with the effect I started stamping Dina Wakley's new stamps, little wonky birds and some phrases. I used StazOn permanent ink to do this. I cut the top corners at an angle and punched a hole in the center to make it look like a tag.
At this point I was disappointed in the way it looked so I decided I had nothing to lose. I stamped Dyan Reaveley's leaves in black ink around the birds. Then I decided to bring out my new Dina Wakley Acrylic paints and just play. I stamped the leaves and painted them green. Then I mixed other colors with a new product I bought this weekend called Whipped Spackle by Faber Castell, it is like a whipped gesso. Very light and fun.
You can really glob on the paint with the spackle. It allows you to see the brush strokes too. Next I added a little green ink around the leaves with a Memento Pear Tart pen. A tiny bit of PICO irRESISTible on the eyes in a silver color followed by a drop of white pen for a catch light. Then I distress the edges with StazOn Midnight Blue and tied some ribbons at the top through the punched hole and there we have it.
Friday, May 2, 2014
Craft Stamper Challenge::Potato Printing
It is time for the Craft Stamper May "Take It Make It" Challenge! This is not only a good place to stretch yourself creatively to use a technique that is out of your comfort zone but also to try and win some great prizes. Here is the new challenge.....Potato Printing.
Technique: Revisit your childhood and get potato printing! Take any old potato and carve a shape that you can then use to print with. These prints can then form a background for your project. We will still need regular stamping on the project as well as the potato prints! The REAL challenge with this theme is to see if we can take a technique used by 3 year olds and turn it into something any arty grown up would be proud of!
I've never done this before so here goes, I'll show you the finished product and then give you a short tutorial walking you through my process.
I started by trying to carve something on the potato. I quickly realized why I'm a stamper not a sculptor!
A simple flower and leaf shape seem to be the safest bet for me. I used the same tools that I would use to carve a rubber stamp, the smallest V-shaped lino cutter in the pack is my tool of choice. After I had my design in place I used a paring knife to cut away the parts of the potato that I didn't want to print. I put paint on the potato to see the parts I wanted to scrape away.
![]() |
| My leaf |
![]() |
| My flower |
I looked around in my stash to find a large tag that already had a Pan Pastel orange background with some aqua acrylic paint stenciled randomly on it. Gesso seemed to be the best medium for me to work with so I painted white gesso on the flower and black gesso on the leaf. I turned it over and pressed down firmly onto the tag to make a print.
A few ribbons laced through the tag top and it is finished.
The potato art project produced by Helen Chilton for this Craft Stamper Challenge is truly a work of art. You might want to take a peek at her work in the latest Craft Stamper magazine, it is extraordinary. Please give it a go and enter your masterpiece at the CS "Take It Make It" Challenge for May. You can go directly there from HERE.
Thank you so much for stopping by today! I hope to see your creations posted through out the month of May. In the meantime, take care. Hugs~Renee
Saturday, November 9, 2013
Splatters and SDC 124::Using Gesso Challenges
Over at Craft Stamper Magazine there is a challenge still going on for things that have been "splattered". At the same time this week there is a challenge taking place at Stampotique for projects that have gesso on them. How nice to be able to combine the two! I decided to make a simple tag using some left over water color paper and of course, Stampotique's cute image by Jill Penney. There is a tad of gesso on the tag that was added with the help of a circle stencil.
All of the splatters and there are a lot of them, came either from Dylusions spray inks or Black India Ink. Tags are always useful for last minute gifts or can serve as a cute thank you note! I hope you're having a great weekend, take care. ~ Renee
Tuesday, September 3, 2013
VersaColor Artists Challenge!
This month’s
AIRs challenge from IMAGINE Crafts® involves using their bright, fabulous IMAGINE
Crafts®/Tsukineko® VersaColor™ Pigment inks!
I received 10 colors to choose from, that was the hard part. I decided first to make a large tag cut from
watercolor paper and decorated with one of Julie Nutting’s doll stamps. After some ribbon and a few touches of bling
later this is what it looked like.
If you want
to make a tag like this start by cutting your own tag. I cut mine out of 140# watercolor paper, the
measurements are 3 ½” by 7 ½”. Punch a
hole in the upper center portion of the tag and trim the edges at an
angle.
Stamp the
doll tag on a scrap piece of the watercolor paper using StazOn® Solvent Ink in
Jet Black. Trim out the girl image.
Apply
VersaColor™ inks to the butterfly stamp using several different colors such as
Turquoise, Orange and Violet. Spritz the
tag with water and stamp the image on the tag.
Repeat this process until there are three butterflies on the tag. Dry with a heat gun.
Using a
bullet tip Fantastix™ brush apply the VersaColor™ Violet and Turquoise to the
dress on the doll. Apply embossing
powder and melt it with a heat gun.
Apply Delicata™Pigment Ink in the Golden Glitz color using a clean
Fantastix™ to the girl’s crown, belt and shoes.
Apply embossing powder and melt with a heat gun.
Punch a
circle to cover the hole punch out of scrap paper and affix it with glue. Tear two pieces of the same scrap paper to measure 3 ½” wide and glue to the
bottom of the tag. Stamp the phrase on
the tag. Now I brought a little bling to
the tag by applying random dots using Shimmer Goosebumps™ with the Dauber top
bottle on the tag and allowing it to dry.
Ink the edges of the tag with VersaColor™ ink in Cyan and Violet using an InkBlushers™ sponge, set the tag aside.
Affix the
doll to the tag with pop dots. Tie
ribbons and twine at the top of the tag.
Glue a small piece of lace across the bottom of the tag and on the girl’s
skirt. Adhere random purple rhinestones
to the skirt of the dress.
Tags are
great when you don’t necessarily want to give a card to someone. They’re cute all by themselves on a shelf or
tucked in a good book. Here is a list of the supplies I used to create this. Thanks for stopping by I always appreciate the visit. Take care, talk to you soon ~ Renee
Supplies
IMAGINE Crafts®/Tsukineko®
VersaColor™Pigment Ink in Turquoise, Cyan, Orange and Violet
IMAGINE Crafts®/Tsukineko® Delicata™
Pigment Ink
IMAGINE Crafts®/Tsukineko®Fantastix™
Multi-Purpose Applicators
IMAGINE Crafts®InkBlushers™ Sponges
IMAGINE Crafts®/Tsukineko®StazOn®Solvent
Inks in Jet Black
IMAGINE Crafts®Goosebumps™Texture
Shimmer with dauber top
IMAGINE Crafts®Embossing Powder™Clear
color
IMAGINE Crafts®/Tsukineko®Memento™
Markers Dandelion
Stamps
Julie Nutting doll stamp
Phrase by Rosie’s Roadshow
Butterfly by Inkadinkado
Other Supplies
140# watercolor paper
Ribbon, twine, lace
Queen & Co. self adhesive
rhinestones
Pop dot glue
Orange Tint Pan Pastels
Thursday, October 18, 2012
Stampotique Designer's Challenge 70::Backgrounds
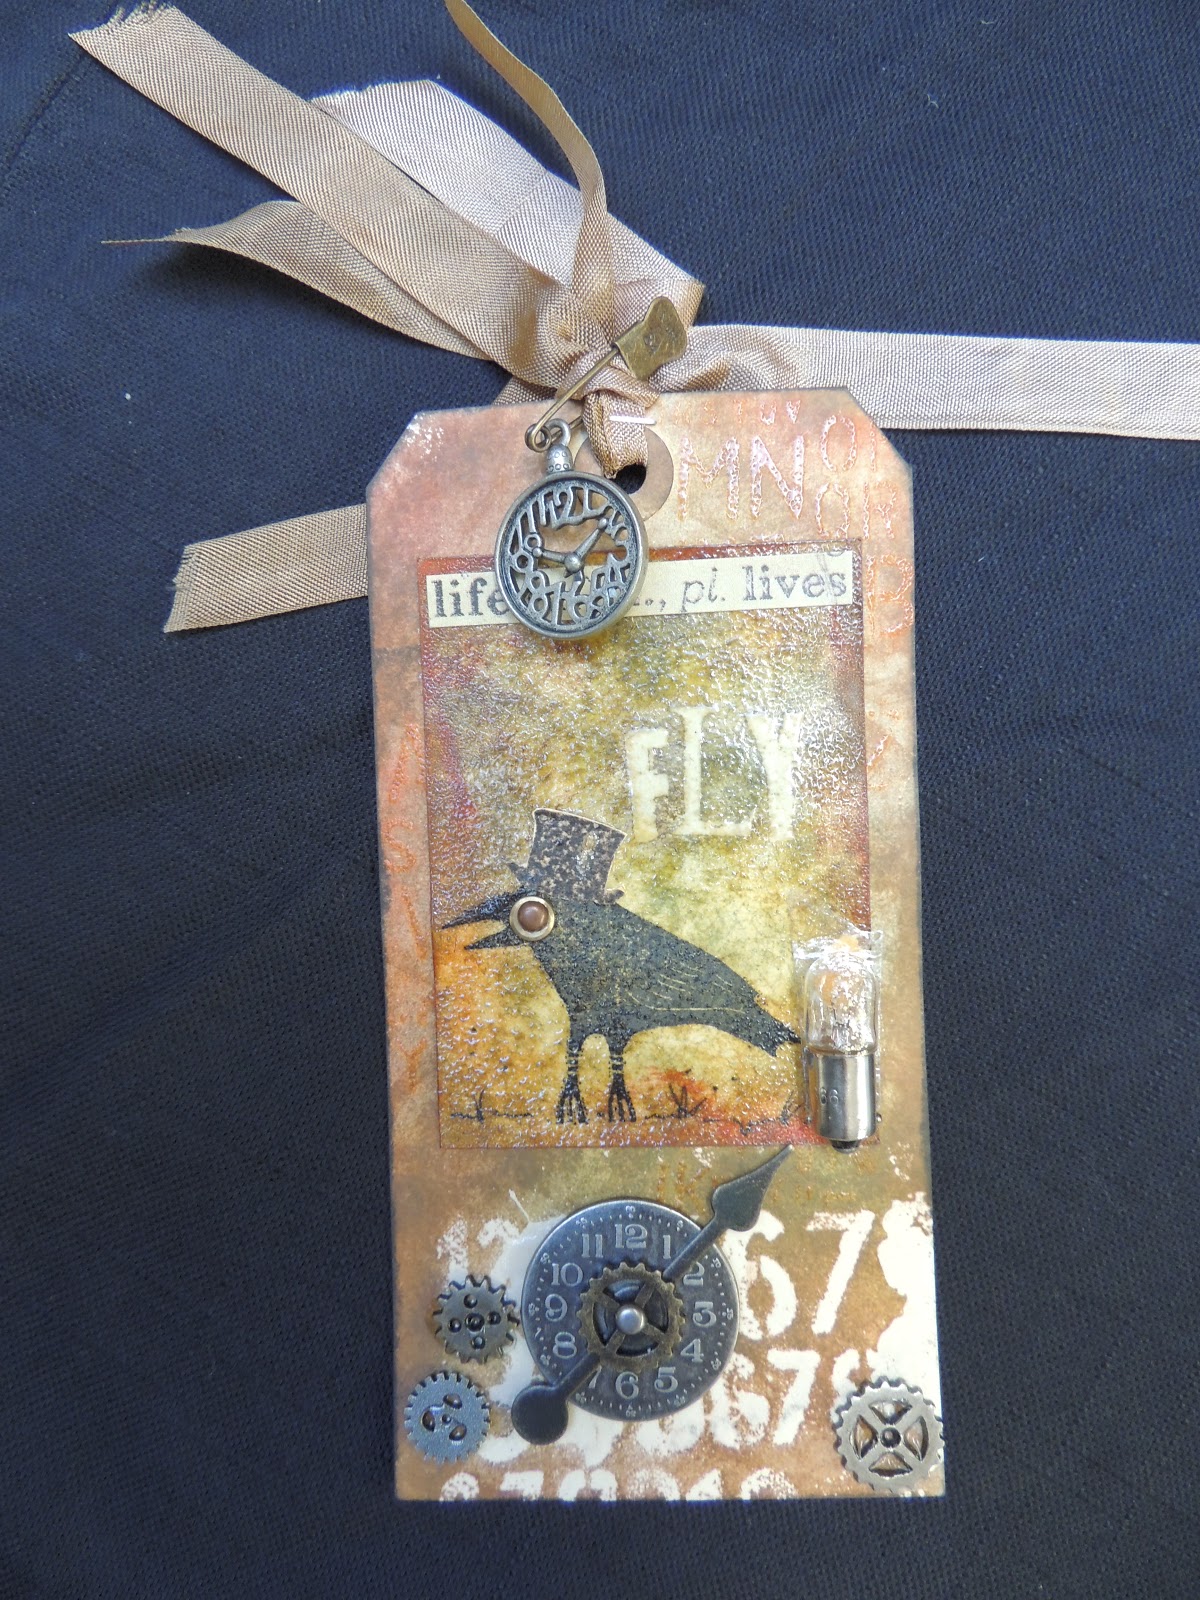
Time for a Stampotique Challenge! This time it is "Backgrounds". I took a class a couple of weeks ago at my LSS with John from Tsukinedo, they produce Memento inks and several other really cool products. I fell in love with a product called Goosebumps. It reminds me of liquid plastic in a spray bottle. I used it to spray through stencils. After it dries you can ink over it and then wipe off the excess ink. It provides a resist similar to embossing. The texture of it feels like rubber, it is pretty amazing stuff. John also re-introduced me to Memento inks. I don't how I've drifted away from using them but the colors he had us working with are delicious: Peanut Brittle, Pistachio, Morocco (my fave) and Espresso Truffle. Here is a fall ispired tag I made using all these colors and of course the Goosebumps.
I used Goosebumps with a stencil on the bottom of the tag and then stamped the word FLY in the Goosebumps and stamped it next to the bird.
Monday, July 16, 2012
Simon Says Challenge: No Rules!
The Simon Says Challenge is a "no rules", do whatever you like type of challenge. My favorite. I have chosen to do a tag using Dyan Reaveley's stamps. The face is from the Dylusions collection called "Bits of This". First I sprayed a manila tag (Ranger's size 8 tag) with Dylusion spray inks. I used Fresh Lime and Vibrant Turquoise. A quick dry with my heat tool. I stamped a large leaf pattern with Ranger's Rusty Hinge Distress Ink randomly on the tag. I stamped the face on a scrap piece of practice paper card stock using Ranger's Black Archival Ink and then colored the lips in with my Distress Markers. Using my Gelly Roll pen called Clear Star, I added some highlights and sparkle to her face. There was an acrylic butterfly in my stash left over from some long forgotten class so I dropped a little alcohol ink on it, dried it, then stamped a crackle finish on it using a crackle stamp by IndigoBlu. The butterfly stays in place nicely with the help of some Glossy Accents. Next came the phrase by Stampotique and a piece of ribbon dyed with spray inks to match.
Sunday, January 1, 2012
Simon Says Challenge/Tim Holtz Tags
This is a Tim Holtz inspired tag. The stamps are by "My Sentiments Exactly" and also "IndigoBlu's"crackle stamp. The flowers are Tim's Tattered Florals die cut. I used Rusty Hinge Ranger ink, Iced Spruce ink (which I adore) and Graphic 45 Steampunk paper with a little Rock Candy stickles on the butterflies. I colored some of Tim's pearls with ink to match the other components and tied them to the top of the tag. It is a tag that can be used for almost any occasion.
Labels:
Alcohol Inks,
Butterflies,
G45 paper,
Tag,
The Stampers' Sampler
Sunday, May 8, 2011
The Altered Alice Challenge
I love "The Altered Alice" blog and have finally decided to submit a card. The card I created is the Rabbit from Alice in Wonderland late for the tea party since the theme is "TIME".
First I applied the new Bo-Bunny "Time" paper to the sticky back portion of a sheet of Sticky Back Canvas. After soaking the canvas in water I rubbed off the paper which left only the clocks. After allowing the new clock fabric to dry thoroughly, I cut a piece of the fabric off and sewed it to a large ready made background "tag" card which had been edged with brown and blue distress ink (Ranger Broken China & Vintage Photo).
Then distressed and attached a piece of red cardstock with several staples. Stamped the rabbit on a mailing tag and then stamped clocks (both stamps are from Greetings from Wonderland SL25 by clearartstamps.com) randomly around the rabbit. Distressed with Tattered Angels glimmer mist, blue, coffee and green.
After the mists dried I glued circles of mica to the clock faces. I layered the mailing tag on to the card. Now I added the large metal clock with E-6000 glue and tied a piece of measuring tape ribbon to the top of the card.
First I applied the new Bo-Bunny "Time" paper to the sticky back portion of a sheet of Sticky Back Canvas. After soaking the canvas in water I rubbed off the paper which left only the clocks. After allowing the new clock fabric to dry thoroughly, I cut a piece of the fabric off and sewed it to a large ready made background "tag" card which had been edged with brown and blue distress ink (Ranger Broken China & Vintage Photo).
Then distressed and attached a piece of red cardstock with several staples. Stamped the rabbit on a mailing tag and then stamped clocks (both stamps are from Greetings from Wonderland SL25 by clearartstamps.com) randomly around the rabbit. Distressed with Tattered Angels glimmer mist, blue, coffee and green.
After the mists dried I glued circles of mica to the clock faces. I layered the mailing tag on to the card. Now I added the large metal clock with E-6000 glue and tied a piece of measuring tape ribbon to the top of the card.
Labels:
alice in wonderland,
Bo-Bunny paper,
card,
Clocks,
measuring tape,
rabbit,
Ranger Inks,
sticky back canvas,
Tag,
Time,
white rabbit
Subscribe to:
Posts (Atom)