Showing posts with label Memento Pens. Show all posts

Saturday, October 1, 2016

A Coloring Studio Project using a page from Volume III

When Stampington was looking for coloring book pages for Vol. 3 of the Coloring Studio,  I thought of a page I had done about a year ago that combined Stampotique rubber stamped images with Zentangle designs.  Here is the uncolored page and how I colored it in with Brushos and Memento markers.


While I might not have been thrilled with the end results of the colored in page, I could see opportunities to use it in the future.  I used it to create the colorful and funky top of a small storage box.


Color in a page out of the Coloring Studio coloring book.  Photocopy the colored in page onto heavy cardstock.    Choose a part of the page that measures the same dimensions as the top of the box and cut it to fit the top of the painted box.  Save the scraps to make cards.

Supplies:
Inks:  Permanent inks to distress edges of paper panel chosen to fit the top
Other:
Cardboard box, Chalkboard Paint (black), strong adhesive such as: E6000, Idea-o-logy metal feet


DIRECTIONS:
1.     Choose a card board box, new or recycled and paint it inside and out with black Chalkboard paint.  When dry attach metal feet to the bottom of box with a strong adhesive and begin working on the lid.  Allow paint to dry completely.

2.     Cut a piece of background paper, this one is from a coloring book page that has been colored and photocopied onto heavy cardstock and is a “master board”.


3.     Adhere panel to a piece of card board cardstock, glue with a strong adhesive to the box.  The inside of the box can be further decorated.

So tell me...what do you do with your coloring book pages when you're done?  I'd love to hear about it.
Thanks for stopping by ~ Renee

Tuesday, December 22, 2015

Got your coloring book? Now what......

Once you purchase a coloring book you may wonder....now what do I do with it?  Why, color in the pages, of course!  What can you color it with?  Anything you've got on hand.  I started coloring in some of the pages in my copy of The Coloring Studio, it took longer than I expected.  Each page is unique in its representation of the artist who created it.  It is more like a workbook to me since there are so many instructions and hints throughout the entire book.  I started with one of my favorites, Mou Saha, on page 100.  I used Pan Pastels, Memento Markers, gesso, stencils, Micron pens and an irRESISTible Pico Embellisher.  It was a meditative, fun, relaxing experience.  You are not facing a blank page and have the liberty to do whatever floats your boat.  This is what my first page looks like now.


Next I thought it only fair that I color my own design on page 60.  The beauty of the book is that you can add even more doodling to the pages or add stamps, etc. to the pages.  Remember the quote that says "art is never finished, just abandoned".  Play with the pages until you feel like abandoning them.  Here's my page.


I couldn't seem to stop adding tangles, color, stamps, etc. to the page.  Finally abandoned.


Whatever coloring book you choose I hope you're having some relaxing moments with it!  Later down the road I'm sure I'll be tearing out pages and doing other projects with them but for now I'll leave them in the book.

Thanks for stopping by, I hope you're having a good one.  Hugs ~ Renee

Wednesday, November 4, 2015

Stampotique Challenge "Bright Colors" ~SDC220~


This week Carol Fox is the hostess on the Stampotique Designers Challenge and she is challenging us to "Bright Colors"
Here is what Carol says about this challenge:

"Bright eye popping colors to brighten up November"

So let's see your best and brightest projects this week.

Your participation could lead to winning a great prize!


This started as just a warm up sheet of paper using stamps and tangling around them.  I usually practice Zentangle patterns early in the morning while I have my coffee.  When the paper is filled up it goes into the pile to be photocopied or cut up, whatever I need it for.  I used exclusively Stampotique stamps on the paper before adding the Zentangle patterns.


Here it is in black and white.  I wish I had used a heavier paper instead of just card stock.  I started out with Brushos and water which made the paper twist and warp.  I then switched over to Memento markers and colored it in like one of those new-fangled coloring book pages.  Fun.  Later I can cut it up and make whatever out of it.

Stampotique Stamps used for this:

  • Girl with heart purse
  • Portland
  • Girl with Lunchbox
  • Blah, Blah, L'artist & People Person

Other supplies:
  • Micron black pen
  • Memento Markers
  • Brushos w/water

I am also submitting this to Craft Stamper's Take It Make It Challenge for November~ Take a Stamp

Thanks for your visit, I always appreciate it!  Hugs ~ Renee

Wednesday, July 15, 2015

Stampotique Designer Challenge ~ Twinchies! ::SDC 204


Today on the Stampotique Designer Challenge our host, Janet, is challenging us to make some Twinchies!   Janet says : "Create a set of twinchies using your favorite Stampotique stamps."

Twinchies are small works of art that measure 2" by 2".  You can cut your own out of whatever paper you choose.   I just happened to have some wonderful pre-cut 2" matboard squares.  I was gifted these ART SQUARES from inchie arts lic and I must admit the quality of these squares is amazing!


I stamped parts of two different stamps, one on each twinchie.  The head comes from "Skiddy" and the skirt and feet came from Kate Crane's "Sing me a song".  I pulled a small gift bag out of my stash, I'll glue the twinchies to it later.


Time to color in the twinchies using Memento Markers in different colors.


Next I used some puffy, double sided adhesive tape to adhere the twinchies to the gift bag.  Then I filled the bag with the gift and added some turquoise tissue paper to top it off.


I invite you to participate in the Stampotique challenge this week.  Don't forget there are prizes to be won!  Take care, talk to you soon!  Hugs ~ Renee

Tuesday, June 2, 2015

Tilted Up Stenciled Face

I am still intrigued with making faces.  I go through spurts with my creativity and periodically get "stuck" on certain techniques or making a series of projects that are all similar.  Do you do that too?

I have been making other things but can't share them as yet but I can share the faces I've been drawing in between.  I used the Jane Davenport stencil called Tilted Up  to draw this one.  Her face is colored with PanPastels, Memento Markers and white Signo pen.  The black background is painted with Dyan Reaveley's new black paint.  I must admit Dyan's paints are light, cover well, dry quickly and have a nice feel to them after they dry.


Now I just need to journal on the left side with a white pen or I could do a Zentangle design with that same Signo white pen.  Decisions, decisions!  I hope you're having a great week and doing something creative.  Take care ~ Renee

Tuesday, November 4, 2014

Creating Art Card Backgrounds with Kaleidoscope Stencils

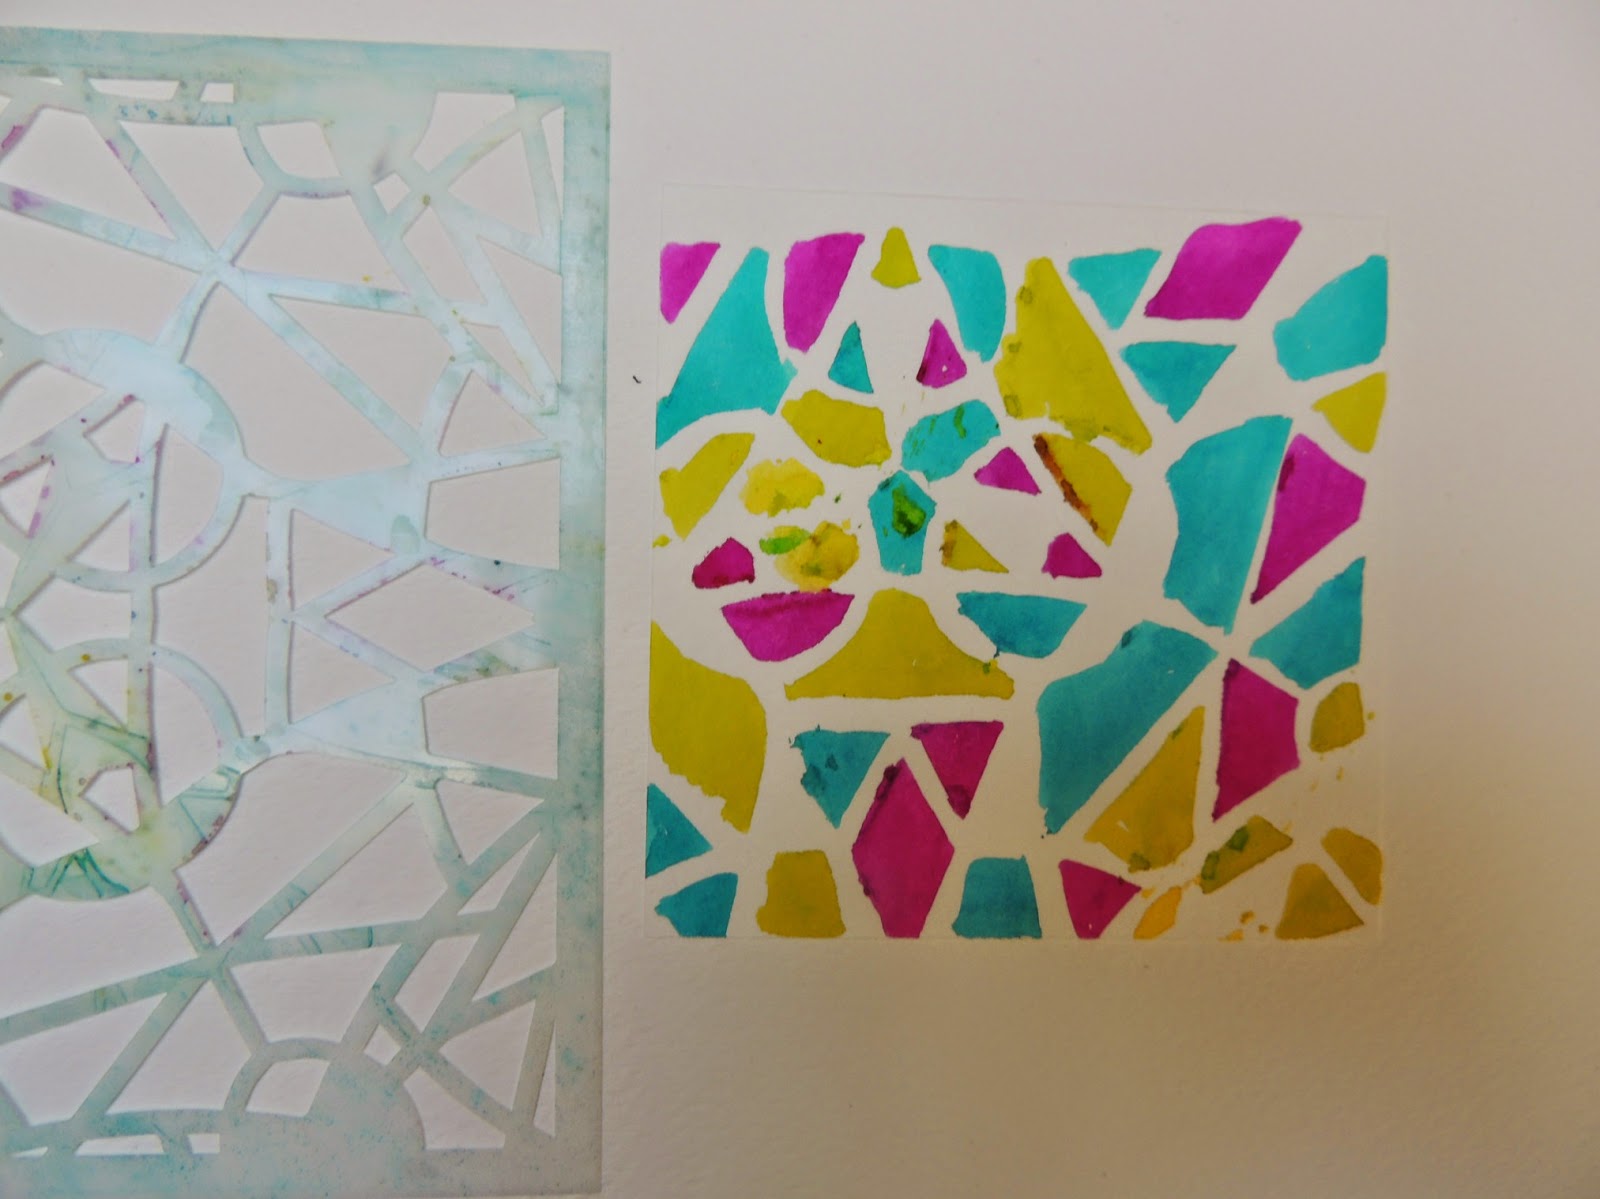
Hello there, happy Tuesday!  I am still pretty excited about finding uses for my new Kaleidoscope Stencils by Artistcellar.  Today I am using just one of the set to create backgrounds for my Art Cards.  I chose the stencil called Trillium to make these cute little Art Cards which can be used on cards, canvases or left just as it is as an Art Card.  This is what I made.


This project began as an Art Card.  Art Cards are small canvases, in this case a piece of 140# water color paper, cut to measure 4" by 4".  You can think of it as a slightly larger version of an ATC.  I began by using the Trillium stencil and some water color pens filled with Dylusions Spray Inks.


I placed the stencil on top of the pre-cut paper and painted the different colors of ink through the stencil randomly.  When I had a lot of color on the paper I lifted the stencil off and set it aside.  These are not permanent inks so the stencil can be washed off at any time.


Next I sprayed water onto the inked paper and let it run together.  When I was satisfied with the look I blotted off the excess water with a paper towel.


I sprayed it with water again and blotted the paper with a towel again to get a lighter look.


At this point you can stamp lines or any other pattern on top of the Art Card.  I decided to layer on a stamped image.  This stamp is an old one by Lockhart Stamp Co. with Mr. Kitty on it.


I stamped the image with StazOn Jet Black ink on a separate piece of card stock, trimmed it out and colored it in with Dylusions and Memento ink pens.  When this was dry, I matted it on card board paper, then glued the entire panel to the back ground colored Art Card.


I didn't want Mr. Kitty to be lonely so I made another one called Puppy Face to keep him company.


These can be kept in an Art Card book, glued to a small canvas, glued to the front of a card....pretty much anything you can think of to display them.  They're sweet and guaranteed to put a smile on your face!  Thanks so much for stopping by today.  I'll be back next Tuesday with more stenciling ideas.  Hugs~Renee

Thursday, October 17, 2013

Somerset Studio Magazine Nov/Dec Issue


I am so excited to share that my very first article is in the upcoming Nov/Dec issue of Somerset Studio magazine.  WooHoo!  In this article I shared my ONE WORD for 2013 that I tried to incorporate in my everyday life rather than making a slew of New Year's resolutions that even I know I will not keep.

This is a photo of the project I created to showcase my word, BALANCE.  It hangs on my studio door so it is the last thing I see at night and the first thing to greet me in the morning.


I emailed a big thank you to Rick St. Dennis (http://www.zibbet.com/Rick1949) this morning since his "Euro Clown" clip art is what really makes the piece stand out.  I adore his work and love the instant gratification of clip art emailed to me within minutes.

I hope you get the chance to take a peek at the magazine when it arrives at Barnes & Noble or your local scrap booking store.  Thanks so much for stopping by, I always appreciate the visit.  Take care ~ Renee

Saturday, March 16, 2013

Simon Says Challenge::Chic to be Shabby

Nothing says Shabby Chic to me like the soft colors of Tsukineko's Walnut Ink Sprays!  I actually started these postcards a couple of days ago and thought I'd finish them up to meet the challenge at
simonsaysstampandshow.blogspot.com
Willow Walnut Ink Spray
Combination of Walnut Ink Sprays
Cornflower color

The cards measure 4" by 6" and are cut from 140# watercolor paper.  I coat each card with a small amount of gesso and allow it to dry before spraying water on the surface.  The light spritz of water is quickly followed with a generous spray of Tuskineko's Walnut Ink Spray.  For one card I chose Willow, the second one was sprayed with a combination of Lilac, Cornfllower and Willow Walnut Ink Sprays and a third was sprayed with  Cornflower Walnut Ink spray.  After I spray the colored Walnut Ink I allow the ink to run all over the surface, spraying a little more water if necessary, blotting here and there with a paper towel and then thoroughly drying it with a heat gun.  As a final touch I spray a little bit of Tsukineko Sheer Shimmer Spritz in Frost or Sparkle.  I allow this to move around the card by lifting and turning it, then a quick dry with the heat gun.  Now I have a muted color that feels a little shabby but still chic at the same time.  After I achieve what I feel is an understated, elegant background color then I add my clip art, DeviantScrap.com has a wonderful selection, and some rubber stamping.  StazOn is a perfect permanent ink for this and comes in a variety of colors.  I turn to my "stash" to see what other embellishments/scraps I can use.  Each card has the edges distressed with coordinating StazOn inks.  I love the intense colors that StazOn provides.  I have found that StazOn ink is not just for stamping, it can be blended using Imagine Crafts Ink Blushers.  The colors are gorgeous!
Thanks so much for stopping by and visiting my blog.  It makes it even more fun if you have time to leave a comment, I love to read your input.  Talk to you soon, have a great weekend.  We have some sunshine here in New England for the moment.  I noticed yesterday that my spring bulbs are starting to pop their little heads out, all we need is a couple of warm, sunny days and everything here will be an explosion of color!
Here's a list of the products I used on these cards.


Products Used
Watercolor paper 140# cut to 6" by 4"
Tsukineko Lilac, Cornflower & Willow Walnut Ink Sprays
Imagine Crafts Sheer Shimmer Spritz/Frost & Sparkle
StazOn Royal Purple, Cactus Green, Black, Forest Green inks
Memento Peanut Brittle ink
StazOn Opaque Cotton White & Black Inkers
Hidden Vintage Studios clip art found at DeviantScrap.com
K & Co self adhesive butterflies
Memento Markers

Tools
Fiskar Paper Cutter
Scissors
Glue
Stamps:    Dina Wakley's Boys Star, River City, Stampers Anonymous, Dyan Reaveley leaves, Impression Obsession flower stamp
old credit cards
Water Spray bottle
Paper towels
Imagine Crafts Ink Blushers (sponges)

Saturday, February 9, 2013

The Blizzard of '13 has passed!

Wow!  What a storm.  We woke up to about 2 feet of snow this morning.  It started snowing yesterday at 10am and just now stopped.  A little over 24 hours of snow, we don't see that very often.  Thank goodness.  The dad across the street has already built an igloo for his kids, a kid's dream come true.  Here are a few pics of what it looks like here right now.

Imaginary North Pole.

 The table out on the deck looks like a giant white cake!
This is my beautiful garden.  Just a different type of beauty.


Time to bring out the heavy equipment and clear the driveway.  Definitely not a time to shovel snow!


Then the doorbell rang and look who was here!


We were blessed not to lose power this time.  My heart goes out to the hundreds of thousands here in New England that not only lost power but actually had to evacuate due to high tides.  Hopefully life will get back to normal soon.

On a lighter note I thought you might like to see a different side of the "Tomato Vine" colors.  If you use the Kaleidacolor ink pad you get a look that is more like the colors of a tomato, whereas if you use the colors that make up the pad separately you can get a completely different look.  I used a Brushstix tool to pick up the color and transfer it to the image.  Any little spots that weren't exactly what I wanted were enhanced with the matching Memento Markers.  I used the pads and the pens to distress the edges also.  Here is a quick card that shows you what I mean.
Here is a list of the products I used for this card.

Products
Inks:  Memento Morocco, Rich Cocoa, Peanut Brittle, Bamboo Leaves, Love Letter
Black StazOn ink
Memento Markers:  Bamboo Leaves, Dandelion yellow
Tsukineko Essential Glue Pad
Gold Glitter
Clear embossing powder
Fude Ball pen, black
Pop dots
Glossy card stock

Tools
Honeycomb stencil by The Crafters Workshop
Stamps by Stampotique, Zettiology, Rubber Stampede
ImagineCrafts Brushstix
Heat gun

I hope you'll try some of these inks, the colors are so intense, I love them.  Have a great day, I'm sure it'll be wonderful here, the sun is coming out.  We have a beautiful winter wonderland outside.  Take care, thanks for taking the time to stop by.  If you have time please leave a comment, I love to hear what you think!  Talk to you soon.

Friday, February 1, 2013

Balance::Still working on it!

My word for the year 2013 is "Balance".  I have a feeling this will be a constant thing to strive for this year.  To keep the thought foremost in my mind I made myself a sign that is hanging on my studio door so it is the first thing I see in the morning and usually the last thing I see at night.  I used clowns as the focal point of the sign since I usually think of the circus and clowns with all their juggling acts, etc when I think of balance.  (Or the girl standing up on the horse's back or the tight rope walker........it could go on and on.)  And so I continue my quest.  At least I've started watching my diet.  I became a gluten free vegetarian a couple of months ago and have cut out most of the refined sugary things in my diet.  People ask if I'm a Vegan but when I heard they don't wear leather I decided I'd rather be a good vegetarian than a naughty Vegan.  Enough about food already!

The sign starts with my big art crush right now:  watercolor paper 140 lb coated lightly with gesso and allowed to dry.  Imagine Crafts very generously sent me their newest addition to their Kaleidacolor family collection of five-ink color pads, Tomato Vine and the individual Memento colors that are in that pad.  These colors include Morocco, Love Letter, Bamboo Leaves, Espresso Truffle and  Peanut Brittle.  I took a brayer and inked it up with the Kaleidacolor pad then ran it across the dried prepared watercolor paper.  Time to spritz with my little water bottle sprayer.  I allowed the colors to run together and blotted them just a  little not too much or you risk removing all the color.  Now for the Fireworks!  That would be Tsukineko Fireworks! Dandelion yellow spray ink.  I allowed this to run and then blotted off the excess.

The clowns are digital images called "Euro Clowns" by Rick St. Dennis.  He has the most amazing clip art on his site.  I started coloring them in with Memento Markers and then fancy cut out the images.  For their faces I used copic markers, then added a little glitter with my Gelly Roll Starz pen through out.  The letters for my word were stamped on a plain, scrap piece of watercolor paper using StazOn Black ink.  I used a Julie Balzer Honeycomb stencil and a dauber to lay some Espresso Truffle lightly onto the surface.  To attach the word and the image firmly to the paper Matte Medium seems to be the best adhesive.

To finish the project I used an old credit card to draw lines in black, white and red acrylic paints.  A chevron stencil to put a translucent design over the project randomly, Pearlescent stencil paste by Dreamweavers is my favorite paste.  The final touch is the delightful hanger to hold it in place on my door.  Here are a few photos.
In the meantime, stay balanced in all parts of your life, you get more done that way!  Great sharing with you today.  I will post my first official Imagine Crafts/Artists in Residence assignment on Sunday, Feb 3rd.  I would like to invite you to stop by and take a look at my answer to the challenge of using their new Kaleidacolor Tomato Vine ink pad.  I will have three challenges each month from them for the entire year of 2013.  If you have comments or suggestions don't hesitate to leave them in the comment section, I love to read what you think!  See you later, have a great weekend.

Thursday, December 6, 2012

Masterboard using Memento Inks


I love creating Masterboards.  When I make a masterboard I can use whatever inks, stamps, etc. that I want just randomly on a large piece of paper.  After it is finished to my satisfaction I can then either photocopy it on heavy cardstock or I can just cut up the masterboard and use it as background paper for cards or other projects.

As I have mentioned before I have fallen in love with the colors of Memento inks.  For this masterboard I used Summer Sky, Pistachio, Espresso Truffle, London Fog, Pear Tart and Morocco.  I have a large piece of watercolor paper coated in gesso to begin.  After the gesso is completely dry, I apply the inks direct to paper and blend them with a foam blending tool.  Every once in a while if the color looks too heavy I just lightly mist it with water and continue to lift the paper, let the ink run a little and then blend it again.  After I have the colors just where I like them I stamped some of Dyan Reaveley's Basic Background stamps, using the same colors of ink.  I also like to make some lines on the paper using black,white and other colors of acrylic paints.  I use the same colors to stamp circles randomly on the paper.  This is the end result.


Sometimes I cut the watercolor masterboard paper to fit the front of a blank 5" by 7" card.  After cutting the paper I can stamp images on it or phrases.  In this case the girl image is by Dina Wakley, it's called Lonely Girl.  The phrase is by Dyan Reavely.  The ink used is Memento's Peanut Brittle.  I placed a tiny scrap of foil on her eyes.


On this second card I used the photocopy made on heavy cardstock of the masterboard.  The stamped images are all Dyan Reaveley's but the inks are Memento's pens.  The pens are really lovely colors so they blend well with what I've already done using their ink pads.


I really love the palette of colors offered by Memento.  Using them this way gives your homemade paper or Masterboard an effect very similar to watercolors.  It is nice to be able to create your very own one of a kind background paper.
Hope you're having a great day.   Talk to you soon~Renee