
Monday, November 25, 2013
SDC 126::A SPLAT! of paint on your creation
I know it is a little late in the week but I still have time to participate in the Stampotique Challenge for this week. It is called SDC 126: A SPLAT! of paint on your creation. My splatters are on a post card stamped with France Papillon's houses, called Village, and a salutation. The houses are colored in with different markers. You still have time to post something the challenge doesn't end until late tomorrow.

Have a great day! ~ Renee


Friday, November 22, 2013
AIRs Themed Project using Authentique paper Collection: Glistening
For this AIRs project I'll be using Authentique's new paper collection called "Glistening". The card turned out a little frilly for me but fun. The paper collection has everything you need to makes various cards. Lots of paper choices, tags, etc.
 |
| "Winter in New England" |
Supplies
From IMAGINE Crafts®/Tsukineko®
IMAGINE Crafts®/Tsukineko®Memento™Dye
Ink Dew Drop size ink pad | IMAGINE Crafts®GooseBumps™Texture Spray with a
dauber top
Other Supplies
Authentique Paper
Collection:Glistening|Sizzix Flower Die | Queen & Co. self adhesive pearls
| One brown brad | Sewing machine with black thread (optional) | one white 5”
by 7” blank white card | Aqua colored ribbon |Adhesive & Glue Dots
DIRECTIONS

Cut Authentique paper to measure 5" by 7", glue to the front of the blank card.
Cut contrasting paper from the Collection to measure 5" by 3"; glue to the lower portion of the card.
Cut contrasting paper from the Collection to measure 5" by 1"; glue across the middle of the card.
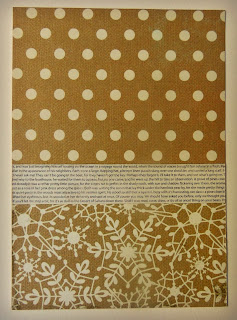
Apply GooseBumps randomly all over the front panel and allow to dry.

Tear the image of the girl out of the Collection of papers, if desired sew black thread around the edges of the image; set aside.
Using a flower die, cut flower out using coordinating paper from the same collection.
Attach a brad to the center of the flower.
Tie ribbon around the left side of the card. Glue flower down with glue dots.
Tuck the image of the girl under the flower and adhere with glue. Take tags from the collection and edge them with Memento Dye ink using a dew drop sized pad, I used the Gray Flannel color.
Tuck the tags under the flower and adhere with glue dots. Edge the entire card with Memento Gray Flannel ink pad.
Attach three self adhesive pearls to the upper left hand corner of the card.

Cut Authentique paper to measure 5" by 7", glue to the front of the blank card.
Cut contrasting paper from the Collection to measure 5" by 3"; glue to the lower portion of the card.
Cut contrasting paper from the Collection to measure 5" by 1"; glue across the middle of the card.

Apply GooseBumps randomly all over the front panel and allow to dry.

Tear the image of the girl out of the Collection of papers, if desired sew black thread around the edges of the image; set aside.
Using a flower die, cut flower out using coordinating paper from the same collection.
Attach a brad to the center of the flower.
Tie ribbon around the left side of the card. Glue flower down with glue dots.
Tuck the image of the girl under the flower and adhere with glue. Take tags from the collection and edge them with Memento Dye ink using a dew drop sized pad, I used the Gray Flannel color.
Tuck the tags under the flower and adhere with glue dots. Edge the entire card with Memento Gray Flannel ink pad.
Attach three self adhesive pearls to the upper left hand corner of the card.

Beautiful paper for winter type cards of all sorts! Thanks for stopping by, if you have time leave a comment, I love hearing from you. Take care, talk to you soon~Renee
Thursday, November 21, 2013
100 Faces and a little help from Zorana
I follow a blog called ZoranaLand which always has incredible art work on it. Recently Zorana did a couple of videos showing how quickly faces can be drawn. I followed along with her videos and did a couple of collages (to be glued into my art journal at a later date) which included FACES. Check it out if you would like some fresh ideas on how to draw faces and what to do with them after you've drawn them. These are the two that I came up with.

We've been having some lovely weather here in NE. Sunshine several days in a row....Glorious! I hope you're having a good week. Thanks for stopping by, take care.~Renee

 |
| This is drawn on some Gelli Plate artwork, great way to use those prints! |
Sunday, November 17, 2013
100 Faces::Round 2
I enjoyed the challenge of drawing 100 Faces so much I decided to do it for a second time. Once I got used to drawing a face (or more) every day I really missed it after I met my goal. Taking Dina Wakley's recent portrait class has inspired me to start drawing faces again at least once a day. Here goes the first one in this series. I'll be sharing some along the way!

I hope this finds you all well. I am recovering from a terrible cold that has knocked me for a loop! I've been making a lot of chicken soup and tea, it seems to be working. Take care of yourselves ~ Renee

Thursday, November 14, 2013
AIRs Project of Choice "A Warm Winter Card"
For this challenge I am doing an all occasion "winter" card. I've used a combination of really gorgeous papers from Authentique, DCWV and a wooden embellishment from Monterey Pine. I found the most adorable stamps with matching "tin pins" at my LSS the other day so I thought I'd throw a little of that in too.
All together it makes for a truly cutsie little card. If you are interested in making some winter cards using scraps and cute stamps just scroll down for the mini tutorial.

Here is a list of the products I used to make this:
All together it makes for a truly cutsie little card. If you are interested in making some winter cards using scraps and cute stamps just scroll down for the mini tutorial.

IMAGINE Crafts/Tsukineko Supplies
Staz-On Jet Black Ink, Memento LUXE Mixed Media Pigment Ink
in Love Letter red, Memento pens in Teal Zeal, Dandelion yellow, Tangelo orange
and Lady Bug red, GooseBumps
Rubber Stamps
Snowman and phrase by Darcie’s heart & home stamps
Other Supplies
Authentique papers “Glistening” and “Joyous” Collections,
DCWV textured paper, Monterey Pine Oval wooden embellishment, Copic pens, Baker’s
Twine, self-adhesive pearl, Flat back “tin
pin” embellishments for the face made by Darcie Heater Designs Warm &
Toasty, adhesive, photo corners, tissue tape, 5” BY 7” blank white card, heat
gun.
DIRECTIONS
Stamp snowman on white paper;
color in image, cut out with small scissors.
Glue “tin pin” on head with strong adhesive and set aside.


Color Monterey Pine oval wooden
embellishment with red ink, heat set.
Stamp phrase on oval with black ink, heat set. Coat the top with GooseBumps and set aside to
dry.
Cut red paper to fit the front of
the card. Cut a piece of DCWV white
textured card stock. Cut another piece
of black & white paper and a small piece of blue polka dot paper.

Glue red paper to card, adhere
white paper, black and white patterned paper and powder blue panel. Use a little bit of glue to glue down the
tissue tape scrap. Using strong adhesive
glue down the snowman. Wrap the baker’s
twine around the finger of the large hand, then glue down the hand allowing the
twine to dangle.


Glue the wooden oval on top of the
twine. Affix a pearl to the sleeve and
glue the photo corners to each bottom corner of the white paper.

I hope you like it! It is always a good thing to have several blank, all occasion cards on hand. I hope you're having a great week. Thanks for stopping by, your visits mean a lot to me. Take care~ Renee

Wednesday, November 13, 2013
SDC125: One Layer::Stampotique Challenge
Samantha Read is our hostess this week at Stampotique's Designer's Challenge. Can't wait to see what everyone creates this week!
"Hi Stampotiquers! I'm so excited to be your host this week and I'm inviting you to make a creation using just one layer. It doesn't necessarily have to be clean and simple, that's the challenge! I love lots and lots of layers but to achieve a sense of depth to a creation using no embellishments etc can really get you scratching your head and rubbing your chin!
Most importantly have fun ;)"
Sounds like fun doesn't it? I decided to make a card with TCW Dina Wakley stencils, gesso, spray inks, acrylic paints, Derivan Liquid Pencil, Black StazOn Ink, Stampotique stamps and a black micron pen. Whew! That sounds like a lot of product but I sure was happy with the results. My card looks like a mini painting.

We all know at least one Diva, don't we? Perfect card for that special someone. Have a great day, it is really cold here and I'm sure it is only going to get colder. Brrrrrrrrr! Good time to make cards. Take care, thanks so much for stopping by, it wouldn't be as much fun without YOU! ~ Renee

Saturday, November 9, 2013
Splatters and SDC 124::Using Gesso Challenges
Over at Craft Stamper Magazine there is a challenge still going on for things that have been "splattered". At the same time this week there is a challenge taking place at Stampotique for projects that have gesso on them. How nice to be able to combine the two! I decided to make a simple tag using some left over water color paper and of course, Stampotique's cute image by Jill Penney. There is a tad of gesso on the tag that was added with the help of a circle stencil.

All of the splatters and there are a lot of them, came either from Dylusions spray inks or Black India Ink. Tags are always useful for last minute gifts or can serve as a cute thank you note! I hope you're having a great weekend, take care. ~ Renee

Subscribe to:
Posts (Atom)