Showing posts with label Spring. Show all posts

Wednesday, May 22, 2013

AIRs Challenge::Themed Project

Today my AIRs (Artists in Residence) challenge for Imagine Crafts/Tsukineko is to take my spring colored products and make something original and interesting out of them using the theme of "Self Portrait".  I had to think of a project that represented me and my personality.  One thing I know about myself is that I LOVE to read.  I also LOVE to give gifts to others, though they might be small gifts, all through the year.  I don't believe in waiting necessarily for a particular day or occasion to show someone that I love them or that I just happened to be thinking of them.


 When I think of a project that would reflect my personality but would be a useful item to others I think of a book marker.  Summer is right around the corner, summer reading goes along with that.  What better thing to make than a book marker?Personally I love to read historical books, which makes me think of historical figures that were larger than life and that inspired me to think of Marie-Antoinette as being the person that I would like to put on my book markers.    In a way I have multiple themes going on here......items that reflect my personality, Spring Colors, Marie-Antoinette and book markers.  Here is what I came up with.

Did I hear someone scream "group photo"?  All of these images are by Alpha Stamps and are from their digital art collection called "Young Marie".  I will show you a tutorial for the pink one but the same techniques apply to all of the book markers just using different colors.
To start I cut a piece of 140# Strathmore water color paper into strips that measure 2" by 9".  You can cut the strips shorter if you like or change the width, it depends on the measurements of the book you are creating it for.  After cutting the strips I used a large stamp by Magenta, you can use whatever stamps you have on hand,.  I covered the stamp with IMAGINE Crafts/Tsukineko Memento Luxe Wedding Dress ink which is a lovely shade of white, then covered the stamping with embossing powder.  I heated the embossing powder and then allowed it to cool.
I love the IMAGINE Crafts/Tsukineko VersaMagic Chalk Pigment Ink in the Pink Petunia color so I started applying that all over the marker, right over the embossed areas.
One of my all time favorite products to use for blending inks and removing inks are baby wipes and this project is no exception.  I coated it with the Pink Petunia ink first and then sprayed the ink covered book marker with IMAGINE Crafts Fireworks! Craft Spray in the Angel Pink color.  I let it run down the marker and then wiped the entire marker down with the baby wipe.


I could continue to add more color if I wanted to at this point and just keep removing portions with the baby wipe until it is just the color I had in mind.  Next I edged the book marker with IMAGINE Crafts/Tsukineko Memento Dye Ink in  Espresso Truffle to distress it a little.

Now it it ready to decorate.  I emptied my stash of trim on the table to see what would work with this project.  I know I can change the color of trims with ink pads and Fireworks! sprays so they match the inks I've chosen.

I had some white seam binding that could be dyed and crumpled for that old world look so I used IMAGINE Crafts Fireworks! Craft Spray in Angel Pink color with a tiny bit of Dandelion Fireworks!  too.  You can keep adjusting the color by spraying some water on the ribbon, wrapping it in a paper towel and drying it with the heat gun.  Just crumple it up while you do that if you want it to look aged.

I decided to use a large tattered lacy flower and give it the same treatment with a touch of IMAGINE Crafts/Tsukineko VersaMagic Chalk Pigment ink in the Aloe Vera green to mimic a leaf and the Angel Pink Fireworks! spray for the pink petals.

I attached the flower and ribbon with a strong adhesive and a light green brad in the center of the flower.  Now I just add Marie to the mix.

I trimmed out the image and adhered it to the back of the marker.  You could also cover the entire back with plain paper at this point in the event that you want it to look finished and also have an area to write book notes on.  I made several of these book markers since they are easy and pretty.  Every one has a different stamp design, is a different color and has a different image of Marie-Antoinette attached to the top.


IMAGINE Crafts/Tsukineko VersaMagic Chalk Pigment Ink in Pink Petunia
IMAGINE Crafts/Tsukineko VersaMagic Chalk Pigment Ink in Mango Madness and Imagine Crafts Fireworks! Craft Spray in Angel Pink edged with IMAGINE Crafts/Tsukineko Memento Dye Ink in Peanut Brittle color

IMAGINE Crafts/Tsukineko VersaMagic Chalk Pigment Ink in Spring Pansy and IMAGINE Crafts Fireworks! Craft Spray in Lulu Lavender edged with IMAGINE Crafts/Tsukineko StazOn Solvent Ink in Royal Purple color


IMAGINE Crafts/Tsukineko VersaMagic Chalk Pigment Ink in Mango Madness and IMAGINE Crafts Fireworks! Craft Spray in Bahama Blue edged with IMAGINE Crafts/Tsukineko StazOn Solvent Ink in Azure and Teal Blue colors


These are great gifts to give with a summer read.  I personally use a Kindle when I read at night but for some reason on a plane or a beach I prefer a real book so a book marker is always a handy way to mark the pages.  Imagine one of these with a Romance novel......hmmmm, love that idea.

Here's a list of all the products and tools that I used on this project.

Products

Strips of 140# Strathmore Water color paper
Miscellanious flowers, ribbons and trims
IMAGINE Crafts Embossing Powder
IMAGINE Crafts Fireworks! Craft Spray Inks in Dandelion, Angel Pink, Lulu Lavender, Summer Sky and Bahama Blue colors
IMAGINE Crafts InkBlushers
IMAGINE Crafts/Tsukineko Memento Dye Ink in Peanut Brittle and Espresso Truffle Colors
IMAGINE Crafts/Tsukineko StazOn Solvent Inks in Royal Purple, Teal Blue and Azure
IMAGINE Crafts/Tsukineko VersaMagic Chalk Pigment Ink in Dewdrop size pads:  Pink Petunia, Spring Pansy, Mango Madness
IMAGINE Crafts/Tsukineko Memento Luxe Mixed Media Pigment Ink in Wedding Dress White
adhesive
self adhesive rhinestone
Digital clip art from Alpha Stamps
baby wipes


Tools

Heat Gun
Paper trimmer
Water spray bottle
scissors
Stamps

Thanks for taking the time to stop by for a visit today, I really appreciate it.  I also appreciate any comments that you might have the time to leave.  Have a great day, I will talk to you soon!


Friday, May 3, 2013

AIRs::Artist Challenge

Every month Imagine Crafts gives all of their AIRs (Artists in Residence) an opportunity to use each product that they have sent us, at least once, on the same project.  This challenge can be quite daunting since they are very generous with that monthly box of goodness that they ship us!  We are using the same products and theme that we used for April, which is "SPRING".  Personally I can't hear that word often enough after the rough winter we've been through here in the Northeast. 


For the challenge I decided to make a Masterboard because of its extreme versatility.  I started with a large piece of 140# Strathmore water color paper.  Since I have an assortment of gorgeous IMAGINE Crafts/Tsukineko VersaMagic Chalk Pigment Inks the colors of the Masterboard are very Spring-like.  If you know me at all you know  I don't really "do" pretty so I had to add a little bit of grunge to the project.  Here is the completed Masterboard.


I started off by working all of the IMAGINE Crafts/Tsukineko VersaMagic Chalk Pigment Inks in the dewdrop ink pads through different stencils.  I also used the IMAGINE Crafts Fireworks! Craft Sprays with the stencils.  If the colors were too intense I sprayed them with a little water and blotted it with a paper towel.  I used the IMAGINE Crafts Ink Blushers to apply the ink from the IMAGINE Crafts/Tsukineko Memento Dye full size ink pad in Morocco through a numbers stencil I purchased at the office supply store.  Additional texture was achieved using my all time favorite product....GESSO!

Julie Fei-Fan Balzer sells this fab stencil that has honey combs, stars and circles all on the same stencil!  Love it.  After applying the gesso make sure you wash the stencil off immediately.  I used a heat gun to dry the gesso.  Here's another product I can't live without....IMAGINE Crafts Creative Medium in Clear.  I used it here to apply a small amount of text from an old book onto the Masterboard.

I painted it on through the honeycomb stencil and then covered it in old book pages, waited about 15 seconds and lifted it up gently.


It leaves just a touch of print, which is the look I was going for.  If you want more print just paint on more of the Creative Medium to your surface before laying down the old book pages.  Here is the look I was wanted.  If I want more on the finished project I can always add it later.


Now that my Masterboard is finished I can use it to make other projects.  If you make a Masterboard you always have the option of making a photocopy on heavy card stock so you don't use your original, you can use the copies like a background paper.  Or if you're like me, just cut it up and use it, you can always make another one at a different time.  Sometimes I'll even make two at the same time, oddly enough they never turn out exactly the same.

I decided use this to make some cards Dina Wakley style, sticking with my grunge-style idea.  I used Dina's new stencils with IMAGINE Crafts/Tsukineko StazOn Solvent Ink full size ink pad in Jet Black to add the image, some tissue tape, sewed it in spots on my sewing machine to add interest, added ribbon and some rubber stamping.  The water color panels were then adhered to blank white cards that measure 5" by 7".  All of the cards were distressed around the edges with IMAGINE Crafts/Tsukineko Memento Dye Ink full-size ink pad in Espresso Truffle.   Now I have three wonderful "spring" cards for friends and family that are interesting but not too "cute".


Here is a list of the products and tools that I used to make this project:

Products
IMAGINE Crafts Creative Medium Clear
IMAGINE Crafts Fireworks! Craft Spray in Summer Sky, Angel Pink, Lulu Lavender, Dandelion
IMAGINE Crafts/Tsukineko Memento Dye Ink Espresso Truffle
IMAGINE Crafts/Tsukineko Memento Luxe Mixed Media Pigment Ink in Morocco, Sweet Plum and Pear Tart
IMAGINE Crafts/'Tsukineko StazOn Solvent Inks full size ink pad in Jet Black
IMAGINE Crafts/Tsukineko Takc 'N Peel Reusable Cling Sheet
IMAGINE Crafts/Tsukineko Versa Magic Chalk Pigment Ink Dew Drop ink pads in Pink Petunia, Mango Madness, Spring Pansy, Aloe Vera and Thatched Straw
IMAGINE Crafts/Tsukineko All-Purpose Stamp Cleaner
IMAGINE Crafts InkBlushers
Black Thread
Black Ribbon
gesso
Three 5" by 7" blank white cards

Tools
Water color paper
paint brush
credit card
old book pages
Miscellaneous stencils (I used Dina Wakleys, Julie Fei-Fan Balzers, office supply store stencils)
spray water bottle
sewing machine
Paper cutting tool
Stampotique Rubber Stamps


Thanks so much for stopping by to visit my blog today, I really appreciate it!  I hope you'll make your own Masterboards with these products or some that you have on hand.  After you make one you'll be hooked on them like I am.  Have a great weekend, I will talk to you soon.


Monday, April 22, 2013

Ten Minute Cards with a "Spring" theme

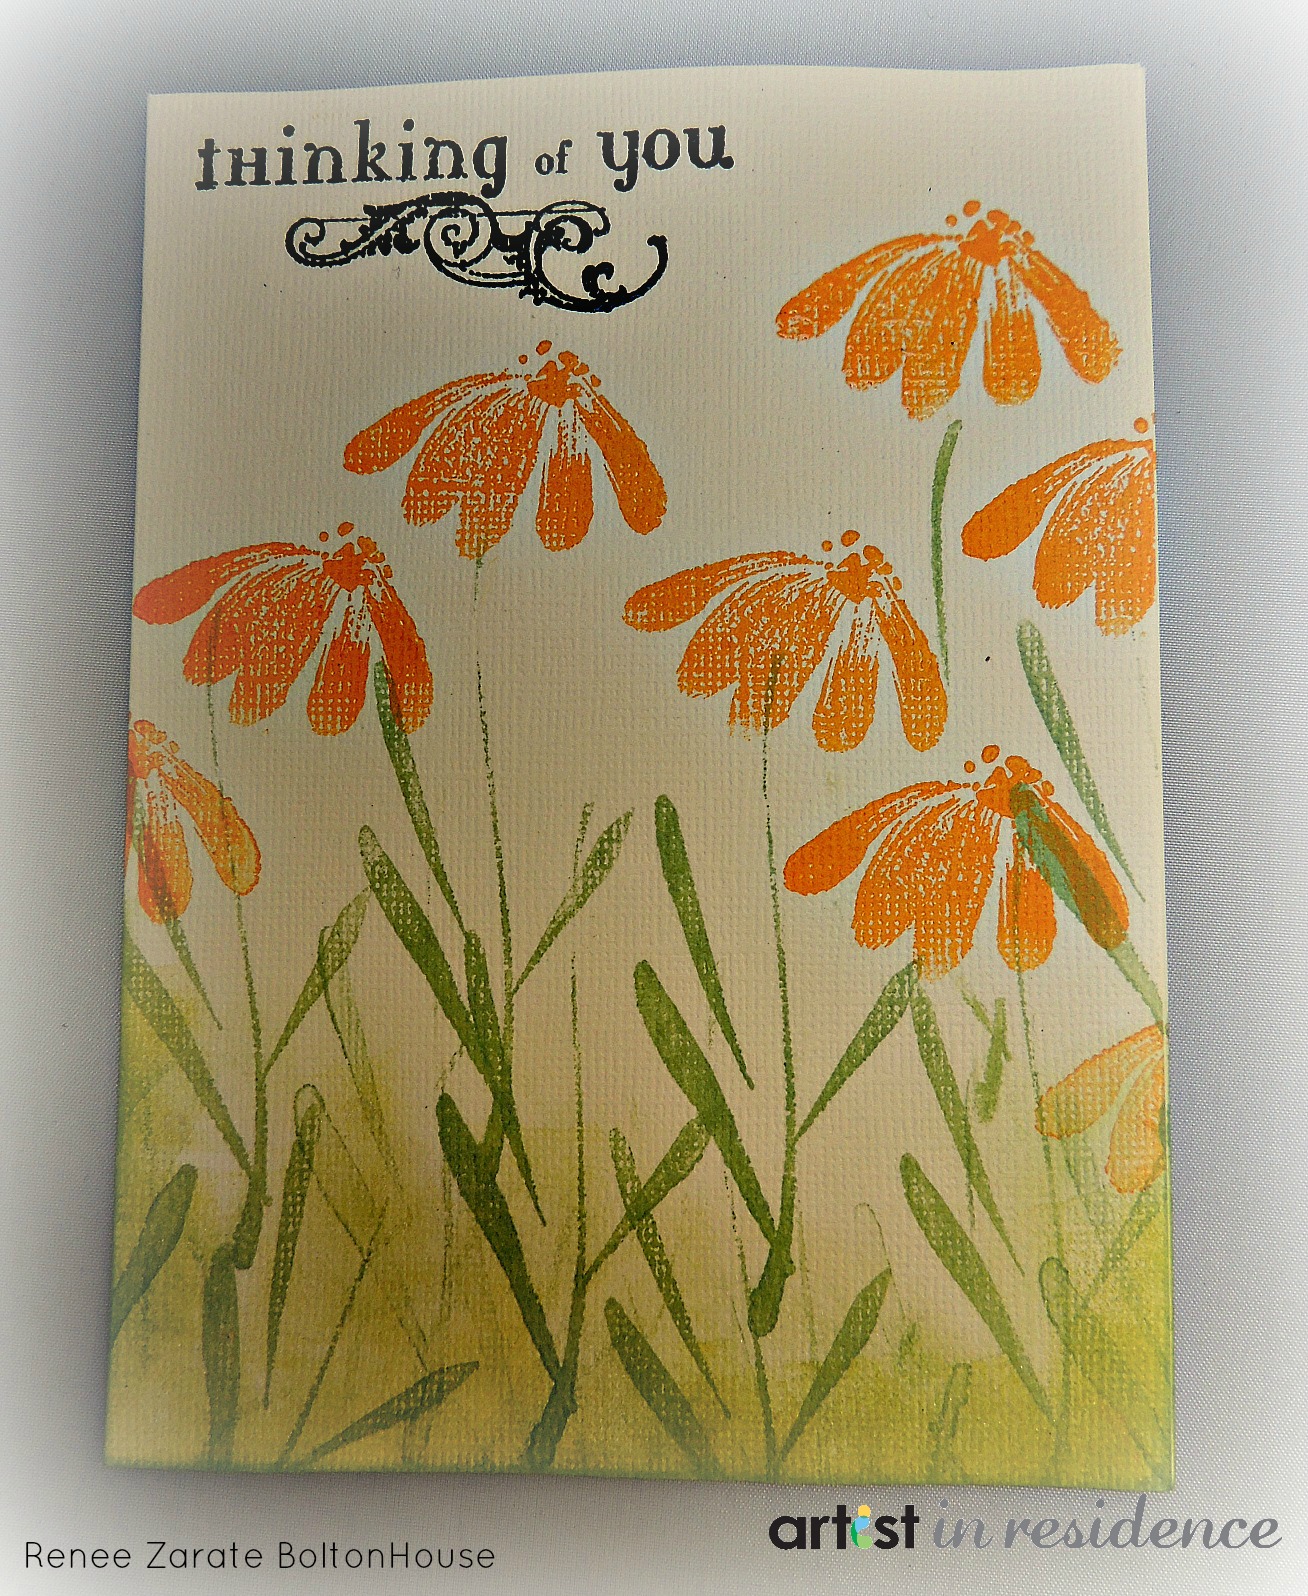
All of us are so pressed for time it seems.  I like to try to create some kind of art everyday and the ten minute card seems to be my answer to that challenge.  John at Tsukineko/Imagine Crafts sent me a box of Tsukineko's Versa Magic chalk inks and all kinds of wonderful sprays to use on my AIRs (Artists in Residence) projects for the month of April.  These chalk inks have a lovely, soft matte look when they dry.  You can heat emboss them with a clear powder if you want a shiny look to them.  I chose to keep the matte look except for one flower on each card.  The phrases at the top are inked with black StazOn ink and heat embossed with the clear powder. 
You could do several cards at one time, one right after the other, just keep inking up your stamp after each stamping.
First I stamped the Penny Black stamp with VersaMagic Aloe Vera green ink, using just the stems of the flowers and masking off the rest.  After heat drying the green ink I stamped the flower portion of the stamp.  I used Spring Pansy ink for this one.


I added a self adhesive dragonfly from K & Co for a little added interest and sponged the bottom portion of the card with some additional Aloe Vera ink.  Next I used Versa Magic chalk ink in the Aquatic Splash, which is a beautiful shade of blue.


On this one I stamped the phrase "Just a Note" and decided I liked it so much I would do one more with this phrase.  Here it is stamped  in Pink Petunia.


I did one more in a delicious Mango Madness color, which is either a bright yellow or a light orange color.  Very rich.


It is always great to have some all occasion type cards on hand and these really fit the bill.  They would also make a lovely hostess gift, packaged together and tied up with a nice piece of ribbon.

Products Used
Cream Colored Card stock/Blank Cards
Tsukineko Versa Magic Chalk Inks in Aquatic Splash, Pink Petunia, Mango Madness  & Spring Pansy colors
StazOn Black Ink
Clear Embossing Powder
Self Adhesive Dragonfly by K & Co

Tools
Heat Gun
Stamps by Penny Black, Hampton Art & Rubber Stampede

Thanks so much for stopping by to visit my blog, I really appreciate it!  If you have time please leave a comment.  Take care and have a great day!


Sunday, April 14, 2013

AIRs Project of Choice::Mail Art

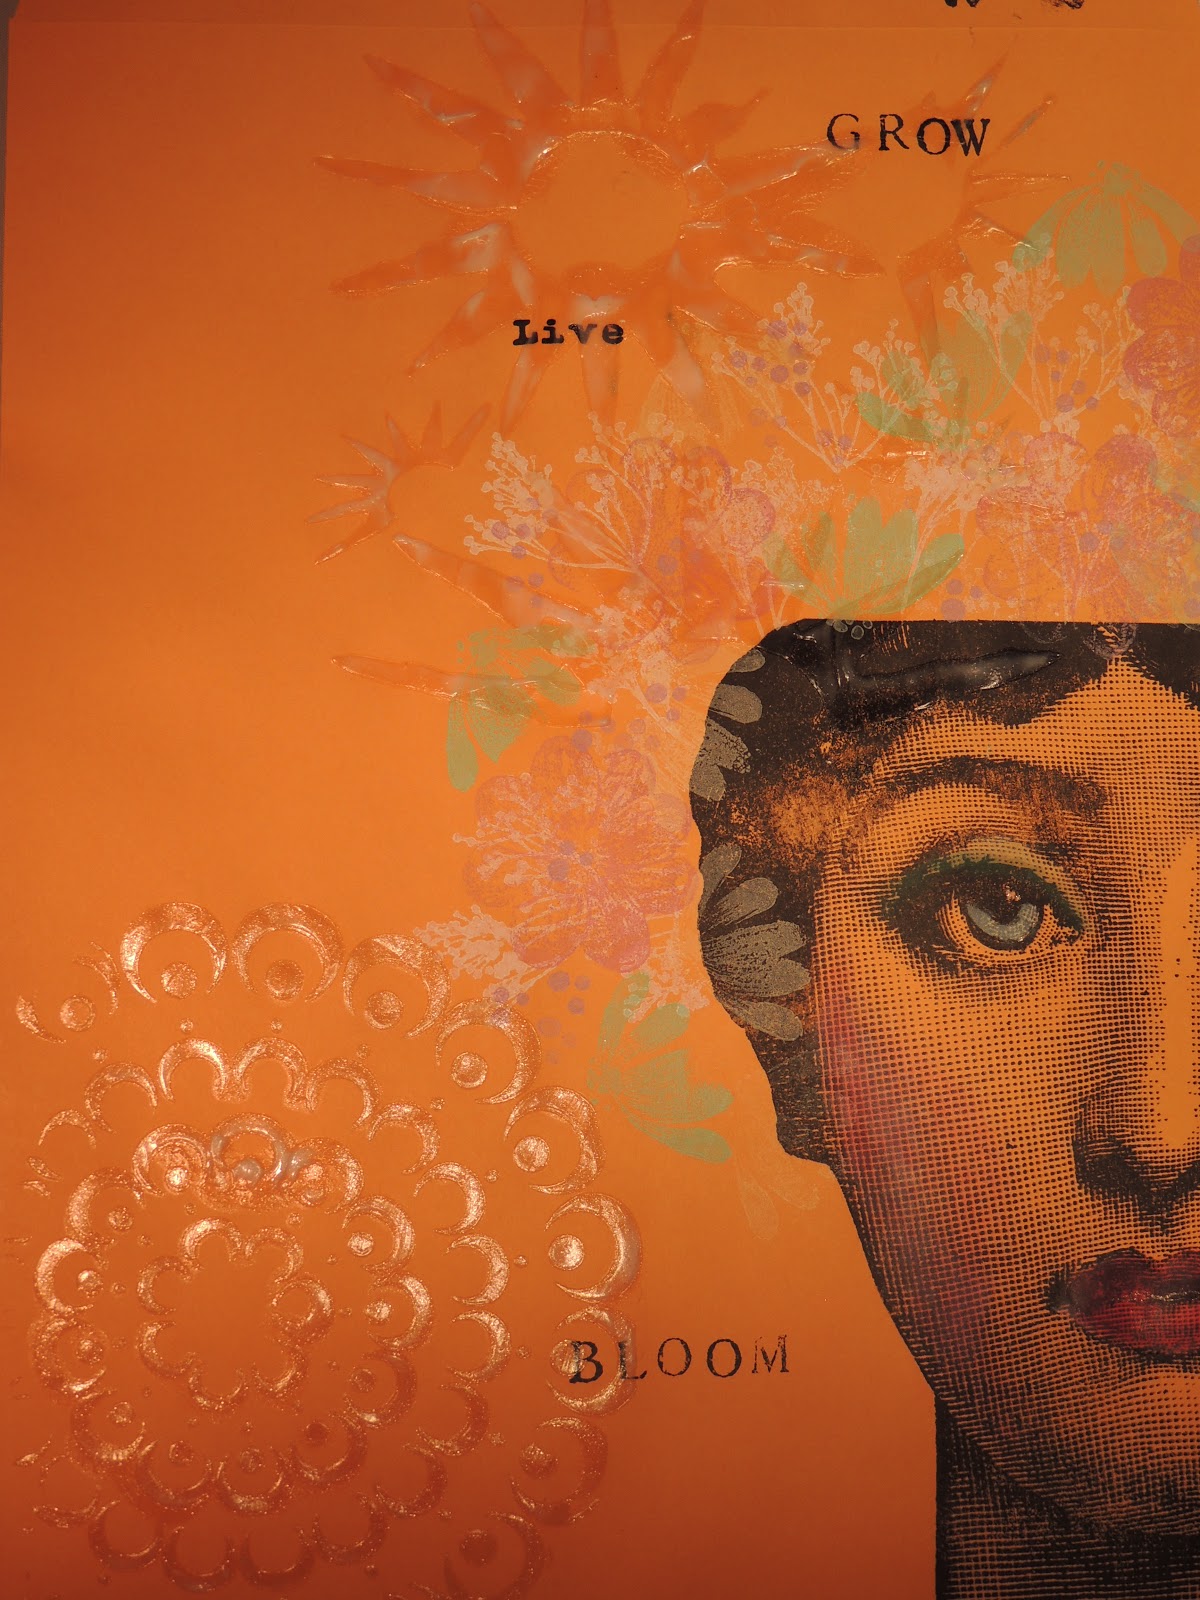
As an Artist in Residence with Imagine Crafts/Tsukineko my favorite monthly challenge is the "Project of Choice".  This is when I get the opportunity to use my favorite products that I've received for this month any way that I want to.  I love to make Mail Art, even if pieces like this one don't actually go through the mail.  Since it has so much dimension and ephemera added to it I'm sure it would get caught in the machinery.  But that's OK, sometimes you do have to hand deliver  items that can be placed in a large envelope like this one.  This envelope is a plain craft colored one that measures 9" by 12" and can be purchased at any office supply store.  When I get done stamping it, applying gesso, ink, Creative Medium, etc. this is what it looks like.


These are the products I started with for this project.

The first thing I do when designing  a piece of mail art is to use a stamp that fits with the size of the envelope.  Since I don't want my image to be floating around or look too small, I used my large Victorian lady stamp that I've had for years.  She is inked up with Black StazOn ink and I use a brayer on the reverse side to make sure that I get a good imprint.


Using flower stamps by Penny Black and others I stamped flowers randomly around her head.  I also colored in her eyes with the Versa Magic Aquatic Splash chalk ink and her lips and cheeks with Versa Magic Pink Petunia.  The Brushstix made by Imagine Crafts make it simple to apply just the right amount of ink to tiny areas like this.  Next I stamped some text randomly around the envelope.
I decided the title of this piece is "The Gardener" since it is Spring and I can't stop thinking about planting flowers. 

I applied Imagine Crafts Creative Medium in the Shimmer and Clear using stencils by Julie Fei-Fan Balzer and Dina Wakley.  You can really see the texture and lacy detail of the stencil up close.

I had some leftovers from a Master Board that I had made with these spring colors so I cut the paper into ATC size, 3 1/2" by 2 1/2" and stamped some images on the cards with Black StazOn ink.  I later inked the edges of the cards with Versa Magic Spring Pansy Chalk ink.  I applied pop dots to the backs of these cards and set them aside for later.


Before I add my ATCs to the envelope I wanted to apply some gesso through a stencil by Julie Fei-Fan Balzer.  It leaves kind of honeycomb effect.  The gesso needs to thoroughly dry before adding any ephemera to the project.


When the gesso is dry I added some flowers that had been cut with my old Sizzix dies.  The paper used for the flowers is also leftover from a Masterboard made for another project using all the inks and sprays that coordinate with each other, this way all of the colors I'm using still compliment each other but not in a "matchy" way.  I found a stamped bee in my stash, the stamp is by Stampotique.  It was easy to color it with same chalk inks using a Brushstix.  Then I adhered the ATCs with some foam pop dots
.
The final touch was to ink or distress the edges with the Versa Magic Spring Pansy Chalk ink using an Imagine Crafts Ink Blusher sponge.  I applied a few dabs of Goosebumps to her lips to make them shine.  Finally  I raided my stash for some Queen & Co self adhesive white pearls to put in the center of a few flowers and she looks complete.

This is a great way to share your art with others by hand delivering it.  It is also a good way to use or trade some of your ATCs that need to go to a new home.  I invite you to give Mail Art a try, like art journaling there is no right or wrong.  Here is a list of the products I used to make this.


Products

Black StazOn ink
Tsukineko Versa Magic Chalk Inks:  Spring Pansy, Aquatic Splash, Pink Petunia, Thatched Straw, Aloe Vera and Mango Madness
Tsukineko StazOn Opaque Cotton White ink
Gesso
Creative Medium Clear and Shimmer Artist's Medium by Imagine Crafts
Imagine Crafts Goosebumps with a top dauber
Master Board paper scraps from project shown on April 3, 2013
One 9" by 12" craft colored envelope
Glue Pop Dots

Tools

Brayer
Imagine Crafts Ink Blushers
Imagine Crafts Brushstix
Sizzix Flower Dies
Heat Gun
Stencils
Flower Stamps
Face Stamp
StazOn All Purpose Cleaner


Friday, March 22, 2013

Creating An Art Journal Page::Spring Fling Project

When I first felt the desire to create art journal pages I was really stumped as far as just how to do it.  My first attempts had so much color on them they seemed too dark to me.  After taking some classes and watching a lot of YouTube videos I feel like I've made a lot of progress.  At least I am happier with my results.  Today I'm going to show you my process, everyone has a different process, but this is how I do what I do.  My products for this page have been very generously supplied by Tsukineko/Imagine Crafts.  This is my third project for them this month as an "AIRs" (Artists in Residence) team member.  It is my themed project for the month of March called "Spring Fling".  This is a VERY long post so please grab a cup of coffee or tea and put your feet up.

I started with a 9" by 12" piece of watercolor paper 140# and coated it with a light frosting of gesso, allowing it to dry before proceeding.  I recently purchased some Yellow Ochre Pan Pastels and couldn't wait to use them so I applied some on the paper with a dauber applicator from Imagine Crafts.  After rubbing this into the paper I sprayed it with water and some Dandelion Fireworks! spray and Tangelo Fireworks! spray.  These sprays have a concentrated color with a little shimmer to them.  I sprayed some additional water on these colors and let them move around on the paper by lifting the paper and turning it.  After blotting the excess ink and water off I used a heat gun to dry the paper.
Next I put a small amount of Liquitex Titanium White Acrylic on the page and spread it all over with an old credit card.  Using a baby wipe I lifted off some of the white paint until I was happy with the color.  Memento makes some lovely colors of ink and for this project I used Peanut Brittle and Morocco on a stamp called "Geometric Swirl" by Rubber Stampede.  I just randomly stamped the image and the colors on my page.
I used TCW's lacy stencil and a chevron stencil to spray Tsukineko Walnut ink and Willow Walnut ink onto the paper.  After spraying these and blotting the page I dried it thoroughly with a heat gun.  I added Cottage Ivy Fireworks! spray onto the page and used a paper towel roll to towel it off.  Since I wanted more of the green I used Memento's Cottage Ivy ink pad and applied a touch more with my dauber applicator.  I blended it in with a baby wipe until the color was just what I wanted.  In a few areas I added white gelatos and orange gelatos for more color.  These can also be blended with water or a baby wipe.

Using Dyan Reaveley's small diamond stencil and some gesso I added a little more interest.  Not completely satisfied I used a circle stencil from the local office supply store to apply some more gesso in the upper left corner.  After the gesso was dry I laid the same stencil back over the white dots, moved it off center just a little and sprayed the Cottage Ivy Fireworks!, blotted with a paper towel roll, dried with a heat gun.  When this was dry and the stencil had been cleaned, I laid the stencil on the green dots and sprayed the area again but with the Willow Walnut Ink spray.  I carefully removed the stencil and blotted it with the paper towel roll, then dried it even more with my heat gun.  Bringing out the Memento inks again I applied more Peanut Brittle and Morocco inks to the edges and blended them with a dauber applicator.

For more texture and depth I made small lines on the page with an old credit card.  Using StazOn Cotton White and Ivory Black Opaque Inkers I dipped my credit card edge in each and made small marks on the paper.  With an old lid dipped in Golden Gold Interference paint I added circles for a metallic pop.  At this point my page is pretty much layered and ready for the focal point.  My focal point is a piece of clip art from DeviantScrap.com made by itKuPiLLi imagenarium.  She was giving this away as a freebie on the site last month and her work is incredible!  There is a quote included that says "Love of beauty is tasted.  The creation of beauty is art." by Ralph Waldo Emerson.  I tore this out, edged it with some of the Walnut Ink spray on an applicator and set it aside.  After cutting out the lady I used Matte Medium to adhere the image
to the page.


I had some white self adhesive pearls by Queen & Co in my stash so I applied those to her hat band and a stray one to her necklace.  I felt like she needed a little more detail on the hat so I stamped a flower on white card stock with clear embossing ink three times, applied Detail White embossing powder and melted it with my heat gun.  When this had cooled completely I sprayed the Lilac Walnut Ink spray on the flower images and wiped the excess off with a paper towel.  I applied a tiny bit of Goosebumps in the center of each flower and set it aside to dry before trimming it out.  Then I glued the flower down with a piece of black grosgrain ribbon underneath.

The sheen on her hat is some leftover Gold Interference paint that I had on my craft mat.  I decided that Spring time always makes me think of traveling to far off places so I stamped some faux postage in Black StazOn ink randomly around her image and a few stamped cancellation marks for good measure.  To get more depth and definition around the image I applied some Black Gelato and blended it down with my finger and a damp paper towel.  When I want to journal but have absolutely nothing to say, at this point you're thinking "after this long winded blog posting how could she think she has nothing to say?", that's when I use a quote from someone else.  Happily for me this quote was provided in the clip art.  I wrote the words of this quote that I glued to her shoulder all around the image with a Faber-Castell Pitt artist pen in White 101.  A little distressing around the edge of the piece with VersaFine Olympia Green and an Ink Blushers applicator and Voila!  My art journal page is completed.

I apologize for the length of this post but you can't fake the layers on an art journal page.  Just remember to dry everything between each layer and enjoy yourself.  You could easily turn this into a calendar page by using the small transparent calendars and applying that to her shoulder instead of the quote.  The beauty of journaling pages is that it is all about YOU and what YOU like on your page.  There is no right or wrong.  You might have noticed how similar this page is to one that I did last week.  It just shows you how the central image can be the same but the colors and theme are completely different.   So if you have an image that you love to use repeatedly, feel free, just mix it up a little.  Thank you so much for stopping by my blog today, I really appreciate your visits.  If you have time to leave a comment please do, I love to hear from you!  Here is a list of all the products I used on this project.

Products
Watercolor paper 140#
gesso
Matte Medium
Yellow Ochre Pan Pastel
Imagine Crafts Dandelion Fireworks! spray
Imagine Crafts Tangelo Fireworks! spray
Imagine Crafts Cottage Ivy Fireworks! spray
Liquitex Acrylic Titanium White
Memento inks in Peanut Brittle, Cottage Ivy & Morocco
VersaFine Olympia Green ink
Black StazOn ink
Imagine Crafts Willow Walnut Ink Spray
Imagine Crafts Walnut Spray
White, Orange & Black Gelatos by Faber-Castell
StazOn Opaque Ivory Black & Cotton White Inkers
Golden brand Gold Interference paint
Faber-Castell PITT white 101 pen
Queen & Co self adhesive pearls
black grosgrain ribbon
Embossing ink and White Detail Embossing Powder

Tools
Paper cutter
scrissors
old credit card
DeviantScrap.com clip art
Stencils of your choice
Stamps of your choice
heat gun
dauber applicators
Imagine Crafts Ink Blushers sponges
Spray bottle of water
paper towels
baby wipes