Showing posts with label ATCs. Show all posts

Monday, October 8, 2018

Hurricane Florence, local floods and a new stencil from StencilGirl Products

We had quite a scare with the recent hurricane (Florence) that skirted past our area and then the subsequent local flooding.  We boarded up our house and literally fled as quickly as we could to Atlanta, GA for nearly a week to get out of harm's way.  As soon as we returned we heard about the flooding heading our way from North Carolina so we sandbagged our house with scores of sandbags and yards of heavy plastic.  Our neighbors reported snakes in their yards that were being displaced from a local river that was rising.  That was eerie!  I have been leery about walking into the backyard ever since, I take a good look around wherever I step.  Now we're gearing up just a little for what we hope will only be a Tropical Storm (Michael) when it gets to South Carolina.  Better a tropical storm than any "category" hurricane.  

So I needed something nice to brighten my mood and Mary Beth Shaw provided that!

A couple of weeks ago I entered my name in a contest to win a StencilGirl Products ATC stencil and look at what I won!  This is Seth Apter's new ATC stencil and it has been a real pleasure to use this over the past few days.  There are many different artists who have created stencils using this format which is great when you're making a lot of ATCs.  With this stencil I'm not fighting the excess areas that I don't want to use, it makes the process very simple.  Just click on the link below to take a look at the new collection.


ATC Mixup Apter Stencil designed by Seth Apter


Here's a group of the ATCs I've made using this tool with ink and Tim Holtz's paper dolls.  I added some of Prima's micro beads for a touch of bling.


Your limits are only your imagination!  Thank you Mary Beth and Stencil Girl Products for my new fun stencil, it's made me really happy.


Take care and thanks for stopping by!
Hugs ~ Renee

Friday, January 26, 2018

Are you an Alice in Wonderland fan? Mini Album for ATCs

I'm such a fan of AIW.  I created this small art journal to house all the Alice ATCs in one spot.  It can be placed on a shelf or opened up to see the characters at the same time.


Front Cover


Back Cover


This is what is hidden inside the accordion style art journal. 


 The stamps are from Stampington and IndigoBlu, colored with Imagine Craft Memento Markers after being stamped with Jet Black StazOn ink.


Leave a comment and let me know if you're an Alice fan.  If you are who's your favorite character?

Thanks for stopping by~hugs~Renee

I'm sharing this mini album on the website below.  Check it out there are all sorts of ideas for small albums.  You might want to enter the Mini Album Makers Challenge yourself.  Here's the link.


Tuesday, May 3, 2016

Just Swap Art! ~ a brand new craft magazine

I just received the first issue of the newest craft magazine called Just Swap Art!  This magazine focuses on ATCs, Tags, Inchies and Twinchies, all the types of art that are often traded amongst friends.  What a fun magazine!  It is loaded with pages of these tiny creations, each one a true piece of art.  Here's what the cover looks like (one of my art friends work is published on the cover, congrats to Marjie Kemper).


I was fortunate to have seven pages of my work published, over 20 individual pieces.  Here's one of my faves:


This is another example of some of my ATCs.  There is some digi art included by artist Julie Lee.  She makes some adorable characters available to print from her online store.


If you are interested in submitting to the next issue here is the email address to get information on the submission deadlines:  KHerrold@scottpublications.com.  Kelly Herrold is the editor and will answer any questions you might have.  The beauty of submitting to any of the "Just" series of magazines is that you do not have to mail in your original artwork, a photograph just needs to be emailed to them.  Easy peasy!

Thanks so much for stopping by and allowing me to share my excitement with you all.  I hope you're having a great week, take care ~ hugs ~ Renee

Sunday, April 14, 2013

AIRs Project of Choice::Mail Art

As an Artist in Residence with Imagine Crafts/Tsukineko my favorite monthly challenge is the "Project of Choice".  This is when I get the opportunity to use my favorite products that I've received for this month any way that I want to.  I love to make Mail Art, even if pieces like this one don't actually go through the mail.  Since it has so much dimension and ephemera added to it I'm sure it would get caught in the machinery.  But that's OK, sometimes you do have to hand deliver  items that can be placed in a large envelope like this one.  This envelope is a plain craft colored one that measures 9" by 12" and can be purchased at any office supply store.  When I get done stamping it, applying gesso, ink, Creative Medium, etc. this is what it looks like.


These are the products I started with for this project.

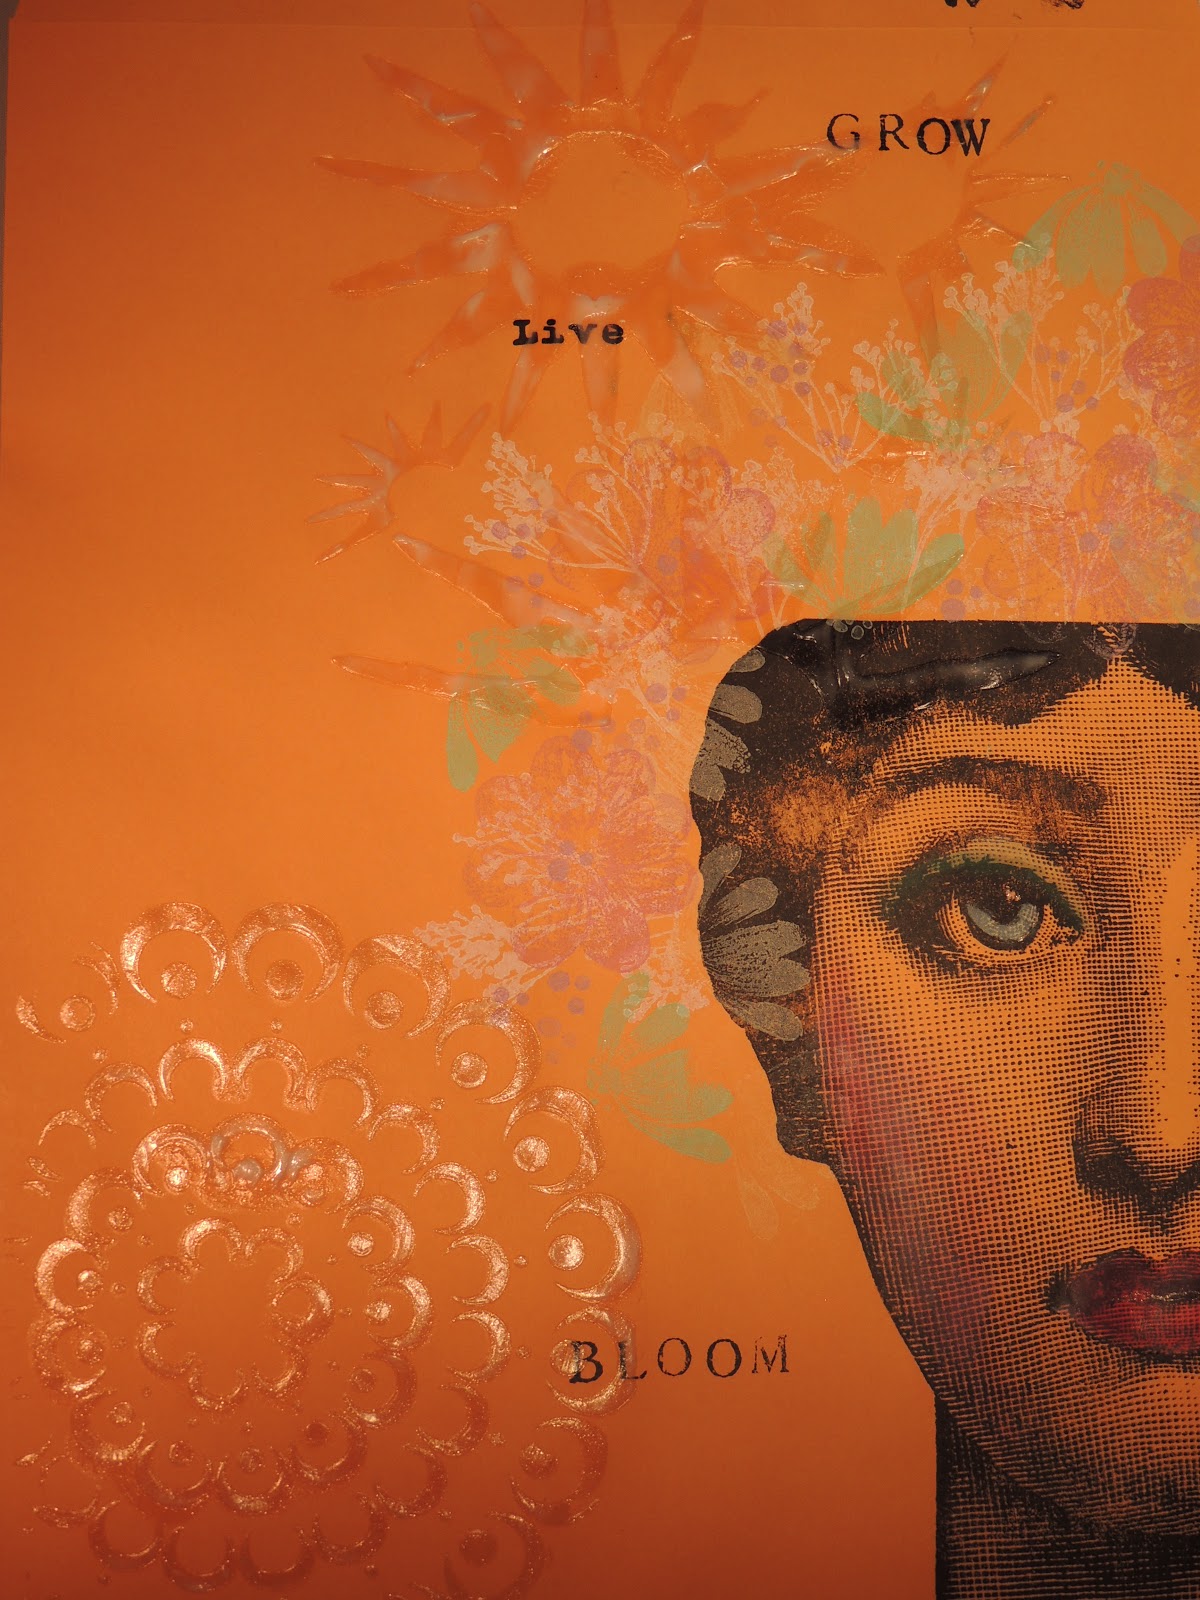
The first thing I do when designing  a piece of mail art is to use a stamp that fits with the size of the envelope.  Since I don't want my image to be floating around or look too small, I used my large Victorian lady stamp that I've had for years.  She is inked up with Black StazOn ink and I use a brayer on the reverse side to make sure that I get a good imprint.


Using flower stamps by Penny Black and others I stamped flowers randomly around her head.  I also colored in her eyes with the Versa Magic Aquatic Splash chalk ink and her lips and cheeks with Versa Magic Pink Petunia.  The Brushstix made by Imagine Crafts make it simple to apply just the right amount of ink to tiny areas like this.  Next I stamped some text randomly around the envelope.
I decided the title of this piece is "The Gardener" since it is Spring and I can't stop thinking about planting flowers. 

I applied Imagine Crafts Creative Medium in the Shimmer and Clear using stencils by Julie Fei-Fan Balzer and Dina Wakley.  You can really see the texture and lacy detail of the stencil up close.

I had some leftovers from a Master Board that I had made with these spring colors so I cut the paper into ATC size, 3 1/2" by 2 1/2" and stamped some images on the cards with Black StazOn ink.  I later inked the edges of the cards with Versa Magic Spring Pansy Chalk ink.  I applied pop dots to the backs of these cards and set them aside for later.


Before I add my ATCs to the envelope I wanted to apply some gesso through a stencil by Julie Fei-Fan Balzer.  It leaves kind of honeycomb effect.  The gesso needs to thoroughly dry before adding any ephemera to the project.


When the gesso is dry I added some flowers that had been cut with my old Sizzix dies.  The paper used for the flowers is also leftover from a Masterboard made for another project using all the inks and sprays that coordinate with each other, this way all of the colors I'm using still compliment each other but not in a "matchy" way.  I found a stamped bee in my stash, the stamp is by Stampotique.  It was easy to color it with same chalk inks using a Brushstix.  Then I adhered the ATCs with some foam pop dots
.
The final touch was to ink or distress the edges with the Versa Magic Spring Pansy Chalk ink using an Imagine Crafts Ink Blusher sponge.  I applied a few dabs of Goosebumps to her lips to make them shine.  Finally  I raided my stash for some Queen & Co self adhesive white pearls to put in the center of a few flowers and she looks complete.

This is a great way to share your art with others by hand delivering it.  It is also a good way to use or trade some of your ATCs that need to go to a new home.  I invite you to give Mail Art a try, like art journaling there is no right or wrong.  Here is a list of the products I used to make this.


Products

Black StazOn ink
Tsukineko Versa Magic Chalk Inks:  Spring Pansy, Aquatic Splash, Pink Petunia, Thatched Straw, Aloe Vera and Mango Madness
Tsukineko StazOn Opaque Cotton White ink
Gesso
Creative Medium Clear and Shimmer Artist's Medium by Imagine Crafts
Imagine Crafts Goosebumps with a top dauber
Master Board paper scraps from project shown on April 3, 2013
One 9" by 12" craft colored envelope
Glue Pop Dots

Tools

Brayer
Imagine Crafts Ink Blushers
Imagine Crafts Brushstix
Sizzix Flower Dies
Heat Gun
Stencils
Flower Stamps
Face Stamp
StazOn All Purpose Cleaner


Wednesday, April 3, 2013

AIRs Artist Challenge/ATCs


This is one of those LONG postings that require a beverage of your choice suited to your time zone and a snack.  I decided to make a Master Board using all the wonderful products recently sent to me by John at Imagine Crafts/Tsukineko for the April AIRs projects.  As "Artists in Residence" we have three project assignments every month, one of them being a challenge to use all of the products in the box.  Fun, fun, fun!  When you make a Master Board or the equivalent of your own custom designed background paper, that task is really simplified since anything goes.  Take a look at my product choices!

Here's my finished project.


I started with a 12" by 12" piece of Strathmore Acrylic paper with a linen finish (246 lb paper).  I pulled out several stencils from my collection and started building my layers of color and texture on the blank piece of paper.  I decided that a lot of stenciling would come into play with the chalk inks, Fireworks! sprays and my Imagine Crafts Ink Blusher sponges which I use for stenciling.  After I get done with all the colors on the paper I will make sure it is dry and before cutting it up to make multiple ATCs and a little book for them to fit into.  My theme for the book is "Don't Forget to Give Yourself a Hug" and it is based on a cast of characters from Stampotique who look like they could use a hug.  The first color I apply is Angel Pink Fireworks! spray, followed quickly with Lulu Lavender and Summer Sky Fireworks! sprays.


For that lovely dark blue color, almost purple, I use Imagine Crafts Paris Dusk Fireworks! spray which is sprayed through a lacy stencil.  Dry with the heat gun.  I arranged several other stencils on the paper and sprayed water lightly through them, then I carefully lifted off the stencils.  I blotted off the water by rolling a paper towel roll over the paper, this is a ghosting technique that lifts off some of the inks and leaves light colored impressions from the stencils.  I took the lid off of the Paris Dusk Fireworks! spray ink bottle and used the pump attachment to fling some splatters of the ink across the page. 

Now to make my own stamp with recycled  materials.  In the box was a product called "Tack 'n Peel Cling Sheet".  Since I am first and foremost a rubber stamper I have a lot of flat stamps that usually need to be mounted on some type of rubber foam backing.  I do like to make my own stamps out of "found" items, like bubble wrap, whenever I can.  This can get messy and I generally throw the bubble wrap away after the first use since it moves around and gets all over the place.  I decided to make my own "bubble wrap" stamp with my Tack 'n Peel cling sheet.  (You could also use rubber bands, toothpicks, etc., whatever you want to attach to the sticky mat for your own unique look.)

I attached some bubble wrap to my TsukinekoTack 'n Peel cling sheet that had been mounted on an acrylic block, inked it up with all of my spring colored Versa Magic Chalk Inks and got some really nice textured stamping on my page.  It's like getting a FREE stamp.  After using it I just pulled it off the Tack 'n Peel and tossed the bubble wrap.  I can reuse the Tack 'n Peel over and over, I just rinse off any residual ink or bits of paper that might get on it.  I run it under the tap and rinse off anything I don't want to stick to it, no soap required, just water.  It is really great to use with those unmounted stamps that I never got around to attaching the foam sticky stuff to.  It can be cut to any size you desire and you don't have scissors covered with gunk when you're done.

I also used the Imagine Crafts Creative Medium with stencils to top off all the inky goodness on my page.  Now I have a lot of texture and color.  When I applied Imagine Crafts Goosebumps I got some additional sheen here and there.  There is a tremendous amount of color, shine and texture, bumpy & smooth stuff, going on here!


 I make sure this page is really dry before I start cutting it up, in addition to drying everything between each layer I usually dry it a little more at the end with my heat gun.  I'm going to use this for the base of  ATCs (Artist Trading Cards) and a card or two.  For the ATCs I need to cut my pieces to measure 2 1/2" by 3 1/2", the standard measurement.  Each of them with be matted on a piece of black card stock that will measure 2 3/4" by 3 3/4".  All of my characters and phrases will be Stampotique images with the exception of the stamped image on the cover of the little book.


After making all of the ATCs that I wanted for the project I made an accordion style book to hold them in.  I cut this from the same type of paper that I used for the other parts of the project, Strathmore Acrylic paper with a linen finish (246 lb paper).   This strip measures 4 inches high by 24" long.  I just folded the paper every three inches, sharpening the fold with a bone folder and then added to the book by gluing extensions onto it until I had enough for all of my cards, which ended up being eight ATCs.

The front and back covers measure 3 1/2 inches by 4 1/2" each and the front cover has an additional ATC adhered to it.


I continued to stencil on the accordion book strip with inks and sprays until it looked like this, just in case there were any bare spots on the front side and in addition to that, now the back is ready for me to add any more ATCs in the future that might be a part of this grouping.

Using a strong adhesive I attached all of the ATCs first, then the covers and finally cut a yard and half of grape and white bakers twine to keep it closed by wrapping it around and then tying it in a loose bow.  Here is a close up of the first four.


 This is a close up photo of the second four ATCs.  I still have this much room on the back to add more at a later date.


The finished line up of my cast of odd characters.

When I'm done looking at them or if I ever give them away I'll  just fold up the little book and tie it up with twine to keep it closed.


Next time you go crazy making ATCs that you can't bear to trade or give away think about making a small but durable         3 1/2" by 4 1/2" accordion book and keeping them for yourself.....for a while at least!  Here is a list of all the products and tools I used on this project.

Products
Tsukineko's Versa Magic Chalk Inks:  Spring Pansy, Thatched Straw, Mango Madness, Aquatic Splash, Aloe Vera & Pink Petunia
Imagine Crafts Ink Blusher Sponge Applicators
Imagine Crafts Goosebumps
Imagine Crafts Creative Medium Vintage, Clear and Shimmer
Tsukineko Black StazOn Ink
Tsukineko StazOn Cleaner
Imagine Crafts Fireworks! Spray Inks:  Angel Pink, Summer Sky, Lulu Lavender, Paris Dusk
Tsukineko Tack 'n Peel Cling Sheet
Bakers Twine
Clear Embossing Powder
Black Card Stock
Adhesive
Paper Cutter
Tsukineko StazOn Opaque Ivory Black & Cotton White Inkers
Tsukineko Memento Markers


Tools
Rubber Stamps by Stampotique, Dina Wakley & Magenta
Clear stamps
Old Credit Card
Bubble Wrap
acrylic block
Stencils by Julie Fei-Fan Balzer & Michaels
Imagine Craft Ink Blushers/sponge applicators
Heat Gun
Bone Folder
Ruler

My thanks to Imagine Crafts/Tsukineko for sending me products that I can challenge myself with and then share with all of you.  My thanks to everyone who stopped by to visit my blog and to take a look at my little book!  I hope you'll make your own Master Boards and have fun cutting up your very own uniquely decorated paper to make fun projects.  Have a great day, I'll talk to you soon!
Saturday, October 6, 2012

ATCs with Foil

What a better way to spend a Saturday night than sitting around making ATCs?  Ever since I took that class with Tim Holtz showing us how to use the Inkssentials Foil Tape Sheets I can't stop "foiling" things.  I made another chunky ATC similar to the one I'm teaching the class on next Saturday at Ink About It.  Then with the leftover pieces I made some regular flat ATCs.  I dry embossed the foil with a texture fade and then peeled off the paper backing and applied it to a paper piece that measured the standard 3 1/2" by 2 1/2".  I did the same type of application for inking the metal by using alcohol inks.  Then I just glued leftovers onto the ATCs with some Red Line tape and Mat Medium.
And a little Alice in Wonderland featuring TD & TD at the bottom under some mica.

A little foil can go a long way since it can be pieced.  It is easy and fun to work with!

Saturday, September 22, 2012

Art Abandonment in Boston

If you haven't heard of Art Abandonment take a look a Michael de Meng's site.  I printed off the gift tags from the site yesterday and bagged up some ATCs to take into Boston.  We were picking up some weekend guests at Logan Airport and meeting up with some of their friends in the North End for dinner.  The first ATC was abandoned in a Starbucks at the airport.  It was picked up and opened within minutes.  I watched as a smile flashed across the face of a big burly man when he opened the tiny envelope and looked at the butterfly.
Another was left in the ladies room of a wonderful restaurant called Florentine.  It, too, was found within minutes and hung in the workstation area for all the waitstaff to see.

The only one that I did not see picked up was this one.

I'll wait and see if the finder posts a message on the Art Abandonment FB page.   I hope she went to a good home.  We're going apple picking sometime this weekend.  Pie will be involved at some point.  Wish we had smell-o-vision for that one.  I love the smell of apple pie baking in the oven, don't you?