Tuesday, October 28, 2014

Artistcellar New Release! Kaleidoscope Stencils


Most of us feel a sense of delight when we hear the word Kaleidoscope.  If you're like me it takes you back to childhood with those tacky little paper/plastic kaleidoscopes that you could purchase at the 5 & Dime store.  The newest release from Artistcellar is called Kaleidoscope and is a series designed by mixed media artist Cecilia Swatton.  There are four stencils in the series:  Trillium, Sunflower, Black Orchid and Lily.


                product image       product image    product image     product image


 I am constantly challenged when it comes to keeping track of all my stencils so I make small books with either the stencils in the book (stashed in clever pockets) or at least samples of what they look like.  I chose to do a "sample" book project so I can have a quick visual of these tiny gems for future projects.

Samples from Kaleidoscope Stencils

Here is my process if you'd like to see it.  First I start by cutting up my Art Cards from a large piece of water color paper.  Each one measures 4" by 4".


After I have these cut I decided just to spray Dylusions Spray inks using a different stencil and colors for each card.


These could be highly decorated, just like an ATC, but I decided to keep them simple.  I only inked the edges with coordinating colors and glued them into my prepared, simply folded book.


I had intended to leave the book simply white to mimic a wall in an art gallery but then I couldn't resist adding a few stamped images from Dina Wakley's newest collection.

To finish off my practical sample book I added the names of the stencils just written with a Fude Ball pen on or around the stenciled images.  My folded book has room for many more Art Cards with stencil samples on them.  I'll keep sharing it with you as I go along filling it up.  When it is full then I will do the front and back covers.


Thanks so much for stopping by today.  There are some pretty amazing projects on the Artistcellar blog this week showing additional ways to use these stencils.  Oh!  And there is a blog hop taking place in which you can win your own set of these fun stencils.  I've posted the blog hop list for you here in the event you want to give it a try.  Here is the message from Lisa at Artistcellar:
Now the good part… join us this coming week for a blog hop with some awesome artists! Everyone will be featuring Kaleidoscope and every stop will be giving away a FREE set of stencils to a lucky winner. Read each blog for the details, for this one, just leave a comment – you can tell me what they remind you of, how you would use them, what is your favorite technique you would use with them. I will close comments Nov. 1st here. Each stop will be announced on our FB page the next 7 days.
October 25th – Lisa Cousineau, Artistcellar www.artistcellar.com/wp  <Kickoff!
October 26th – Effy Wild – http://effywild.com/
October 27th – Lisa Chin – http://somethingcleveraboutnothing.blogspot.com/
October 28th – Cheryl Sleboda – http://www.blog.muppin.com
October 29th – Paula Phillips – http://www.journalartista.com/
October 30th – Cindy Powell – http://cynthiapowell.blogspot.com/
October 31st – Cecilia Swatton – http://ceciliaswatton.blogspot.com

Until next week, take care.  Big hugs ~ Renee

Tuesday, October 21, 2014

A Group of Stenciled Tea Cup Cards

It's Tuesday!  That means it is Artistcellar stencil play day.  I have been creating a lot of those stenciled tea cups on master board paper.  Some became tiny canvases and the rest are being turned into a series of cards like this one.


The technique on this is just like the ones I did the last couple of Tuesdays, just a reminder....

Begin by creating a master board or several different master boards with stamped images, etc.  These can be used for the back grounds.  If you want to do a series of cards with just one master board all of the cards will "match" in a way having a unified look.  Your master board, your choice.


Next stamp your image onto to the cut panel of master board, in my case it measures 4" by 4".


Now bring in the stencils to decorate the background and the tea cup.  Use as many stencils as you like to create lots of texture on each panel and card.


I used Dylusions inks, Memento pens and a black Micron pen to make designs and color them in.


None of the cards or cups are the same which to me makes them all the more interesting and fun!


This was so much fun, now I have the tea cups out of my system and the cards into my Etsy shop!  Thanks for stopping by today, I hope you'll come back next Tuesday and check out some more techniques to use with your stencils.  Hugs ~ Renee xx

Friday, October 17, 2014

Craft Stamper Challenge Continues

You still have time to put in your entry for the Craft Stamper October Challenge.  Here is your link.  I keep making projects based on my master board created with multiple colored inks stamped on water color paper.  Here is another cute canvas using the master board paper as a frame, the entire unit is glued to a burlap 6" by 6" canvas.


I hope you'll enter a project on the CS site so we can all enjoy your work!  Take time to be creative.  Hugs~Renee  xx

Tuesday, October 14, 2014

Stenciled Teacups

It's Tuesday, time for stenciling!  I am still creating little stenciled teacups using different Artistcellar stencils, combining them for backgrounds and decorations on stamped teacups.  This is similar to the one I created last week, the same color palette but different designs.  If you have time, sit down with a cuppa and take a look at my process.


This process started just like the one last week with a piece of my master board.  My master board has stamped images on it in different shades of blue and pink inks.  To begin I cut a piece measuring 4" by 4" and then stamped a teacup image on the paper.


When the ink is dry I started using stencils to make the designs and lines that I would color in or doodle designs in later. 


 First I completed the background with different stencils using Dylusions spray inks in a water brush type pen.  I used a Coral stencil with Fresh Lime ink.  Then I used the X's stencil with a deep yellow Memento marker called Dandelion.  When I was finished with the background I drew a horizon line with a Micron black pen.  I used the same pen to doodle in a design on the bottom portion of the cup.  I colored in the teacup with Dylusions Bubblegum Pink ink and Vibrant Turquoise.  The Memento Marker in Dandelion was used on the handle and other parts of the cup and saucer.  I made the teabag out of a tag and a piece of twine.  The phrase was part of a longer DR phrase just cut out, inked the edges of it and after gluing it on I anointed it with a coating of Clear irRESISTIbles Pico Embellisher.  The only thing left to do was ink the edges with StazOn Chai permanant ink.  Chai seemed like the perfect color to use!  Then I adhered my little water color panel to a  blank 4" by 4" canvas.


  Now I have two.


Thanks for stopping by today, I hoped you enjoyed seeing how I use my stencils.  I like getting the maximum value out of my supplies and using them in unusual ways does it for me.  I'll have another stenciling idea to share with you next Tuesday, hope to see you then!  Hugs~Renee

Friday, October 10, 2014

Craft Stamper October Challenge~Half Way Point

It is the midway point of the CS Take It Make It Challenge, have you entered your creation yet?  I will be using the same Master board technique as before but with different colors.  I have included a tutorial technique sharing how I made this postcard.


I made a Master board with Vibrant Turquoise, Lemon Zest and Fresh Lime Dylusions Spray inks sprayed onto a foam ink pad.  The large stamp is an old one from Stampers Anonymous.  When the Master board is dry it can be cut into card backgrounds or post cards.


I cut a piece measuring 4" by 6" since this is the size of a postcard.  Next I stamped a Dina Wakley's  image using Jet Black StazOn ink and heat embossed it with Clear Embossing Powder.  I also stamped some mail type stamps to the mix.


Now to dress up my silhouette.  I added a head from my Marie-Antoinette collection, a little tinsel twine to her waist, some rhinestones to her dress and a phrase from Dylusions.

I hope you will enter in the fun at the Craft Stamper Challenge, you still have plenty of time and lots of inspiration from the Design Team.  Don't forget there are prizes to be won!

What Can You Win?
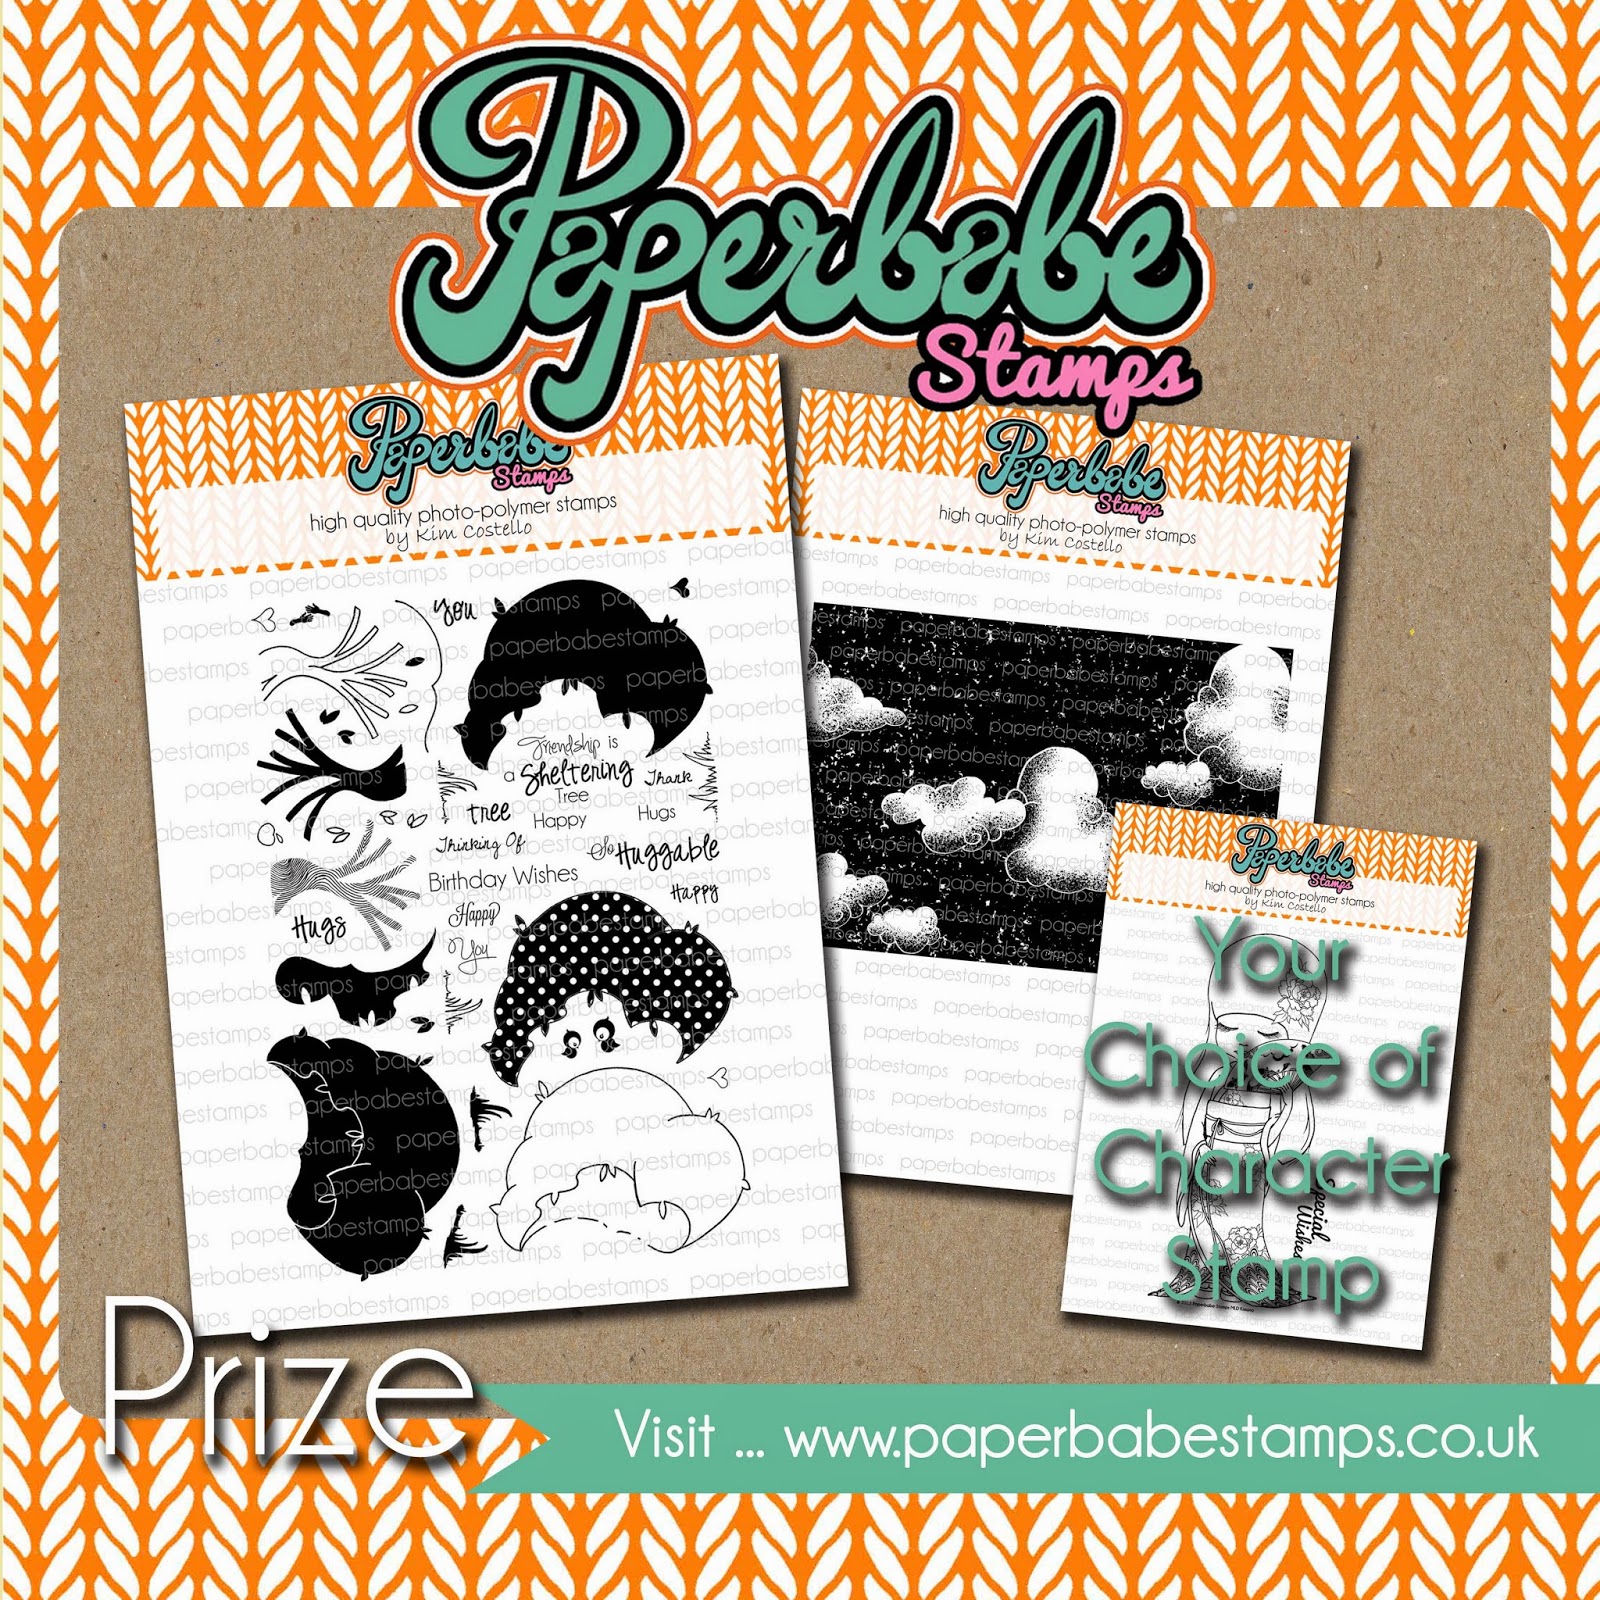
For the October challenge, we are delighted to be sponsored by Paperbabe Stamps!

https://www.etsy.com/uk/shop/PaperbabeStamps

Owned by Craft Stamper DT member Kim Costello, Paperbabe stamps are a wonderfully eclectic mix of designs, from gorgeous backgrounds and quirky figures to doll face stamps, indispensable when it comes to creating our own whimsical faces!The prize for the October challenge?
This....
https://www.etsy.com/uk/shop/PaperbabeStamps
You will receive the tree hug set, the cumulus background set and a character stamp of your choice! How fab! 

PLUS:The Design Team will have a look at all your gorgeous work, and choose their Top Three..... and the overall Winner will get published in Craft Stamper magazine! Yes, the winning entry will appear in the UK's number one stamping magazine!
AND: The Challenge winner will be offered a Guest Designer spot for an upcoming challenge!

Thanks for stopping by.  Take care ~ hugs, Renee

Tuesday, October 7, 2014

Small Stencils Make a Big Impact

Hi there, it's Tuesday so it must be Artistcellar stencil day!  Today I'm going to show you how many stencils I used on a small 4" by 4" canvas to make a huge impact.  The stamped teacup looks like the star of the show but without the stencils it would be pretty boring.  This started out as an Art Card experiment and ended up as a small canvas.  I have been hearing and reading about these new tiles called Art Cards, they measure 4" by 4" and remind me of ATCs.  Tiny surfaces packed with all sorts of colors and ephemera.  I'll walk you through my process.  CAUTION:  heavy use of photography!


I began by using a piece of an existing master board, that way I didn't have to face a blank canvas.  This gives the piece a background and a few colors to work with.  I just cut off a 4" by 4" piece of the master board made last week on 140# water color paper.


I used a stamp that had a lot of open space, this one is called "Teacup" by B Line Designs.  When stamping on water color paper I use Jet Black StazOn ink and really get a lot of ink on the stamp before stamping.


I collect old tea cups and none of them match.  I thought I'd do the same thing here and make a series of these using different colors and stencils so none of the cups match.  This is the first one.  I brought in one of the Sacred Hearts stencils; this one is called "Immaculate".  Using a Micron 01 Black pen I stenciled the rose on the top half of the cup and the beams of light on the lower half.  The stencil can be moved repeatedly to get the desired design.


I added color to the design with Dylusions inks that had been poured into a water brush pen. Now rather than spray the inks I can paint them on very specifically.


First I painted the Bubblegum Pink ink then Fresh Lime and Vibrant Turquoise.  I added yellow with a Memento Marker in Dandelion.


Next I used stencils again, this time for the background.  All of the stencils are 6" by 6" and are called X's from the Marked Series, Julie Fei-Fan Balzer's Circles in Lines and Fire Coral from the Coral Series.  I just layered one after the other and used different inks chosen from the above four colors.


I stamped a phrase from Dylusions, cut out the portion I wanted and edged it in the Turquoise ink.  Then I glued it to the watercolor panel and inked the edges of the paper.


The tea bag was created from a tiny tag stamped with stamp from Rubber Stamp Tapestry and attached to a piece of twine.  The tag was glued to the panel.


I used an irRESISTible Pico Embellisher in Shimmer to highlight areas of the teacup and the phrase.  It spreads easily with the needle-like tip and looks like liquid plastic when it dries.  When everything had dried I used a strong adhesive to glue the water color panel to a 4" by 4" by 3/4" canvas that I bought a Michaels.


That's it for today.  This was a fun project, didn't take very much time to make and challenged me to use stencils in different ways.  I will see you next Tuesday with more ideas on how to use stencils in your artwork.  Hugs~  Renee

Saturday, October 4, 2014

Pink Ribbon Breast Cancer Awareness Month

October is the Breast Cancer Awareness Month.  In honor of that I have a created a tag for a friend who is a survivor and an extra one to put in my Etsy shop.


I hope you're having a great weekend.  It is raining gently here and the leaves are starting to fall.  Hugs~Renee

Friday, October 3, 2014

Craft Stamper October Challenge! Multicolored Stamping

The Craft Stamper "Take It Make It" Challenge for October is Multicolored Stamping. By using multiple colors to ink up your stamp you can achieve some pretty fantastic results.  The multicolored stamping can be used as your background or main image, it is up to you.  For the card I made today I used Dylusions spray inks instead of regular ink pads.  Dyan Reaveley has a blank pad that can be sprayed with her inks, rinsed out after use and then re-used repeatedly with different colors.  Here is one of the cards I created using a Masterboard stamped with these multicolored inks.  I have included a tutorial if you'd like to see how this was made.


I began with a large sheet of 140# watercolor paper and a big postal stamp from Stampers Anonymous.  I sprayed Dylusions Ink Spray in Bubblegum Pink, Vibrant Turquoise and Crushed Grape onto a Dylusions Ink Spray Pad and allowed the colors to mix.  Then I stamped multiple images on my watercolor paper.


When this is completely dry I have a Masterboard that will yield backgrounds for cards and post cards.  My first project is a card that measures 5" by 7".  I stamped the images and phrase that I wanted to use on a separate piece of card stock using StazOn Jet Black ink.


I trimmed out the images and the phrase then started coloring in the Pondering Petunia image.  The octopus will serve as her hair.


I used Inktense pencils, Dylusions Spray inks in a waterpen, Memento markers and Copics to color my images.  Then I glued everything onto my background, inked the edges with Ranger Watering Can color.  The panel was then matted with matching card stock and the adhered to a blank white card.


I hope you will create something for this fun challenge!  If you make a Masterboard you can create an entire set of cards or post cards for your personal use or as a gift to a friend.  Please check out the challenge, there are some pretty wonderful prizes to win and the opportunity to have your work published.  I'll have some more projects to share next week with this same technique.  I hope to see you then ~ Hugs ~ Renee