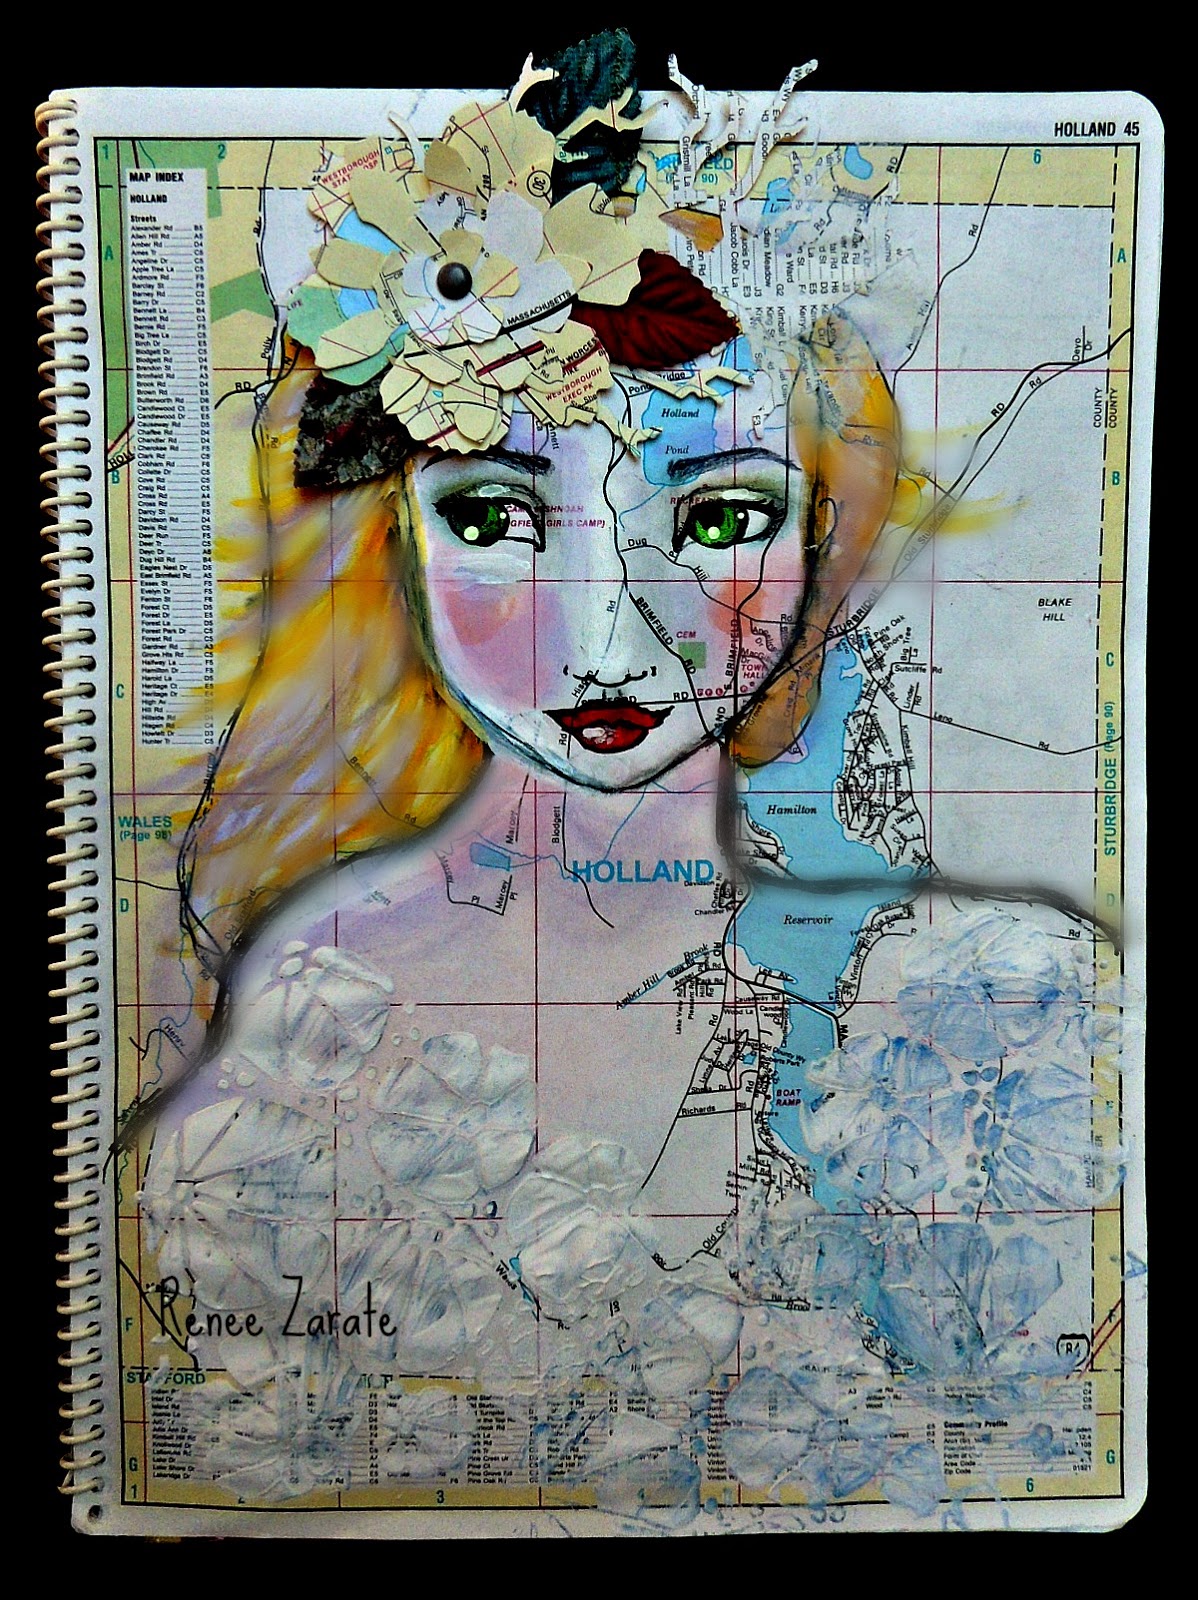
When I do map art the first thing I do is choose the map I want to use. Next I put the stencil down and then outline the features with a pencil. I draw the neck and shoulders after the face is sketched into place.


After that I start putting the hair around the face using pencils, Pan Pastels and colored pens. She looked like she needed bangs so I cut some twigs out using a Sizzix die using the same map paper.


I continue to adjust the colors on the face and hair using Pan Pastels and white gesso.

Instead of just bangs I added another layer of paper twigs going the opposite direction to form a crown like appearance.

Then I cut a flower out of some additional map paper using Tim Holtz's Tattered Florals die. I glued that to her head to mimic a crown with a spring flower popped into it. I used another stencil called Bodacious Pods, also made by Artistcellar, to make it look like she is wearing a white lace dress. I used my palette knife to spread a small amount of white gesso through the stencil randomly on the upper body.

BEAUTIFUL! I loved watching your process. I'll be watching here to learn what a personal life experience map might look like.
ReplyDeleteYowza..gorgeous. map background is great.
ReplyDeleteLove the map background! These are wonderful!
ReplyDeleteClever - I love maps & like what you are doing
ReplyDeleteRenee, You are so very versatile in your art- I love it! I love following your tutorials and learning new things from you!
ReplyDeleteThis piece is fabulous! I truly love it!! and I have to tell you , I love your daughter's name- Holland is wonderful!
Such a beautiful portrait- so glad you shared! xoxo
I love it! I love map art and Holland is gorgeous-not as beautiful as your daughter, though~
ReplyDeleteSo fun Renee! I so want to try this~
Thank you for sharing your process!
Lovely!
ReplyDeleteThis is very striking, Renee, especially with the lace dress and headpiece! I haven't tried this yet, but you have inspired me to try "mapping" my art!
ReplyDeleteVery lovely Renee!!! And seeing the different steps is great too... love this. :) Thanks also for your last comment on my altered Steampunk box, you're right I will cherish it! Bises
ReplyDeleteI love your art work! Thank you for sharing your process.
ReplyDeleteOh my giidy aunt looove it!! xxx
ReplyDeleteLove this map art concept. Can't wait to see your personal map. Thanks for sharing her she is just gorgeous :)
ReplyDelete